1.Overview
Activate a Live chat system on your e-commerce to interact with your customers and improve the customer satisfaction rate.
Already you have WCFM Inquiry and Support Ticket modules, but none of these allow customer-vendor instant communication.
Now you may allow your vendors to do that using WCFM Live Chat Module.
System requirement
2.1.Firebase
Select “Firebase” as Chat Library.
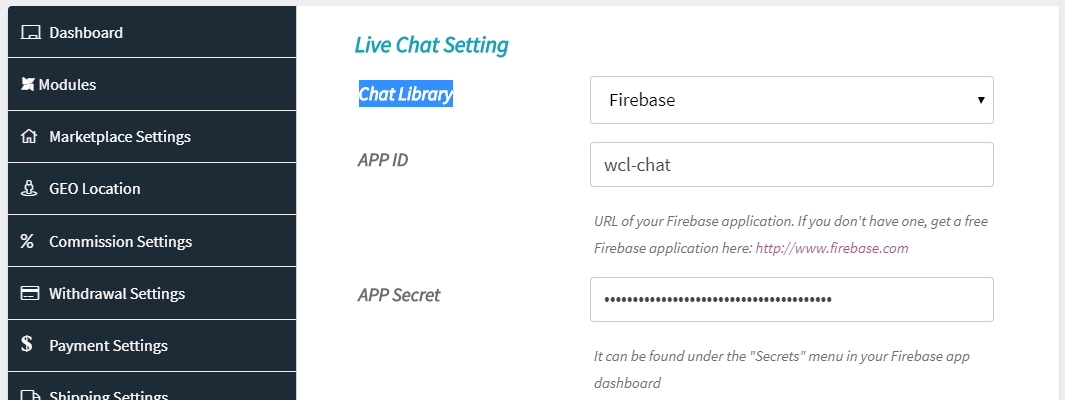
Now you have to setup three important things –
- Firebase APP and get APP ID
- Firebase APP Secret
- Setup APP Permission and Rules
2.1.1.APP ID
Step 1 : Go to Firebase.com
Step 2 : If you have a Firebase account, Sign in, else create an account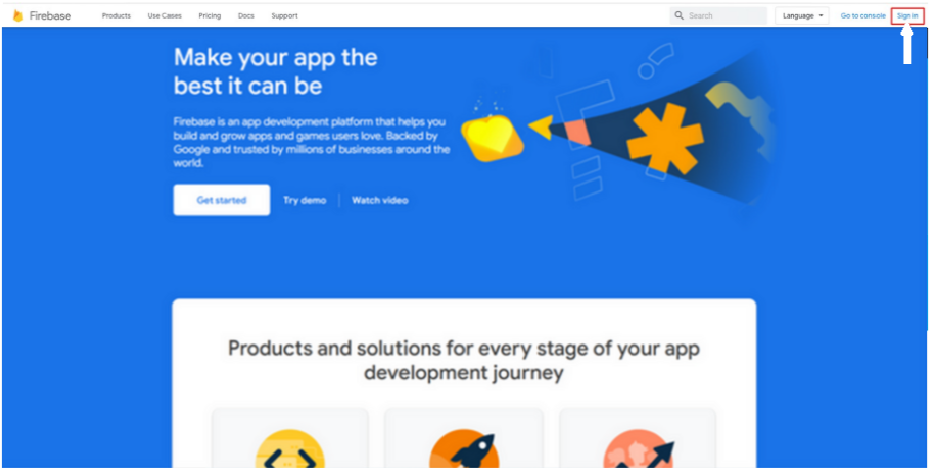
Step 3 : Click on Get Started 
Step 4 : Click on Create a Project
Step 5 : Enter Project name and tick mark the checkbox to accept Firebase terms.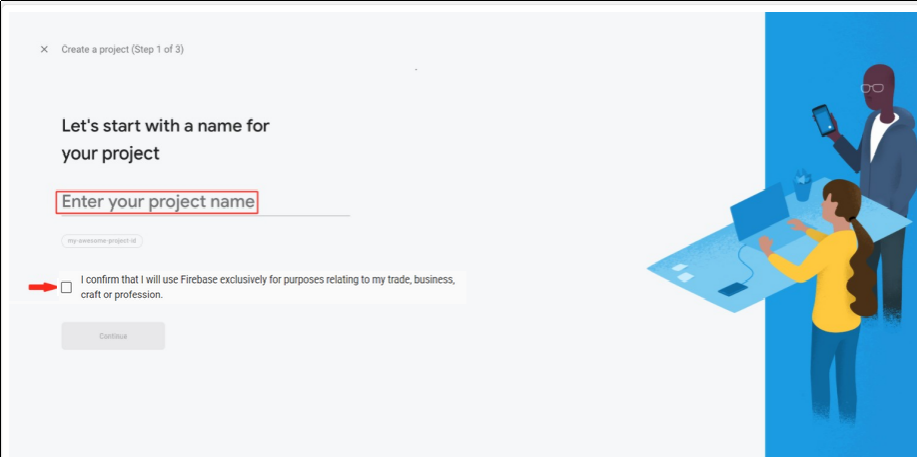
Step 6 : Click on Continue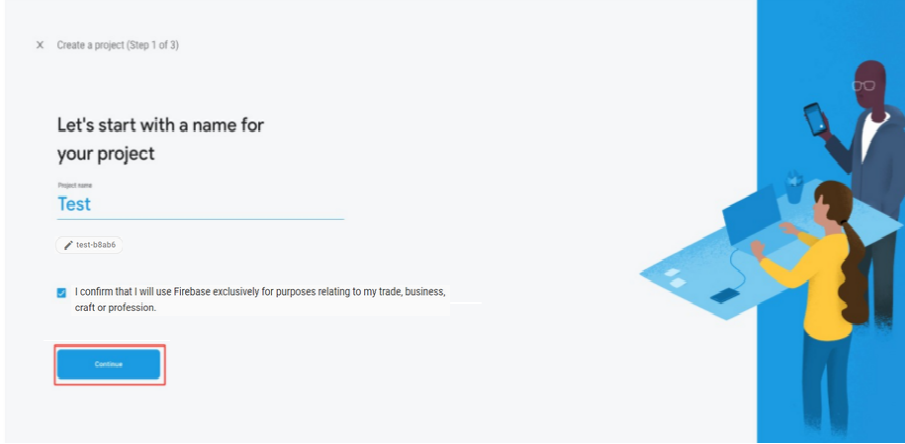
Step 7 : Select “Set up Google Analytics for my project” and click on Continue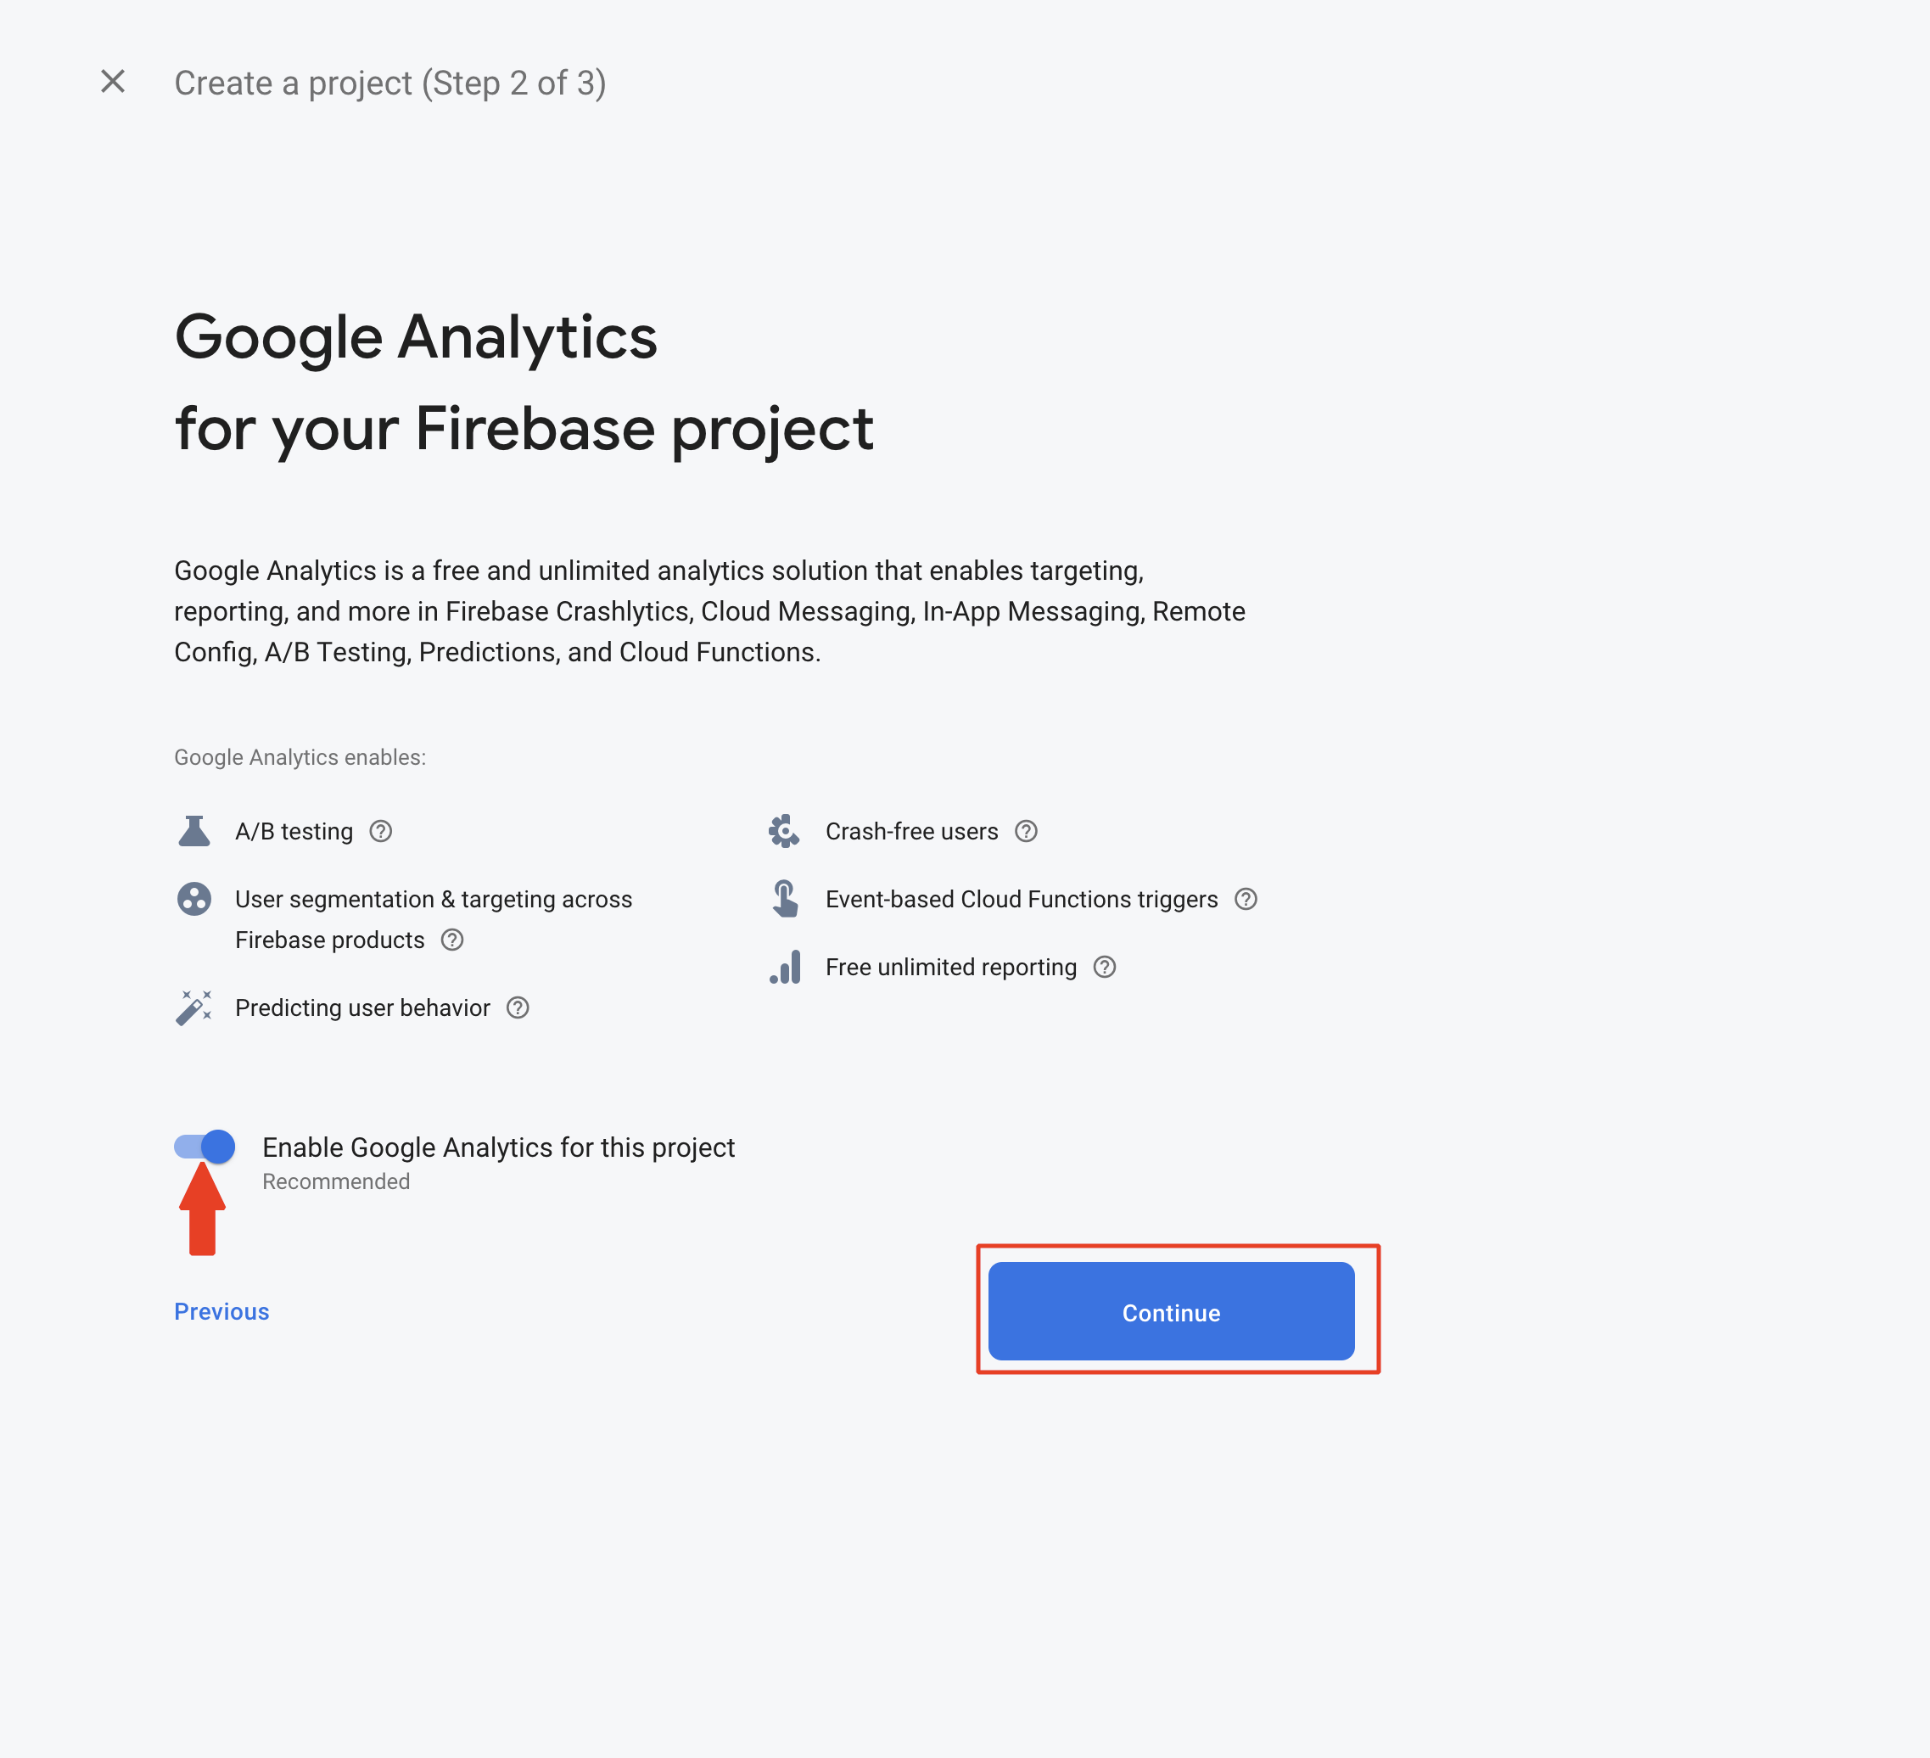
Step 8 : At the Configure Google Analytics screen, select the options as represented on the screenshot below if you are intending to create the project on the default Firebase account, and hit Create Project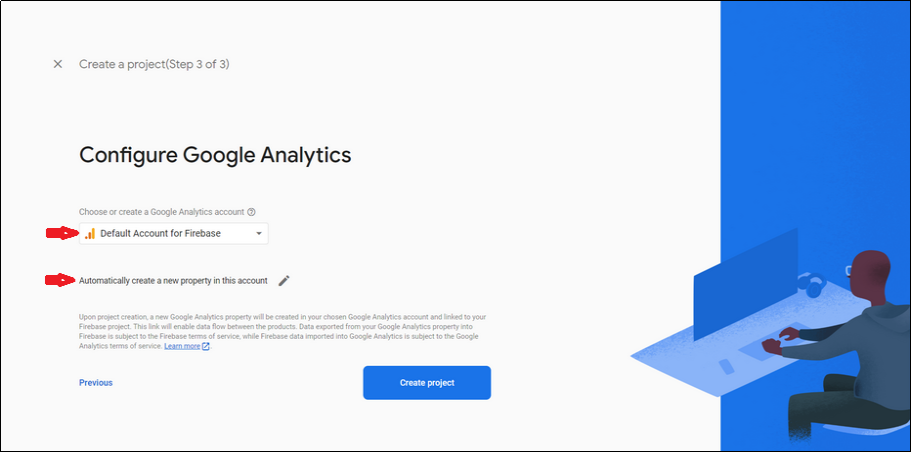
Step 9 : Click on Continue
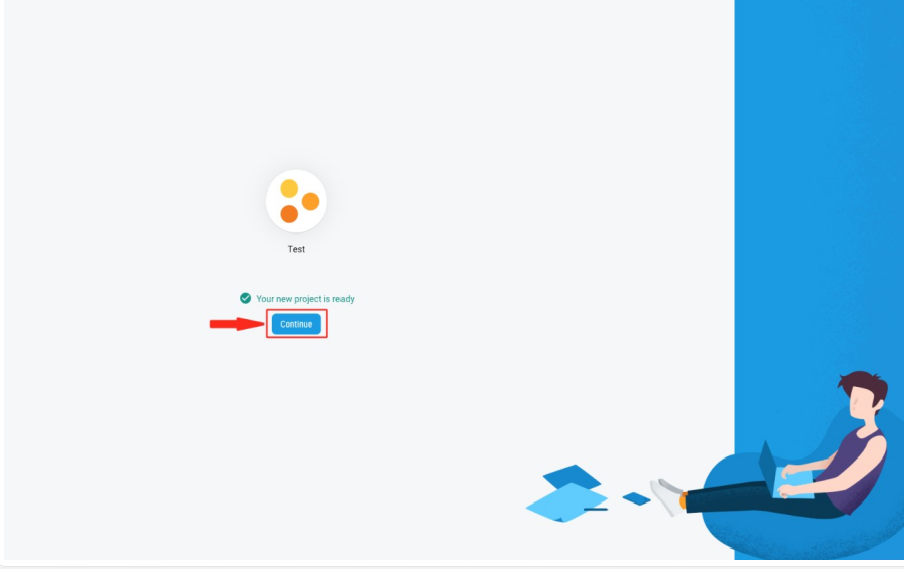
Step 10 : In the Build menu on the left hand side panel, click on Realtime Database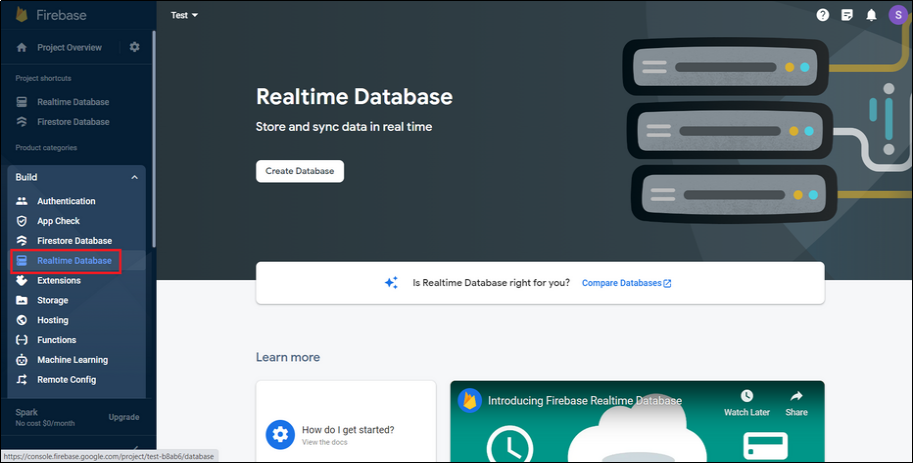
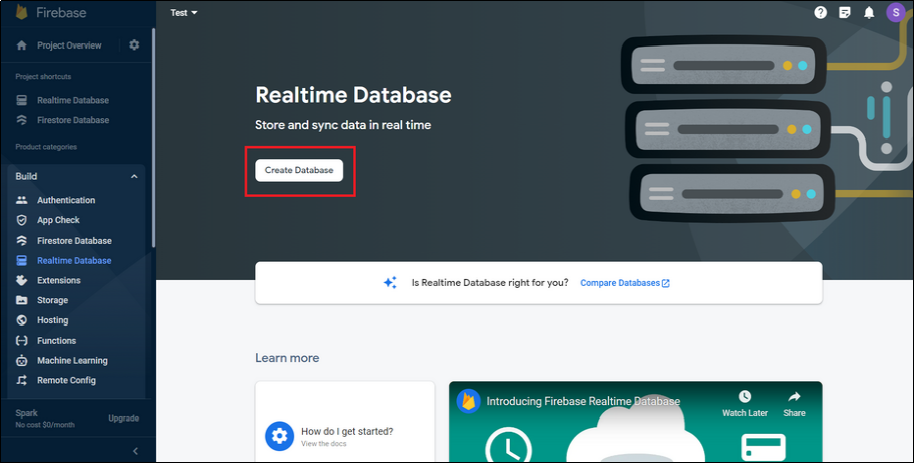
Step 12 : Click on Next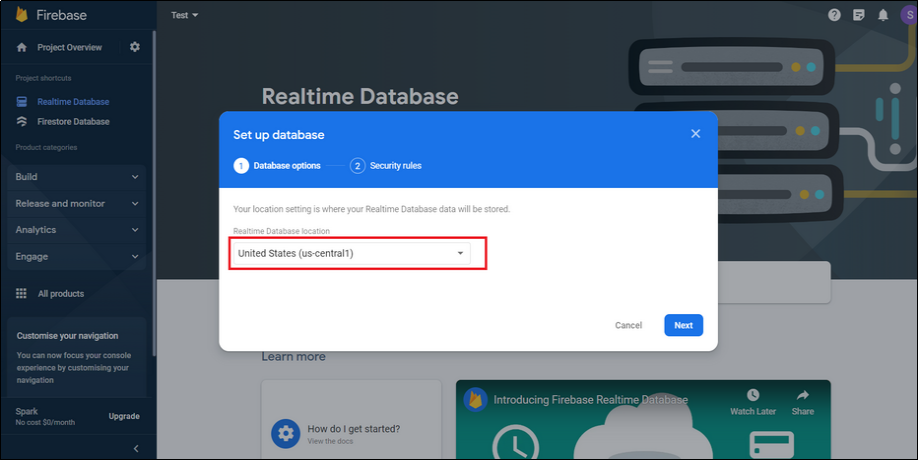
Step 13 : Click on Enable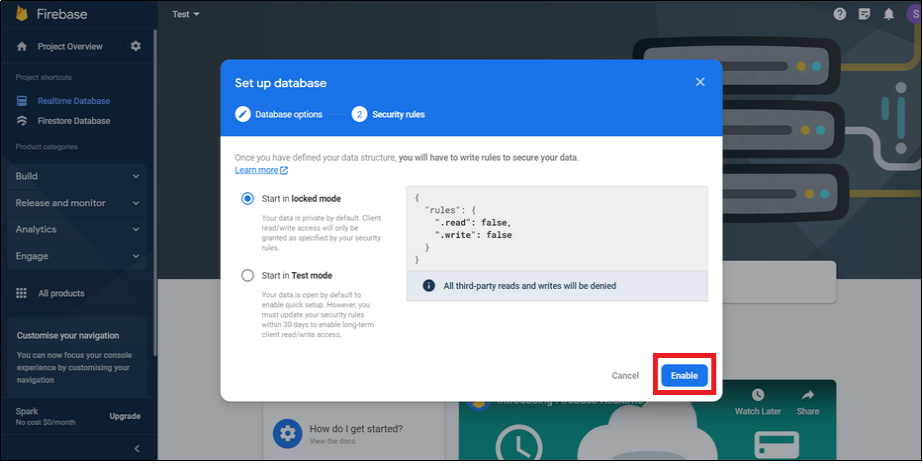
Step 14 : You will see Firebase url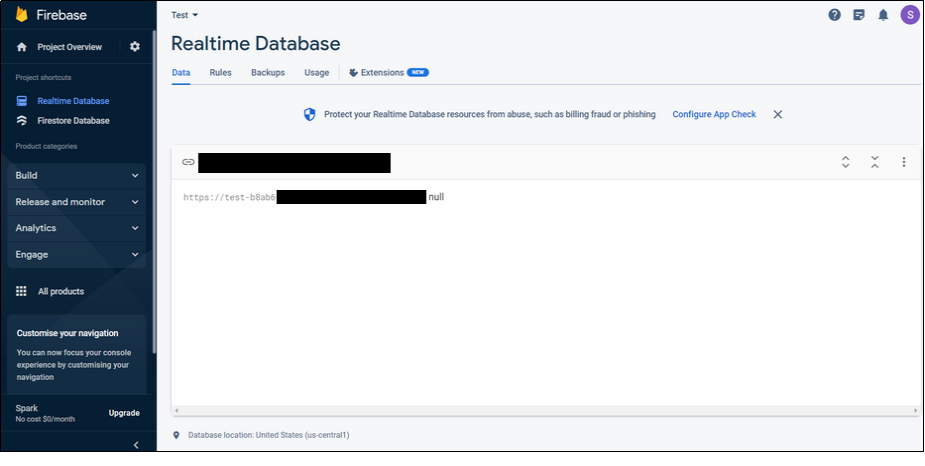
Step 15 : Just copy first part of this URL, it is your Firebase APP ID (in my case it is “wcl-chat”)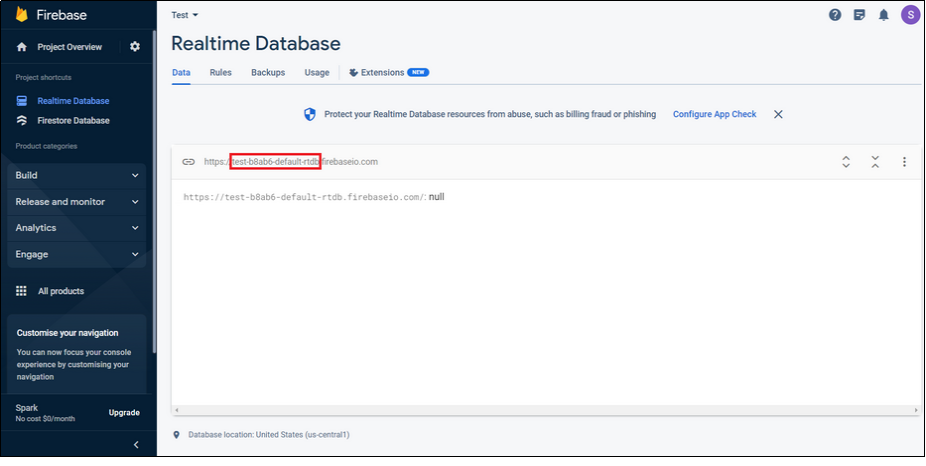
2.1.2.APP Secret
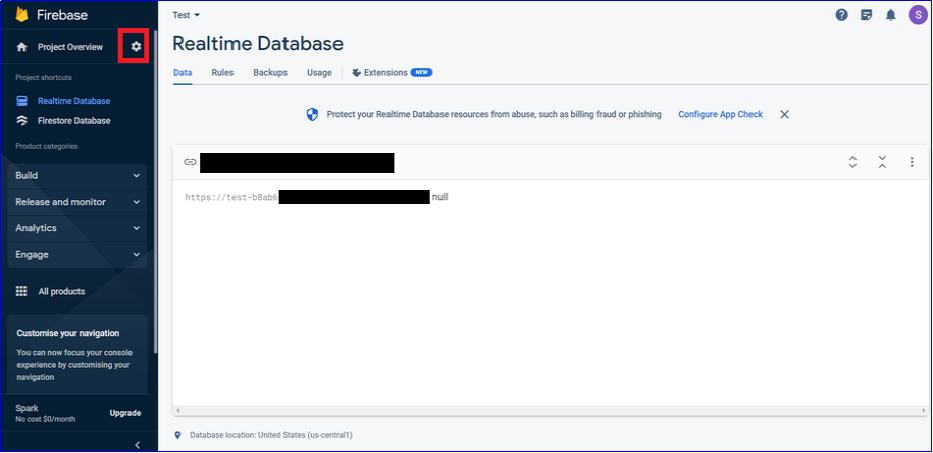
Step 1 : Click on Settings icon
Step 2 : A dropdown menu will open. Select Users and Permissions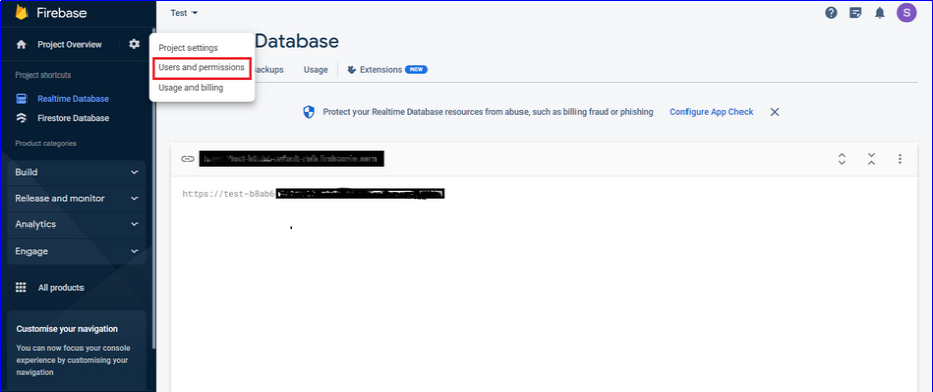
Step 3 : Go to Service Accounts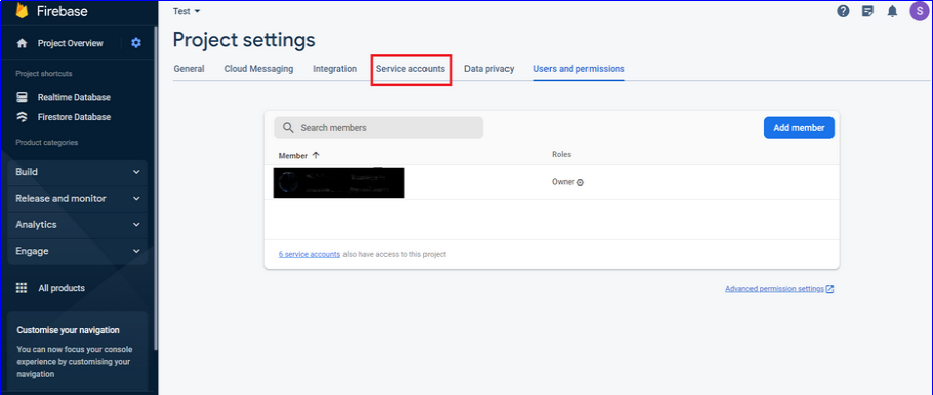
Step 4 : Click on Database Secrets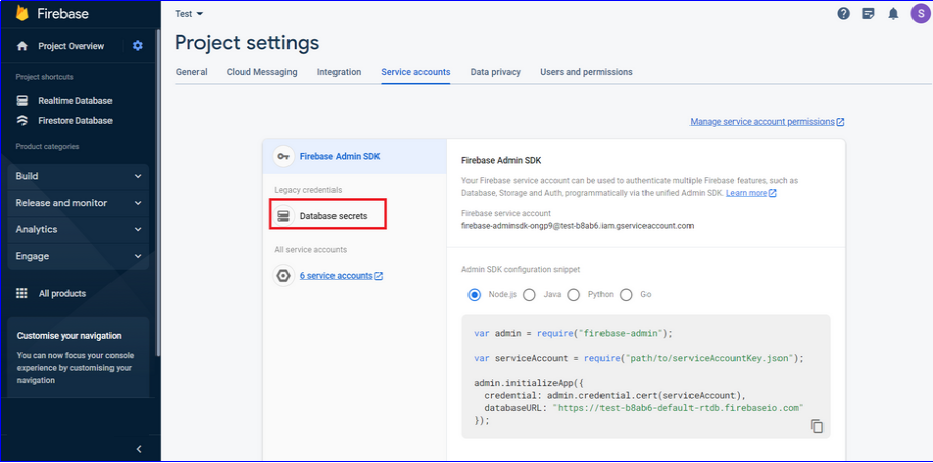
Step 5 : Click on Show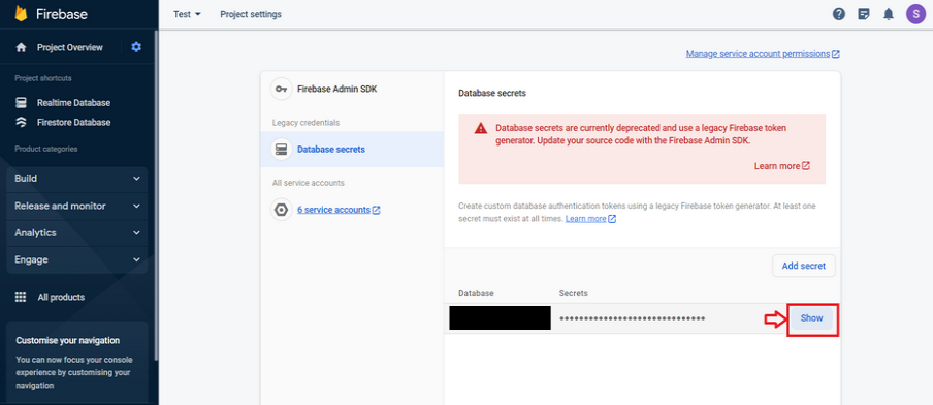
Step 6 : Here is your Firebase APP Secret Key.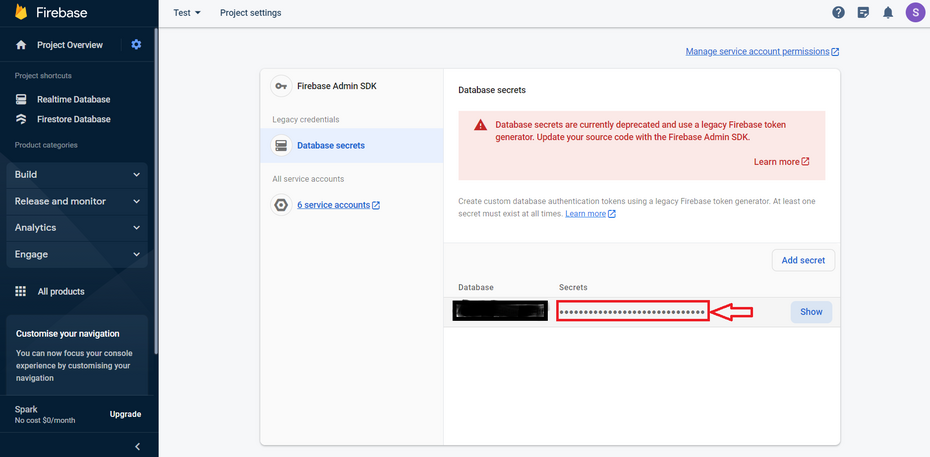
2.1.3.Rules
Step 1 : Click on Realtime Database from left menu. 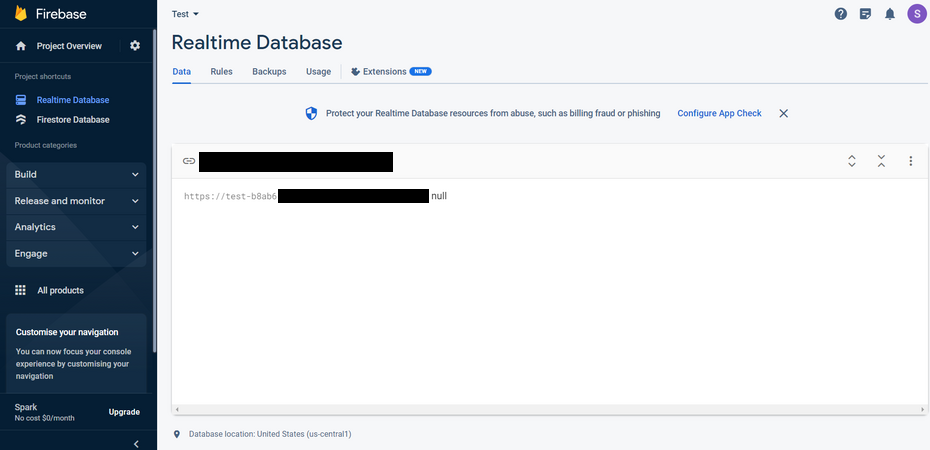
Step 2 : Switch to Rules tab
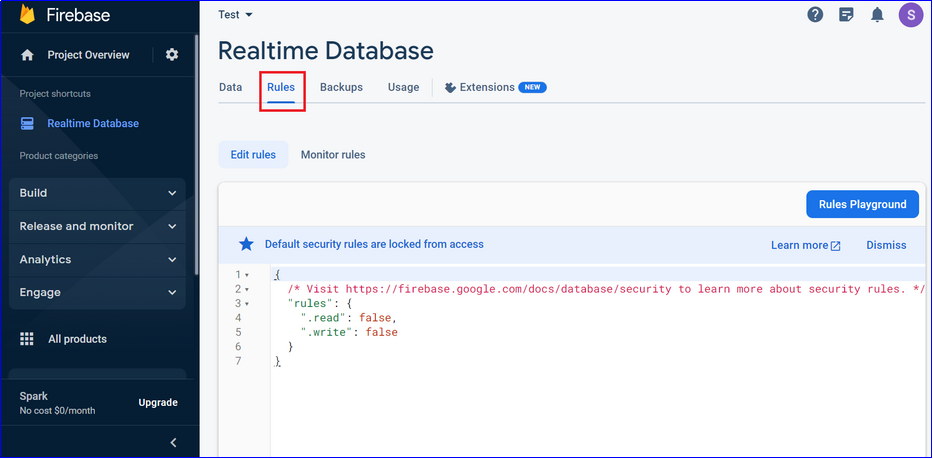
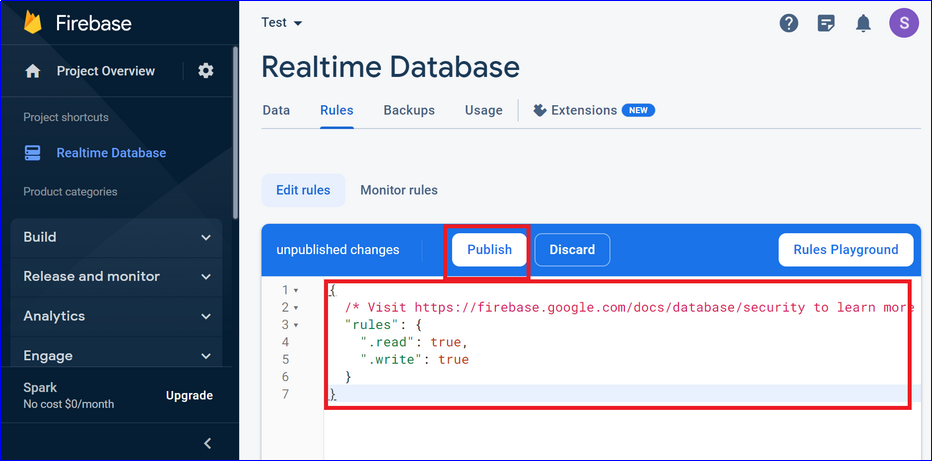
Step 3 : Replace code with the following code (same as shown in below image, if it’s not same already) and click on Publish button Code:
{

"rules": {

".read": "true",

".write": "true"

}

}
Step 4 : Click on Storage from left menu. 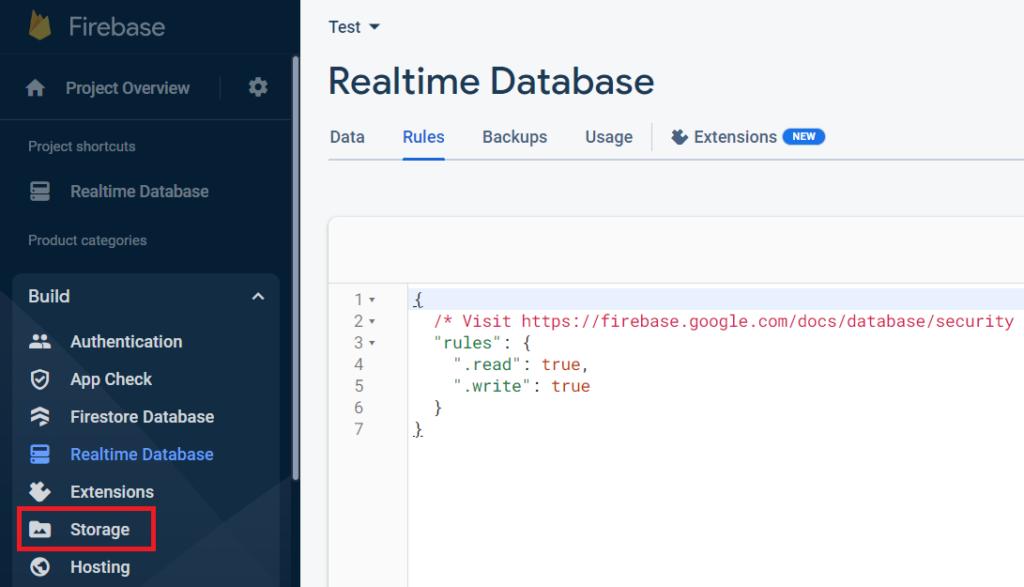
Step 5 : Click on Get Started 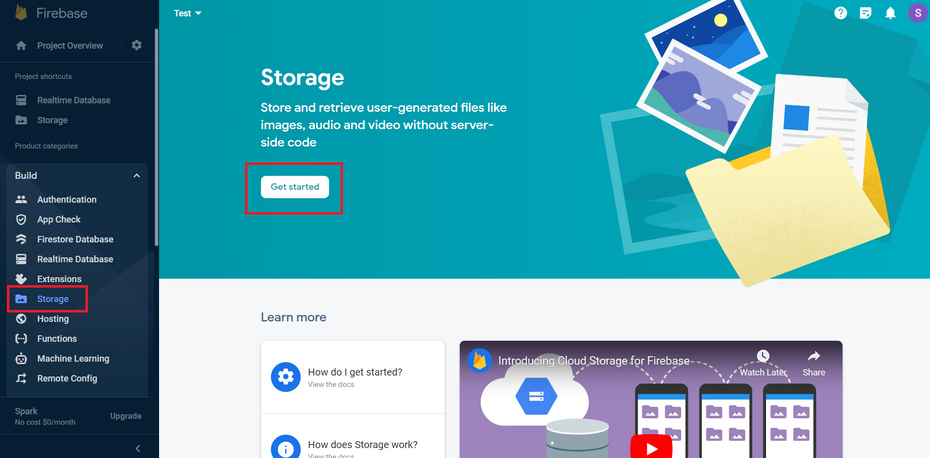
Step 6 : Follow the setup wizard and set the Storage rules as shown below: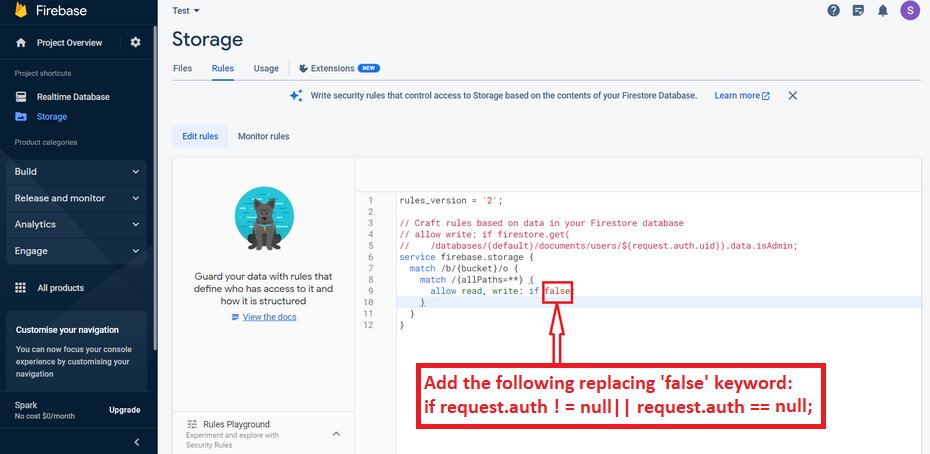
Step 7 : Click on Publish as shown below.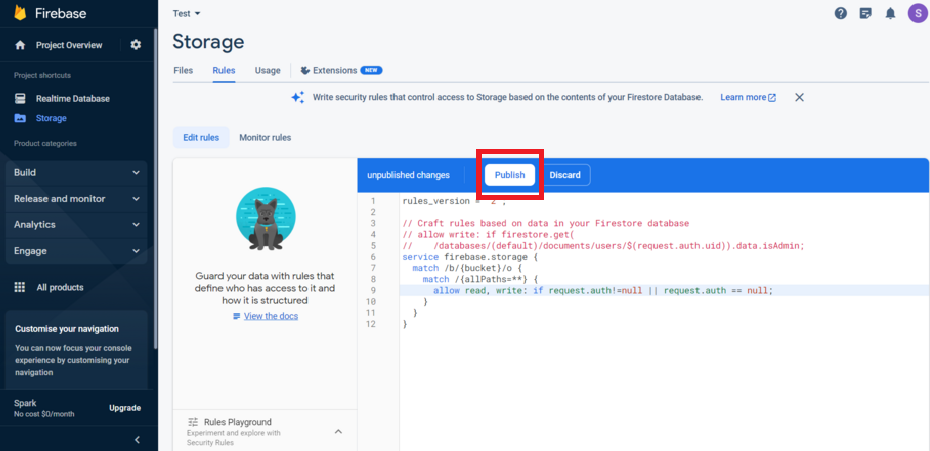
2.2.TalkJS
Now, you have to set App ID and Secret Key at WCFM Chat Box setting panel.
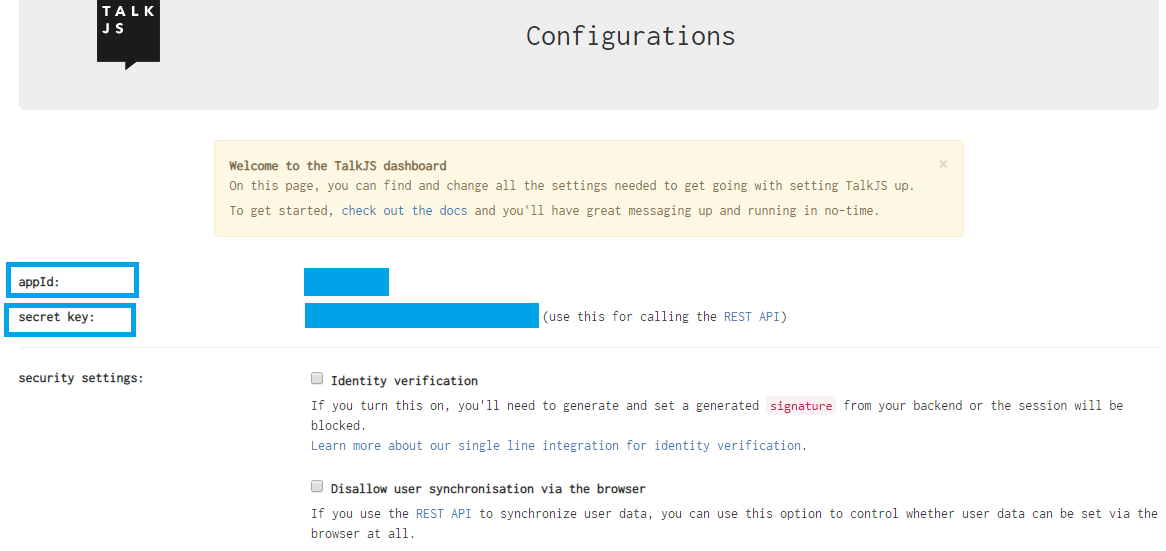
You just have register at Talk JS site to get your App ID and Secret Key.
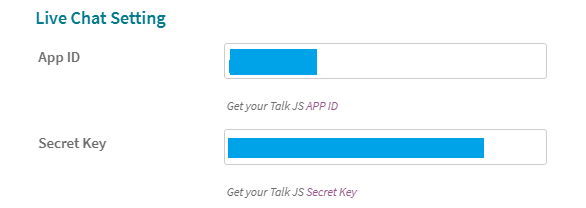
For this, kindly go to -> WCFM Admin Dashboard -> Setting -> Chat Box -> Choose “TalkJS” as Chat module and set APP details.
3.Init Chatbox
3.1.Product
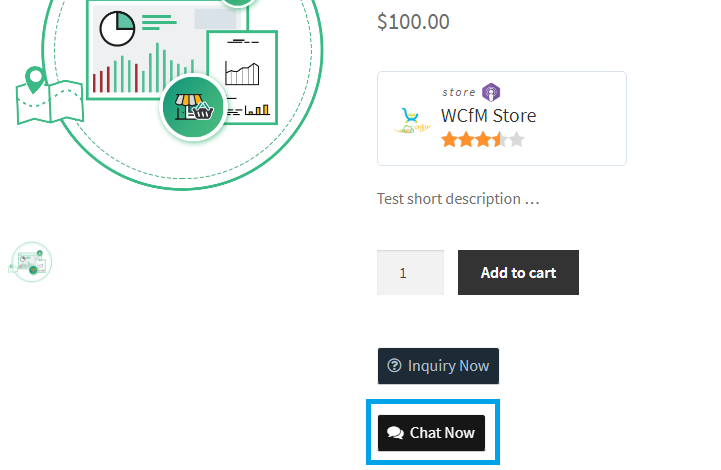
3.2.Store
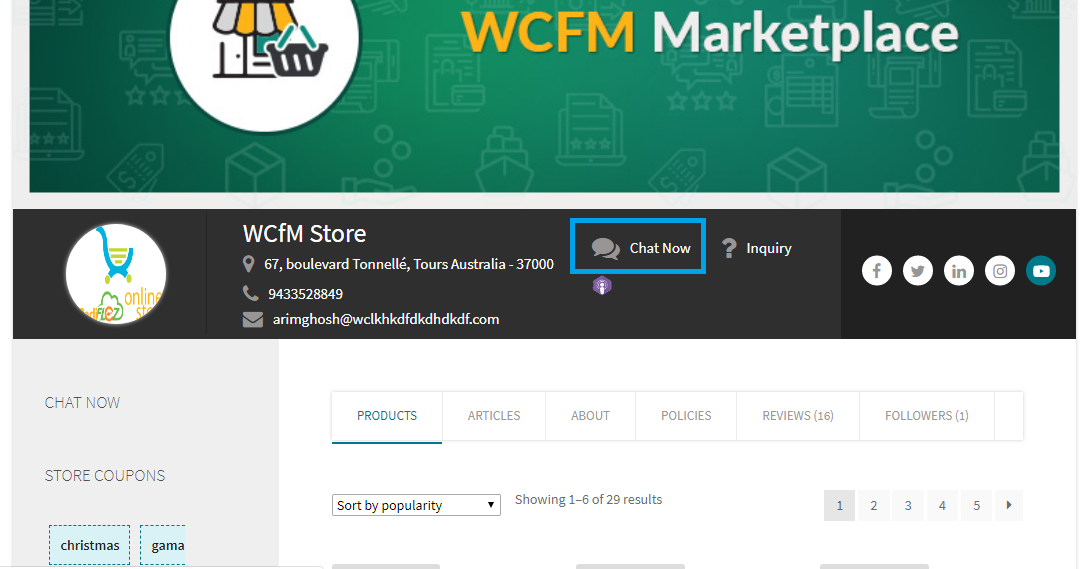
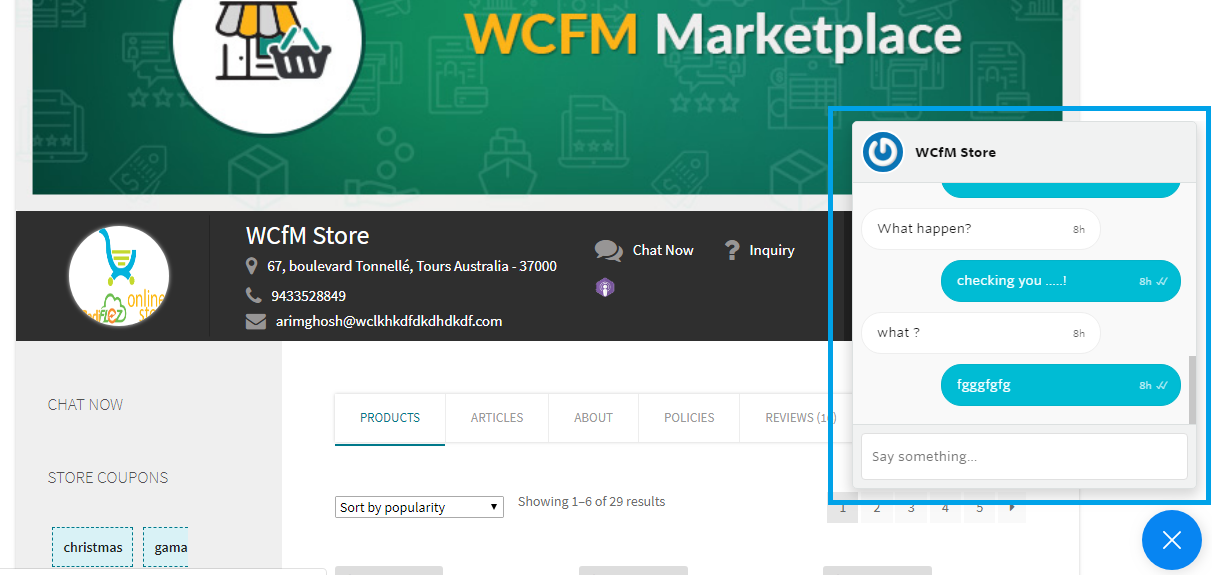
Now it’s time for your customers to directly interact with store vendors.
3.3.Dasboard
Vendors may manage chat requests from their Dashboard -> Left menu Chat Box
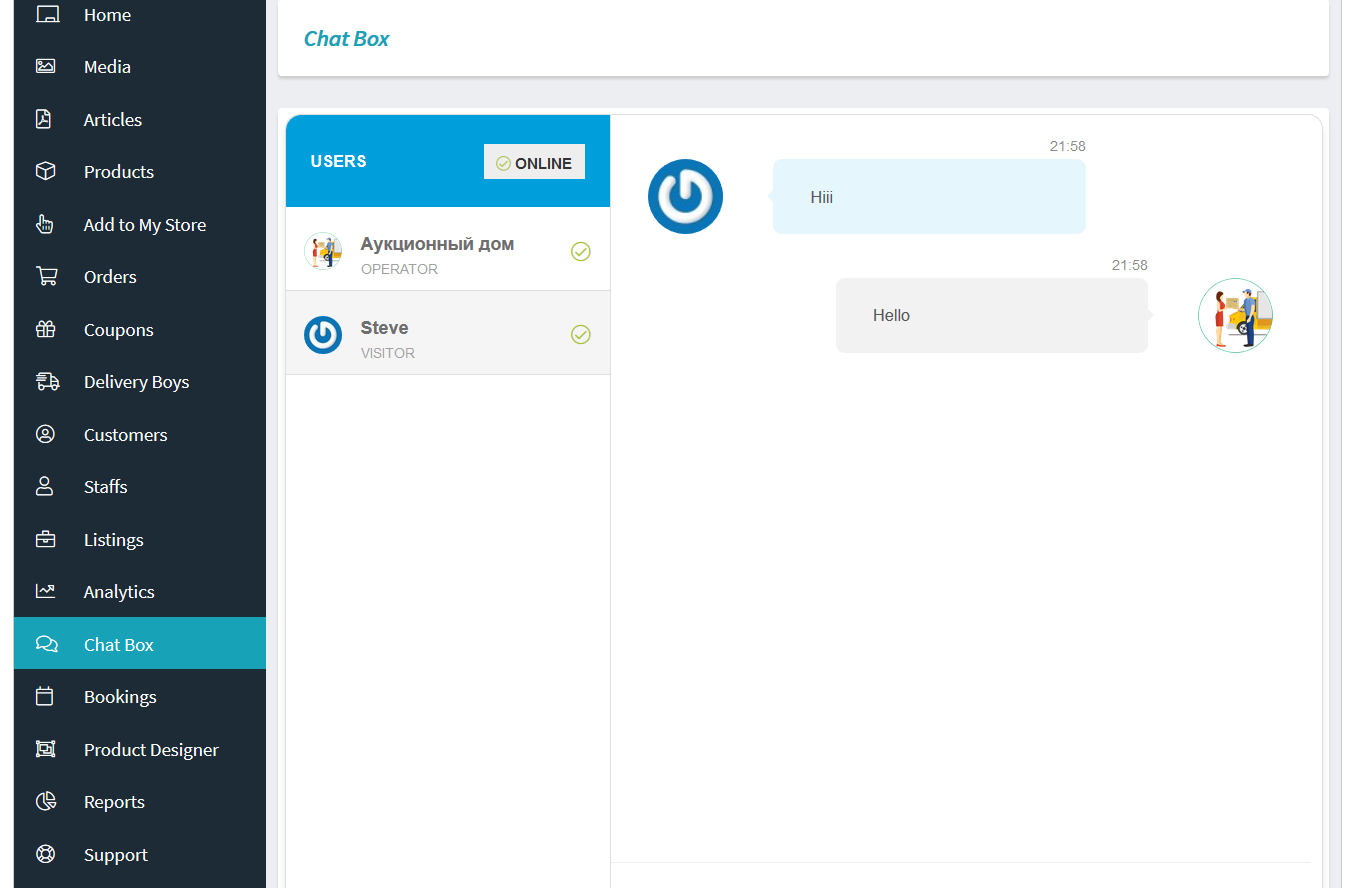
Also note that the vendor needs to click on ” Connect” button for being available to chat as shown below:
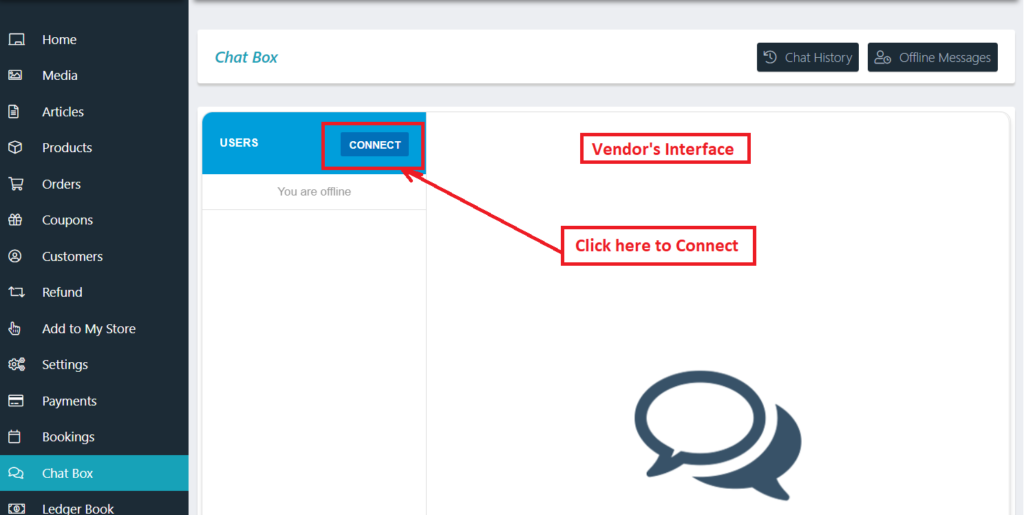
If the above ” connect” button is not clicked the vendors will not be available for chat and the users ( or customers ) who wants to chat with vendors will receive a notification in their chat-box as shown below:

4.Capability
If you don’t want to have Chat Module in your site they you may disable just by on click.
Kindly go to WCFM Admin Dashboard -> Modules -> Chat Box -> Set this OFF
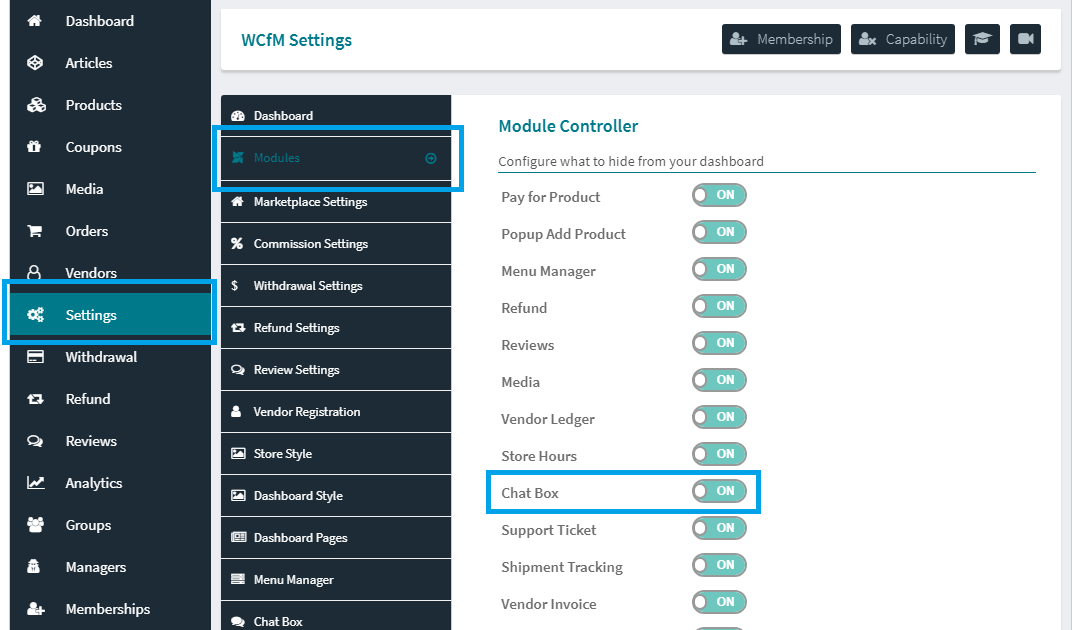
You may control “Chat Box” capability from WCFM Capability setting page.

You may control chat module availability as per vendor as well.
Membership specific chat box capability controller is also possible using WCFM – Group & Staff addon.

