
1.Introduction
In today’s global economy, businesses are expanding their reach beyond their physical locations to connect with customers across the world. However, for local marketplaces or service marketplaces, it’s crucial for vendors to cater to the needs of their customers within a specific geographic region. This is where the WCFM seller multi-branch feature comes in handy.
The WCFM seller multi-branch feature is especially useful for hyperlocal marketplaces, where vendors are looking to expand their reach within a specific geographic region. It’s also helpful for service marketplaces, where vendors can manage their operations and connect with customers in different regions. With the multi-branch feature, vendors can improve their customer experience and increase their sales while maintaining operational efficiency.
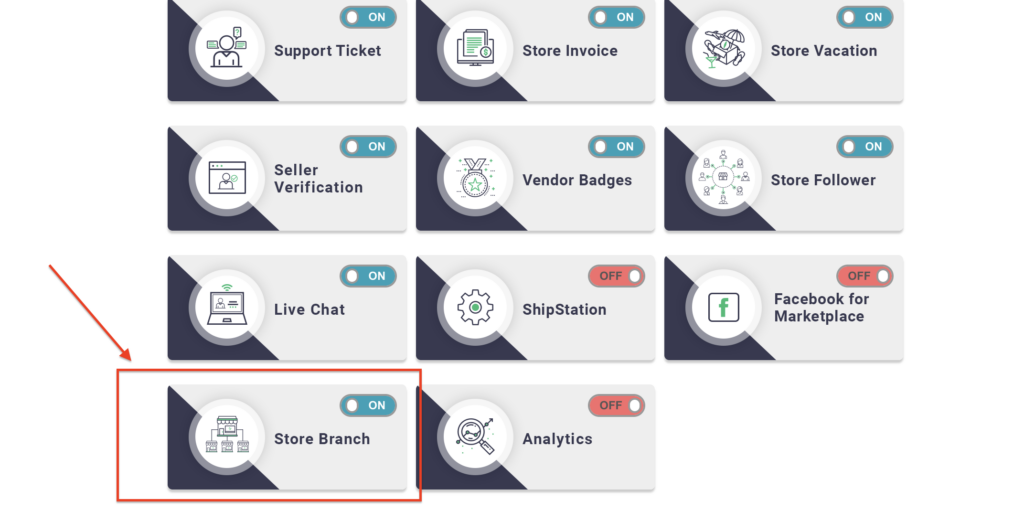
2.Enabling the feature
To use this feature, the admin must first enable it from the admin dashboard by navigating to the Settings > Modules tab and turning it on. The store multi-branch feature is kept disabled by default for backward compatibility purposes.
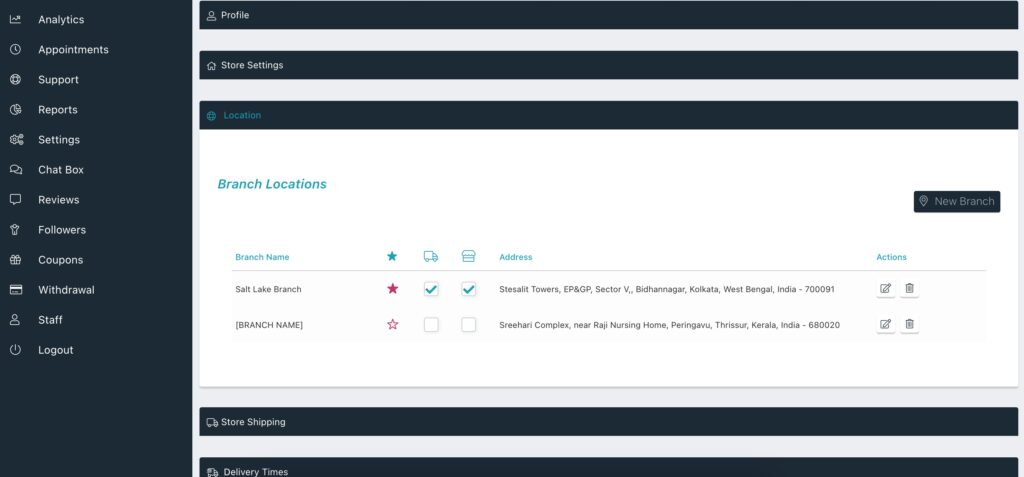
3.Vendor settings
Vendors can manage their branches and locations from their dashboard by navigating to the Settings tab and selecting the Locations sub-tab. Allowed branch operations are listed below-
3.1.Add a new branch
To add a new branch, simply click the ‘New Branch’ button, which will open the branch registration form.
If no branch name is provided, the default name ‘[BRANCH NAME]’ is displayed in the branch list.
3.2.Edit an existing branch
To edit an existing branch, click on the ‘Edit’ button from the branch list.

3.3.Delete a branch
To delete an existing branch, click on the ‘Delete’ button from the branch list.
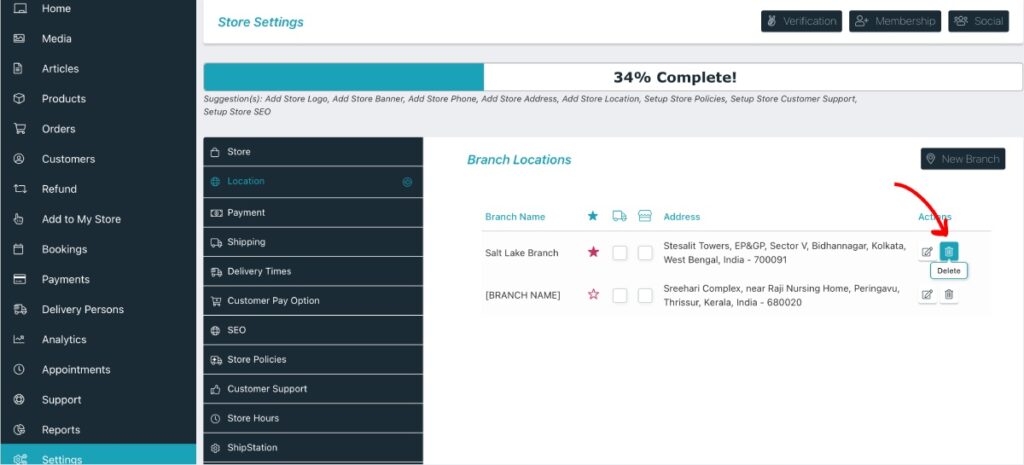
3.4.Mark as main branch
The main branch is a unique branch that can be selected from among all other branches of a store. Once designated as the main branch, its address will be displayed on the vendor store page and used as the store address on invoices, the order details page, and other relevant pages.
To mark a branch as the main branch, click on the ‘Mark this as main branch’ (star icon) link. When a vendor adds the first branch, it is automatically assigned as the main branch for that store. If a main branch is deleted, the first store branch will automatically be marked as the new main branch.

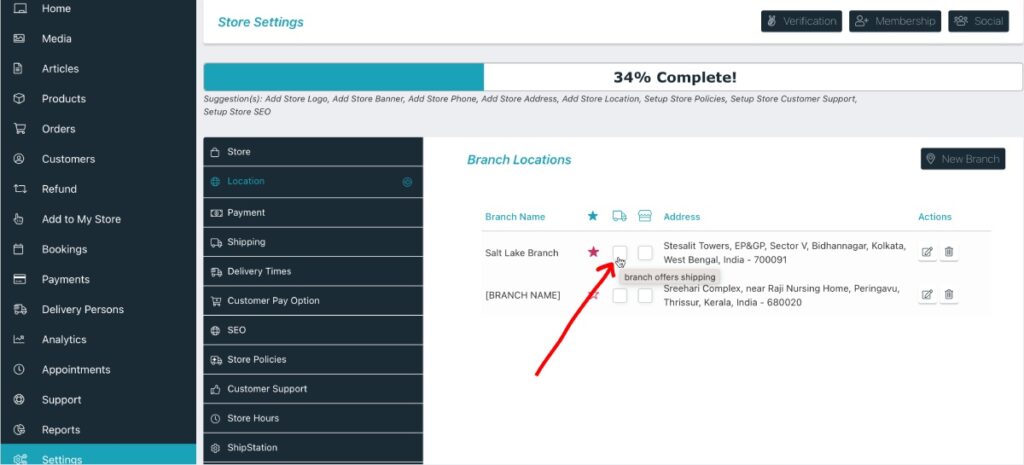
3.5.Branch offers shipping
Checking this option denotes that the store can ship items from that branch to the customer’s location. This is particularly useful for the ‘Shipping by distance’ method, as the shipping rate will then be calculated based on the customer’s nearest branch that offers shipping.
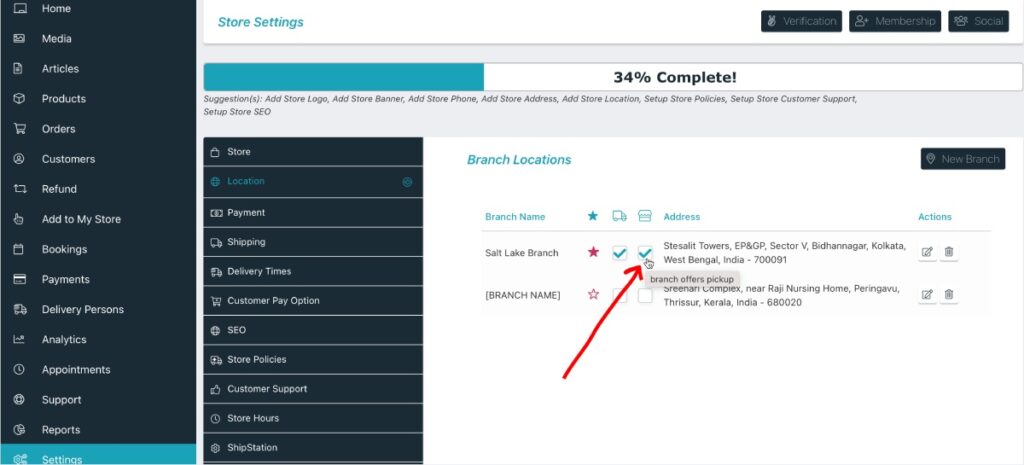
3.6.Branch offers pickup
When checked for a branch, customers can pick up their purchased items from that branch. This enables the customer to locate the nearest local pickup available from that store. The pickup address will be shown to both the customer and the vendor on the order details page, as well as in the order confirmation emails.
4.Admin management
The admin can manage individual vendor branches from the dashboard by going to Vendor List > Manage a Vendor page. The admin interface looks the same as the vendor interface, and the same options are provided.
5.Customers usability
Customers can enjoy the benefits of the multi-branch feature by easily finding stores and products within their proximity. On the store list and product list pages, customers can use the proximity search feature to filter stores and products based on their location. This allows them to conveniently find the nearest stores and products within their desired distance range.
Furthermore, on the checkout page, customers can see the available pickup and shipping options based on the distance of the store branches from their location. The shipping and pickup rates are automatically calculated based on the distance, ensuring that customers are charged accurately and fairly. This feature enables customers to get the most convenient pickup or shipping option based on their location, making the purchase process smoother and hassle-free.
6.Developers documentation
Available hooks-
The following action is triggered after changing or marking a branch as the main branch:
do_action('wcfmu_main_branch_updated', $branch, $vendor_id);
The following action is triggered after the shipping status update for a specific branch
do_action( 'wcfmu_branch_shipping_pref_updated', $branch, $vendor_id );
The following action is triggered after the pickup status update for a specific branch
do_action( 'wcfmu_branch_pickup_pref_updated', $branch, $vendor_id );
The following filter can be used to force shipping from the main branch only.
apply_filters('wcfmu_shipping_default_to_main_branch', false);
To control the visibility of the shipping checkbox on the branch list table the following filter can be used.
apply_filters('wcfm_is_allow_individual_branch_shipping', true);
To control the visibility of the pickup checkbox on the branch list table the following filter can be used.
apply_filters('wcfm_is_allow_individual_branch_pickup', true);
Add/remove/update branch details fields using the following filter. The store name is the only field available under this.
apply_filters('wcfm_marketplace_settings_fields_branch_details', $fields <array>);
Add/remove/update store branch address fields with the following filter. The available fields include Street, Street 2, City/Town, Postcode/Zip, Country, and State/County.
apply_filters('wcfm_marketplace_settings_fields_branch_address', $fields <array>);
Add/remove/update store branch geolocation/map location fields.
apply_filters('wcfm_marketplace_settings_fields_branch_map_location', $fields <array>);