
1.Live Chat Overview
Activate a Live chat system on your e-commerce to interact with your customers and improve the customer satisfaction rate.
Already you have WCFM Inquiry and Support Ticket modules, but none of these allow customer-vendor instant communication.
Now you may allow your vendors to do that using WCFM Live Chat Module.
System requirement
2.1.Firebase
Select Firebase as your Chat Library.
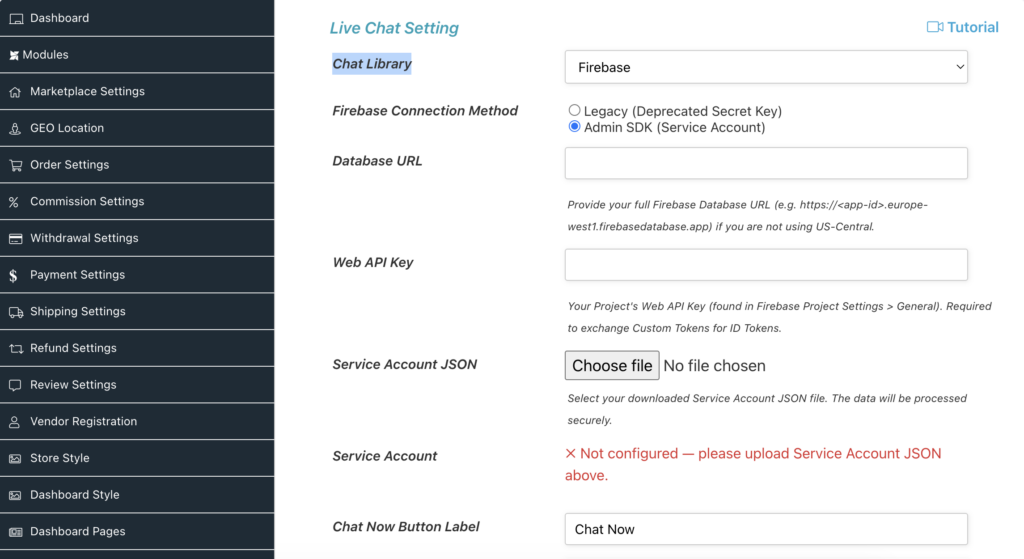
To enable Live Chat, you must connect your WordPress site to Firebase. The current method utilizes the Firebase Admin SDK for secure server-side communication and the Web API Configuration for the chat interface.
2.1.1.Create a Firebase Project
Step 1 : Go to Firebase website
Step 2 : If you have a Firebase account, Sign in, else create an account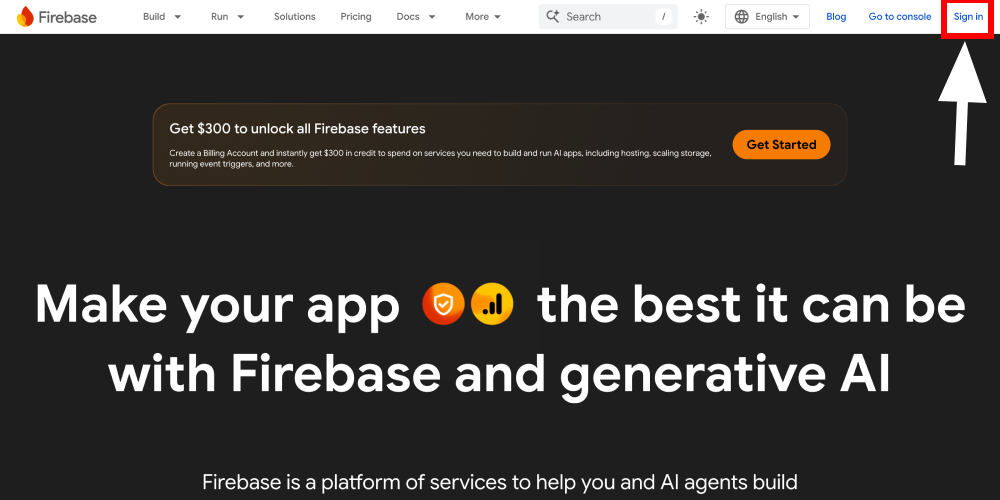
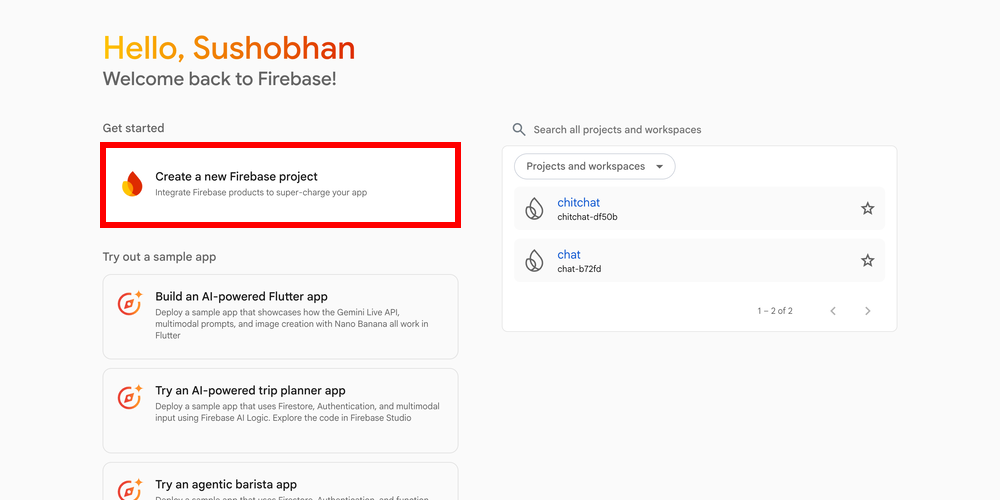
Step 3 : Click Create a new Firebase project
Step 4 : Enter a project name (e.g., “WCFM Live Chat”).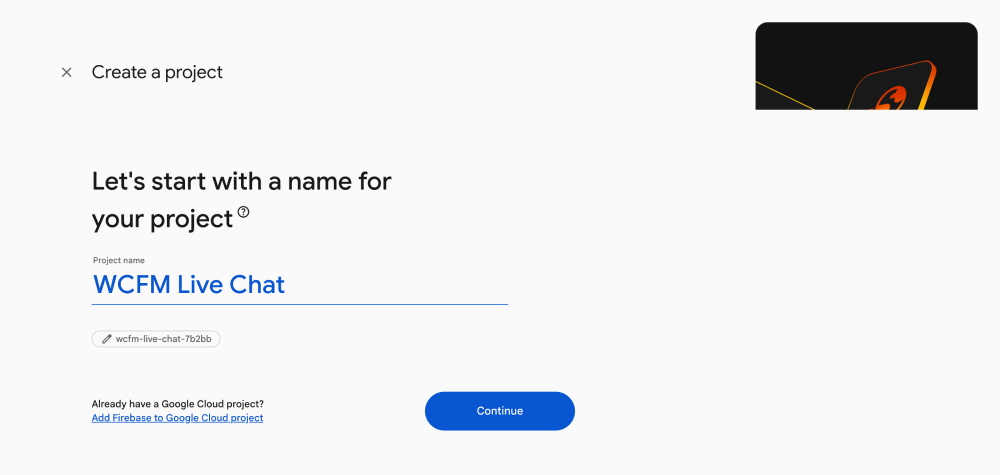
Step 5 : Turn On Enable Gemini in Firebase (optional but recommended)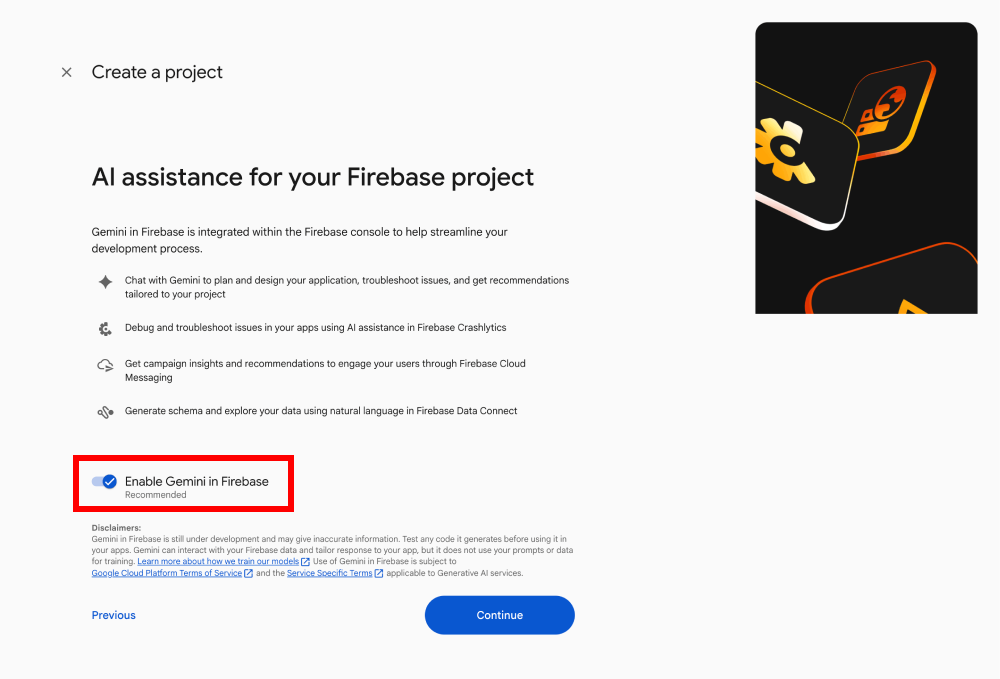
Step 6 : Turn On Enable Google Analytics for this project (optional but recommended)
Step 7 : At the Configure Google Analytics screen, select your Google Analytics account and click Create Project
Step 8 : Click Continue once the project is ready.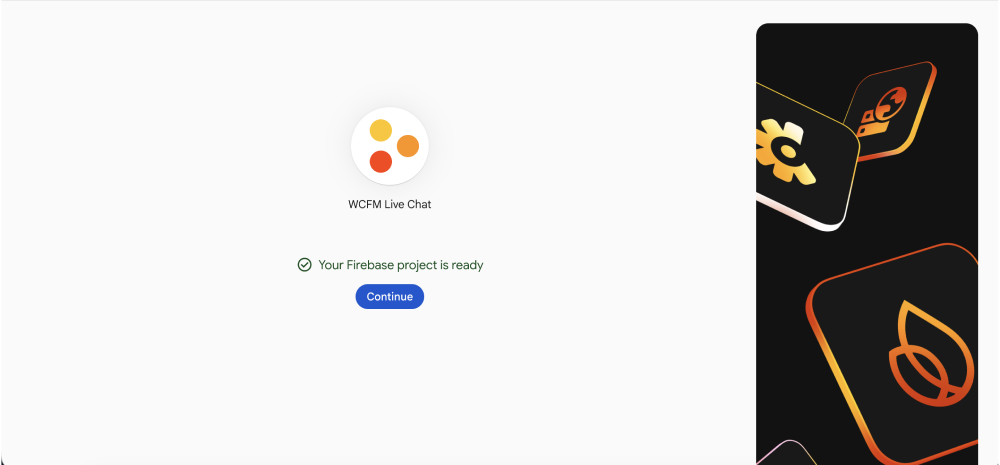
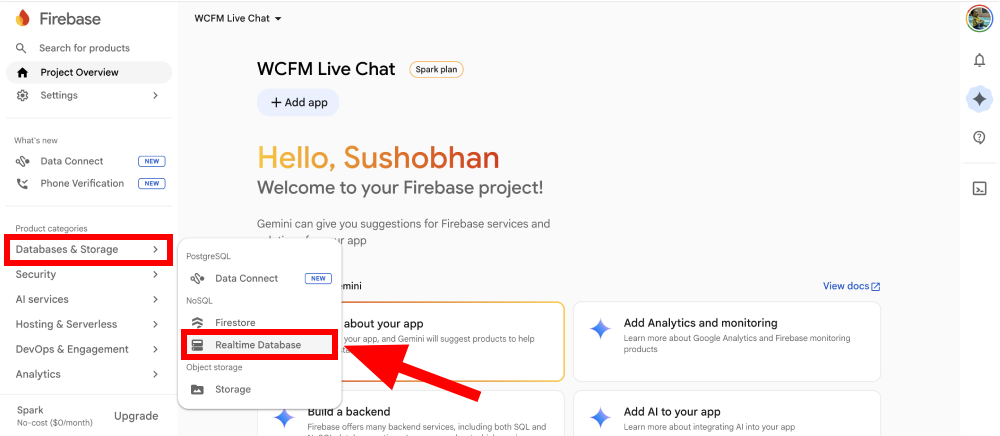
2.1.2.Configure Realtime Database
Step 1 : On the project home screen, click the sidebar toggle button
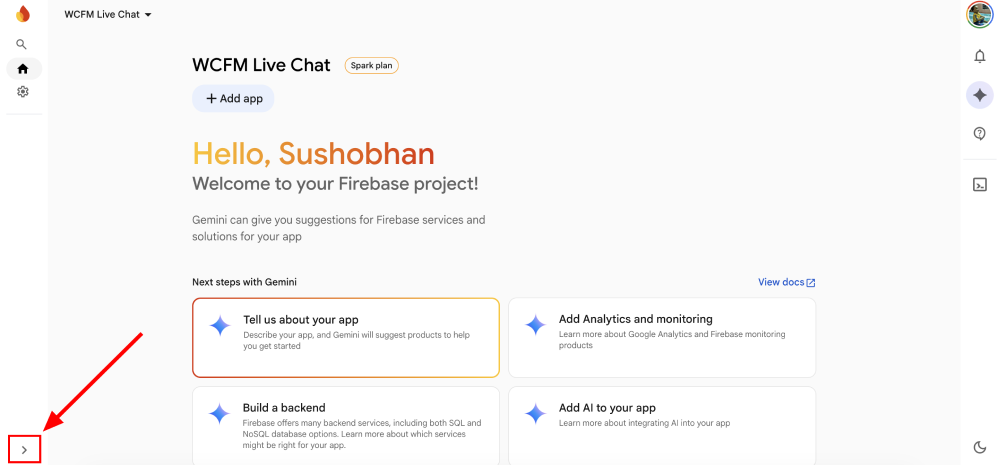
Step 2 : This will expand the sidebar menu.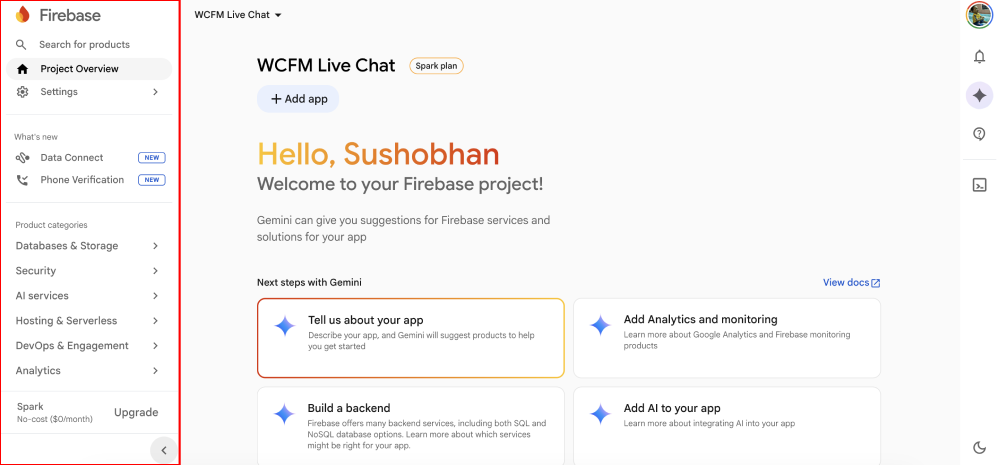
Step 3 : From the sidebar, navigate to Databases & Storage > Realtime Database
Step 4 : On the Realtime Database screen, click Create Database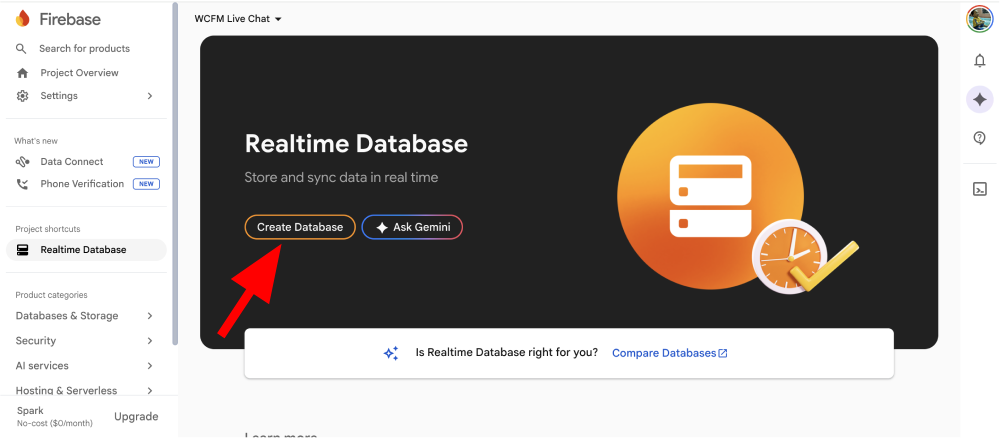
Step 5 : Choose the database location and click Next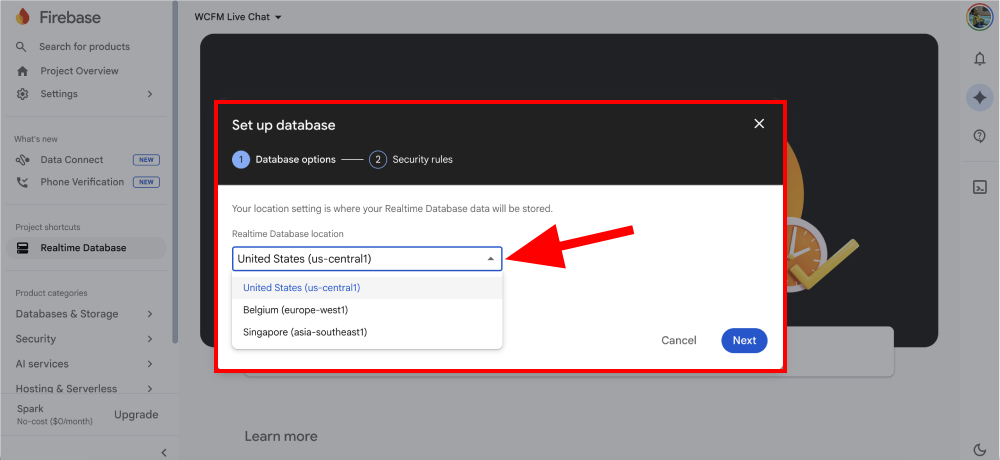
Step 6 : Click Enable
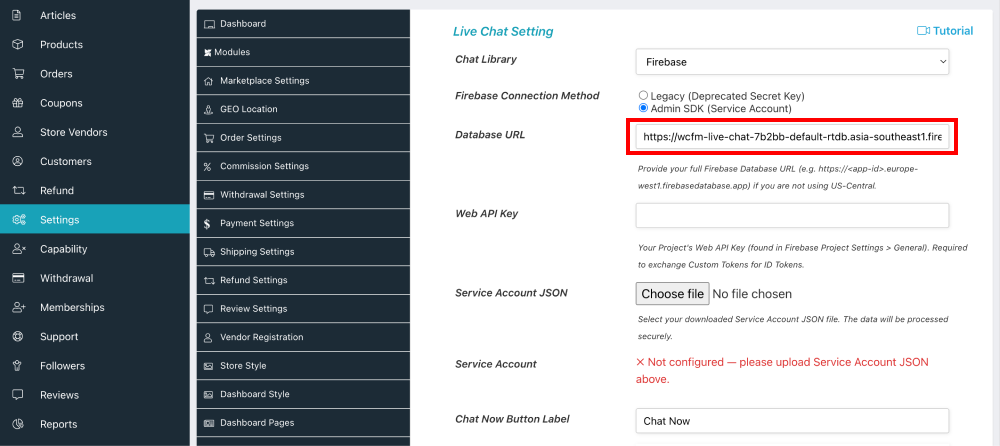
Step 7 : Copy the Firebase Database URL and add it to the WCFM dashboard > Settings > Chat Box > DatabaseURL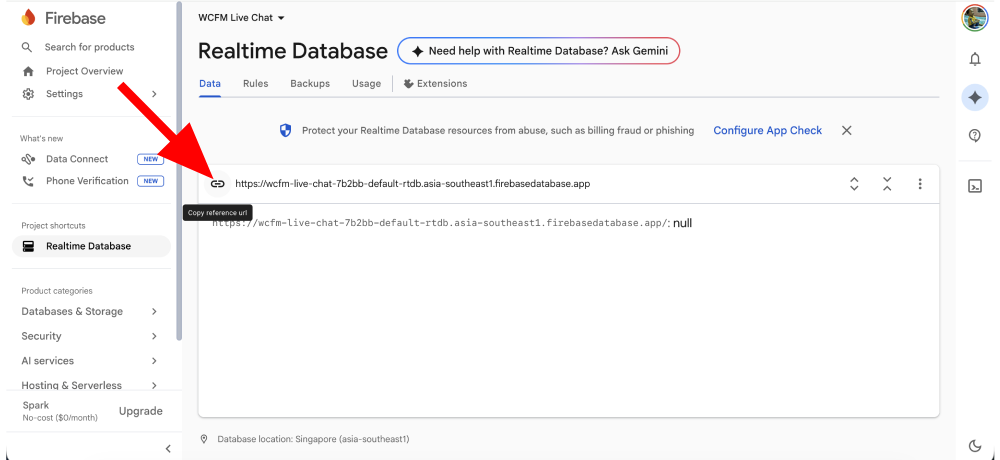
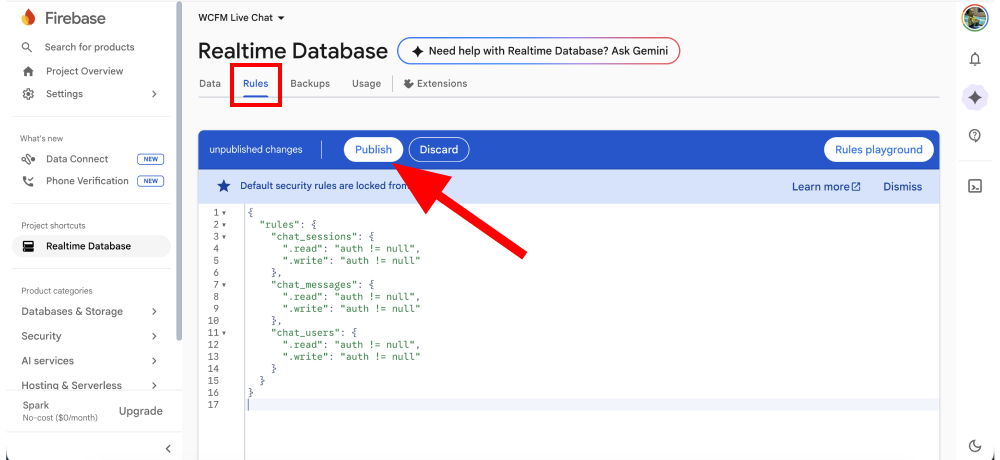
Step 8 : Click the Rules tab, copy-paste the following rules, and then click Publish
{
  "rules": {
    "chat_sessions": {
      ".read": "auth != null",
      ".write": "auth != null"
    },
    "chat_messages": {
      ".read": "auth != null",
      ".write": "auth != null"
    },
    "chat_users": {
      ".read": "auth != null",
      ".write": "auth != null"
    }
  }
}
2.1.3.Register Web app
Step 1 : Create a Web App for your project. Click the Settings menu in the sidebar, scroll to the Your apps section at the bottom of the General tab under Project settings page, and select the Web (</>) icon.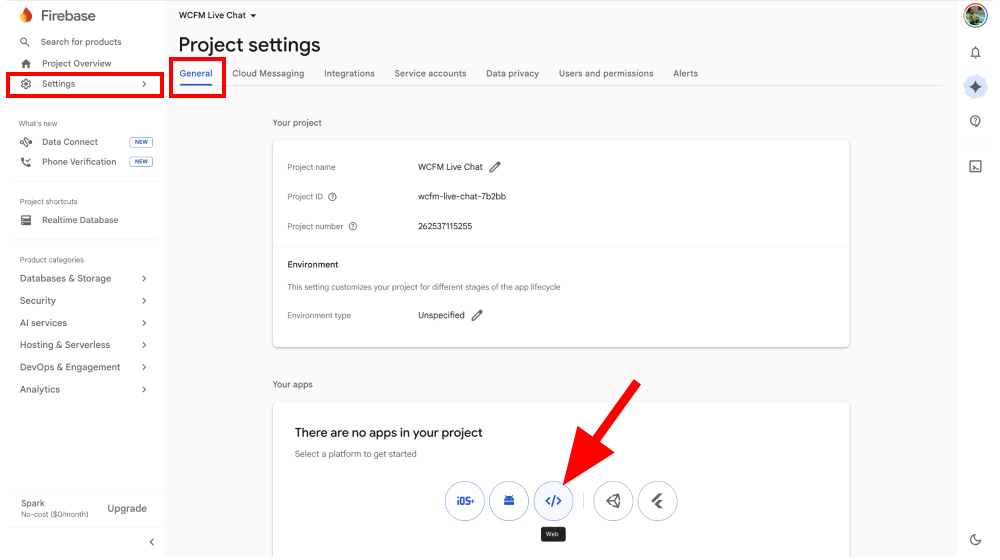
Step 2 : Enter an app name (e.g., “WCFM Web App”) and click the Register app button.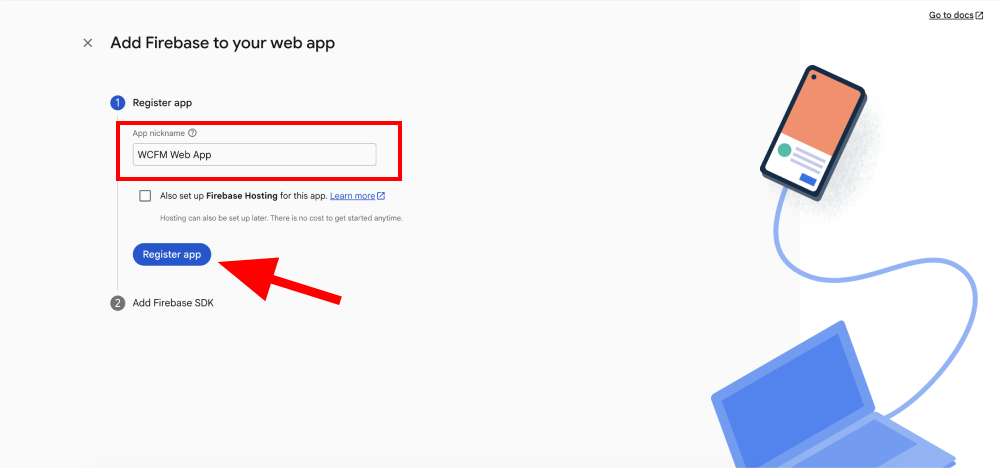
Step 3 : You’ll see the app configuration details. You can copy the apiKey now or retrieve it later. Click Continue to console.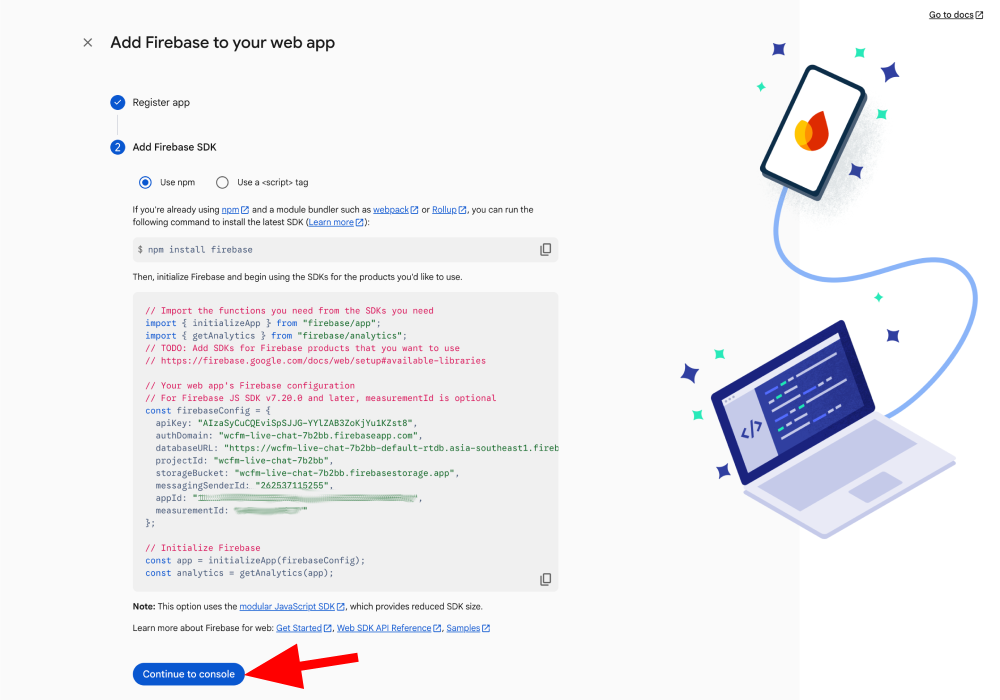
Step 4 : Copy the apiKey value (if not already done in the previous step).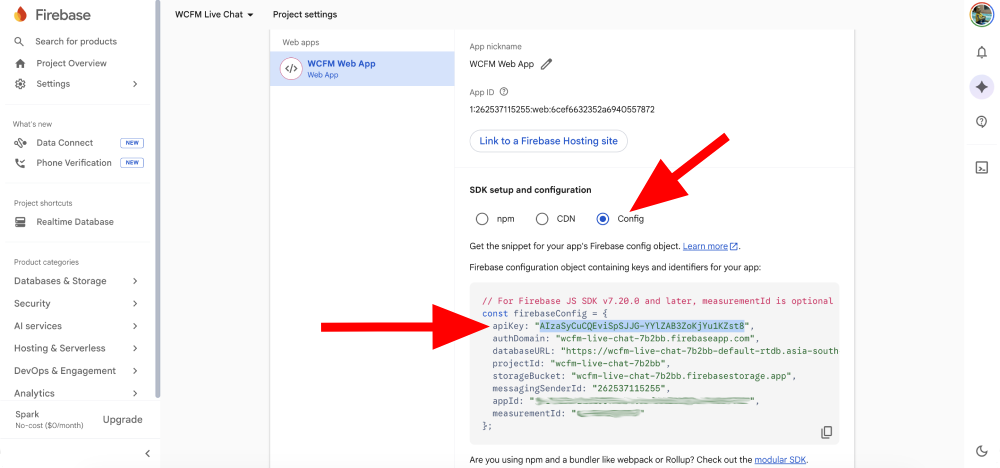
Step 5 : Paste the apiKey into WCFM dashboard > Settings > Chat Box > Web API Key field.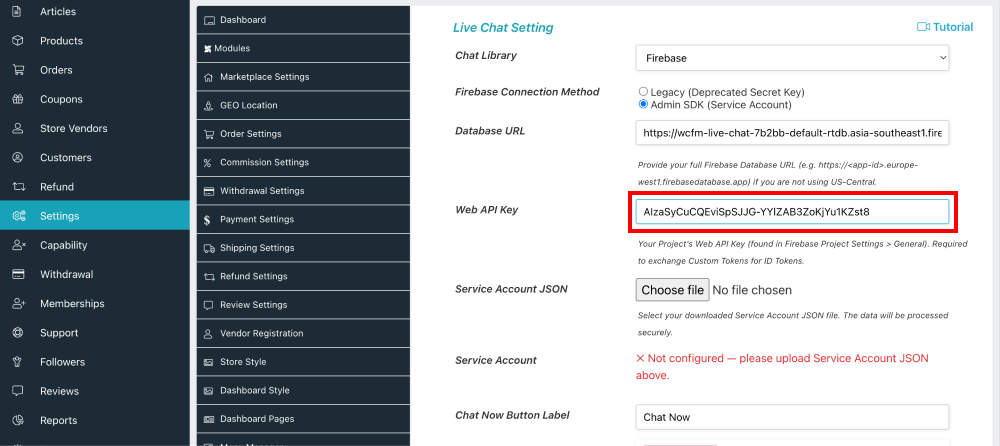
2.1.4.Generate Admin SDK Key
Step 1 : Click the Service Accounts tab under Project settings and select Generate new private key.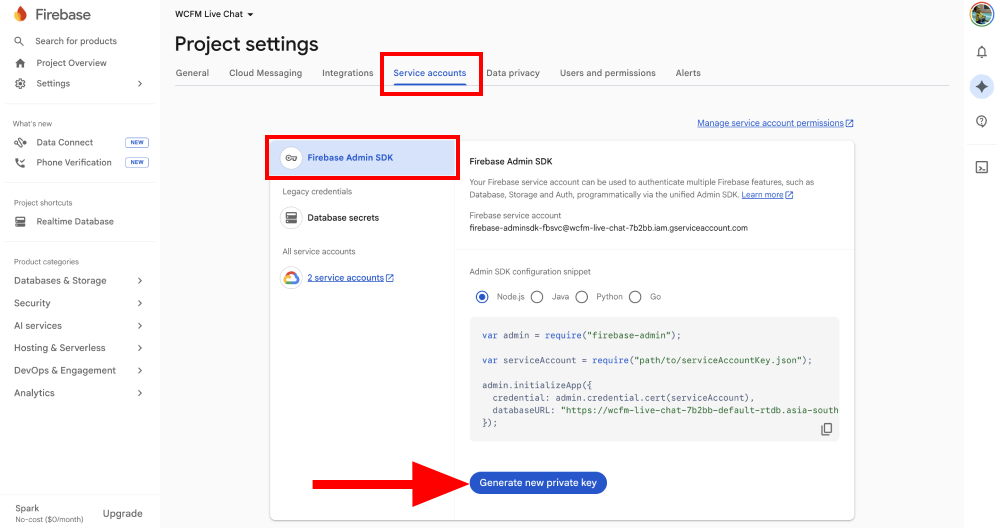
Step 2 : In the confirmation pop-up, click Generate key. This will download a JSON key file to your computer.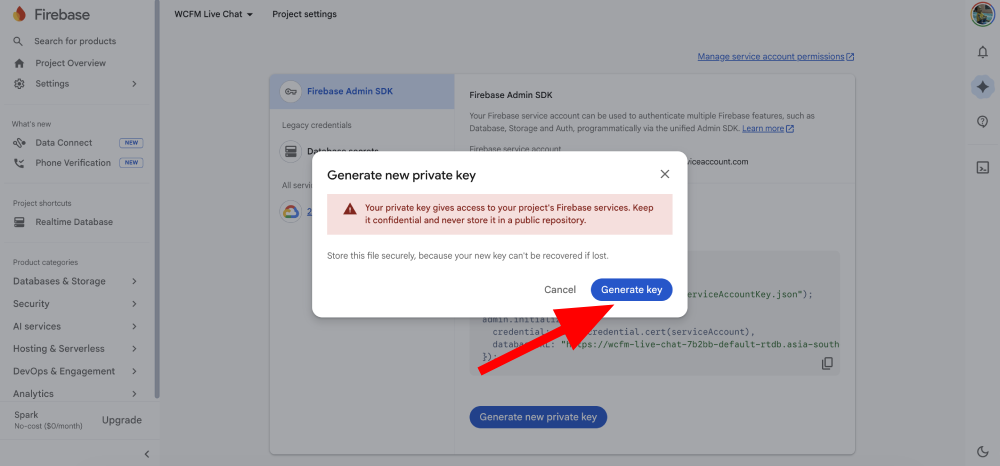
Step 3 : Go to the WCFM Chat Settings page and click the Service Account JSON > Choose file button to upload the JSON key file you just saved.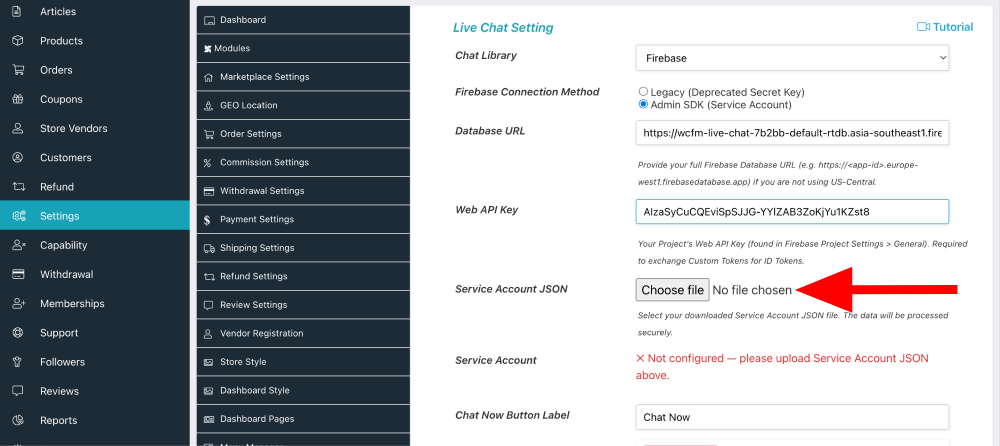
Step 4 : Once uploaded, the status will show as Configured. The Delete button allows you to remove this private key and upload a new JSON key file if necessary. 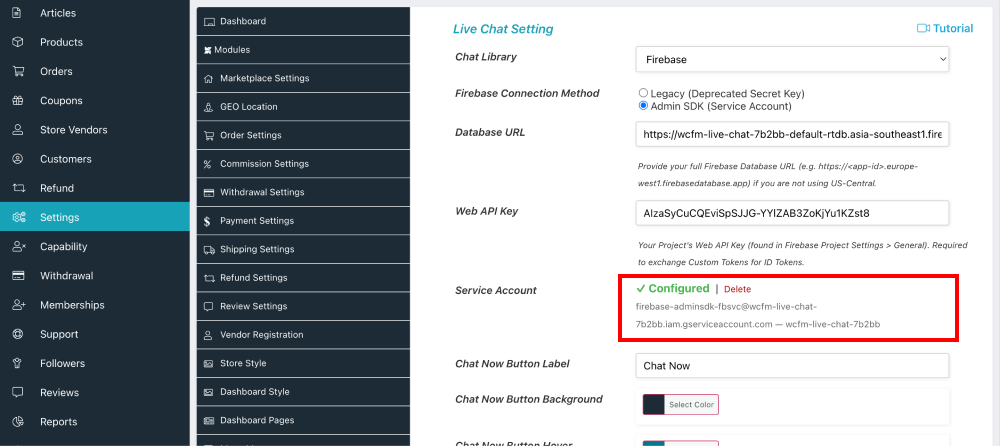
2.1.5.Authentication
Step 1 : From the sidebar, navigate to Security > Authentication. On the authentication page, click Get started.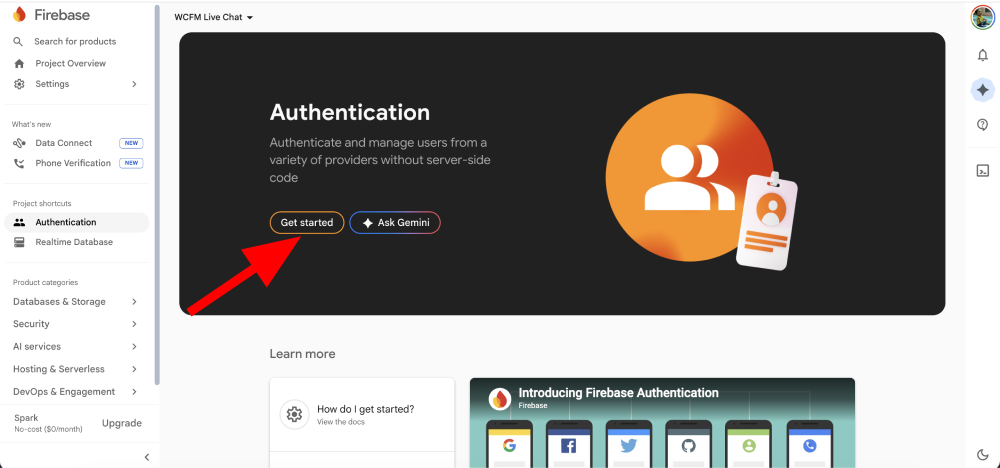
Step 2 : You do not need to enable Email/Password or any specific providers—simply clicking Get started (from the previous step) initializes the Identity Toolkit for your project, which is required for the system to function.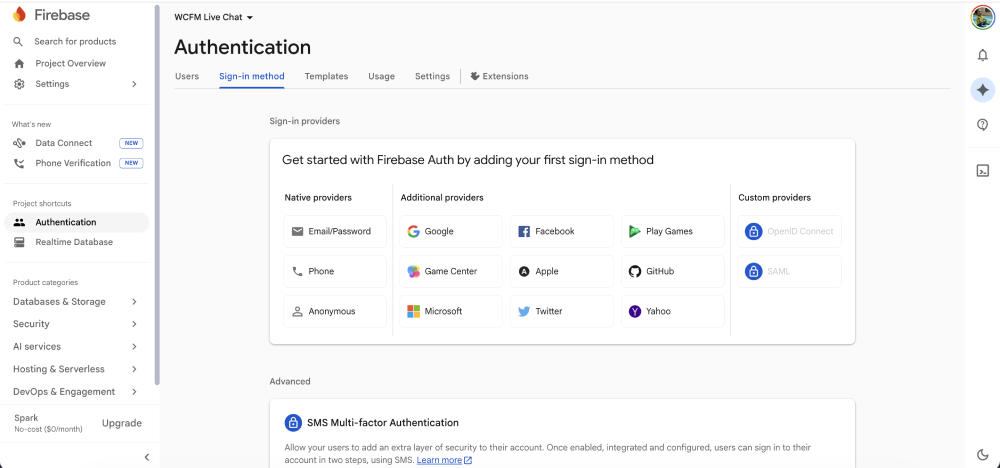
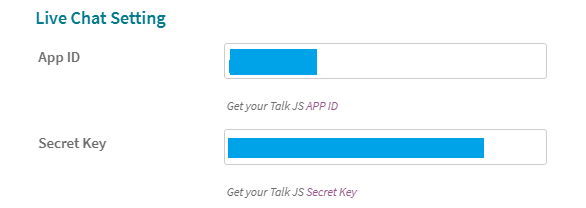
2.2.TalkJS
Now, you have to set App ID and Secret Key at WCFM Chat Box setting panel.
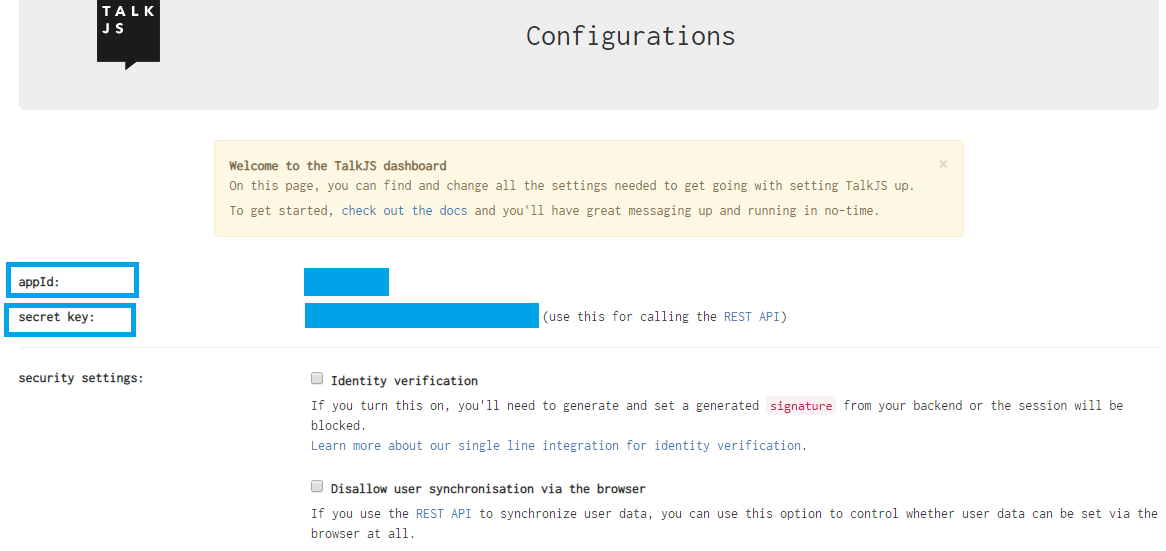
You just have register at Talk JS site to get your App ID and Secret Key.
For this, kindly go to -> WCFM Admin Dashboard -> Setting -> Chat Box -> Choose “TalkJS” as Chat module and set APP details.
3.Init Chatbox
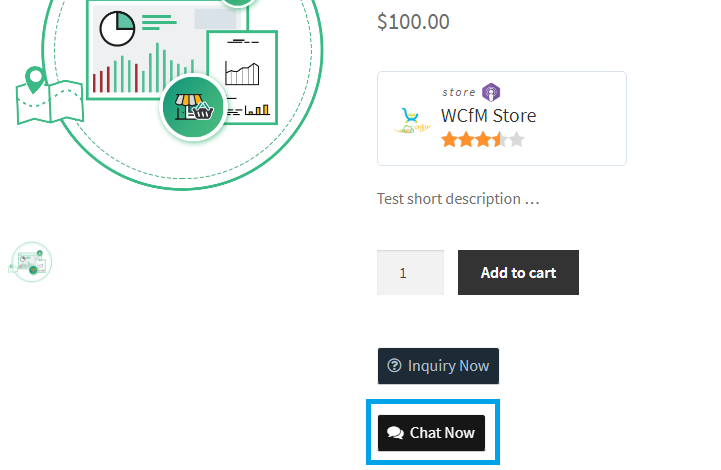
3.1.Product
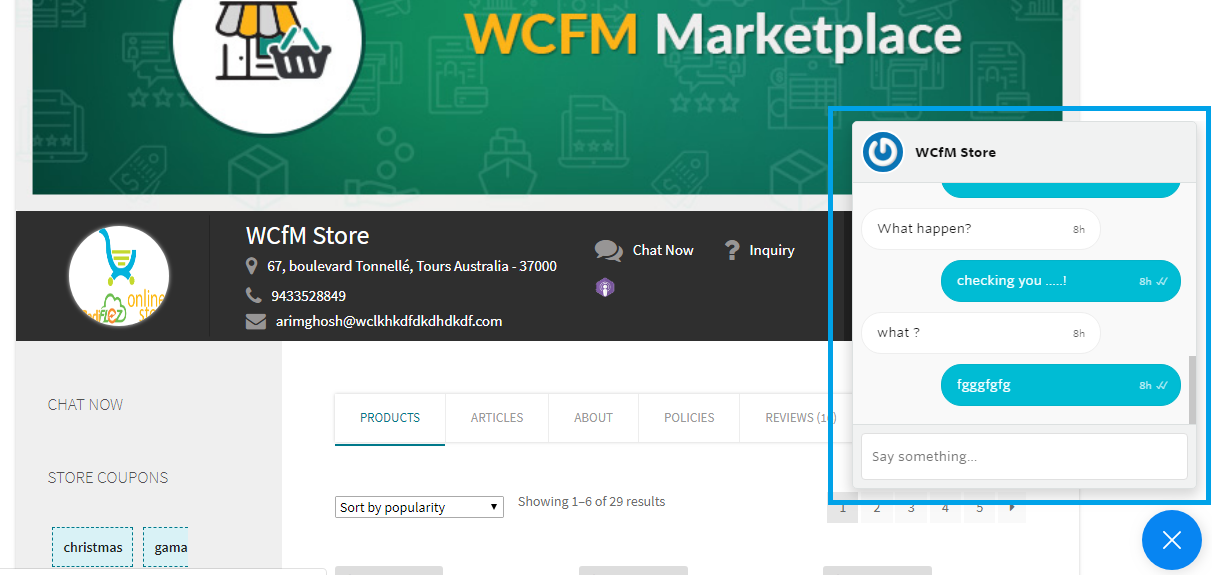
3.2.Store

Now it’s time for your customers to directly interact with store vendors.
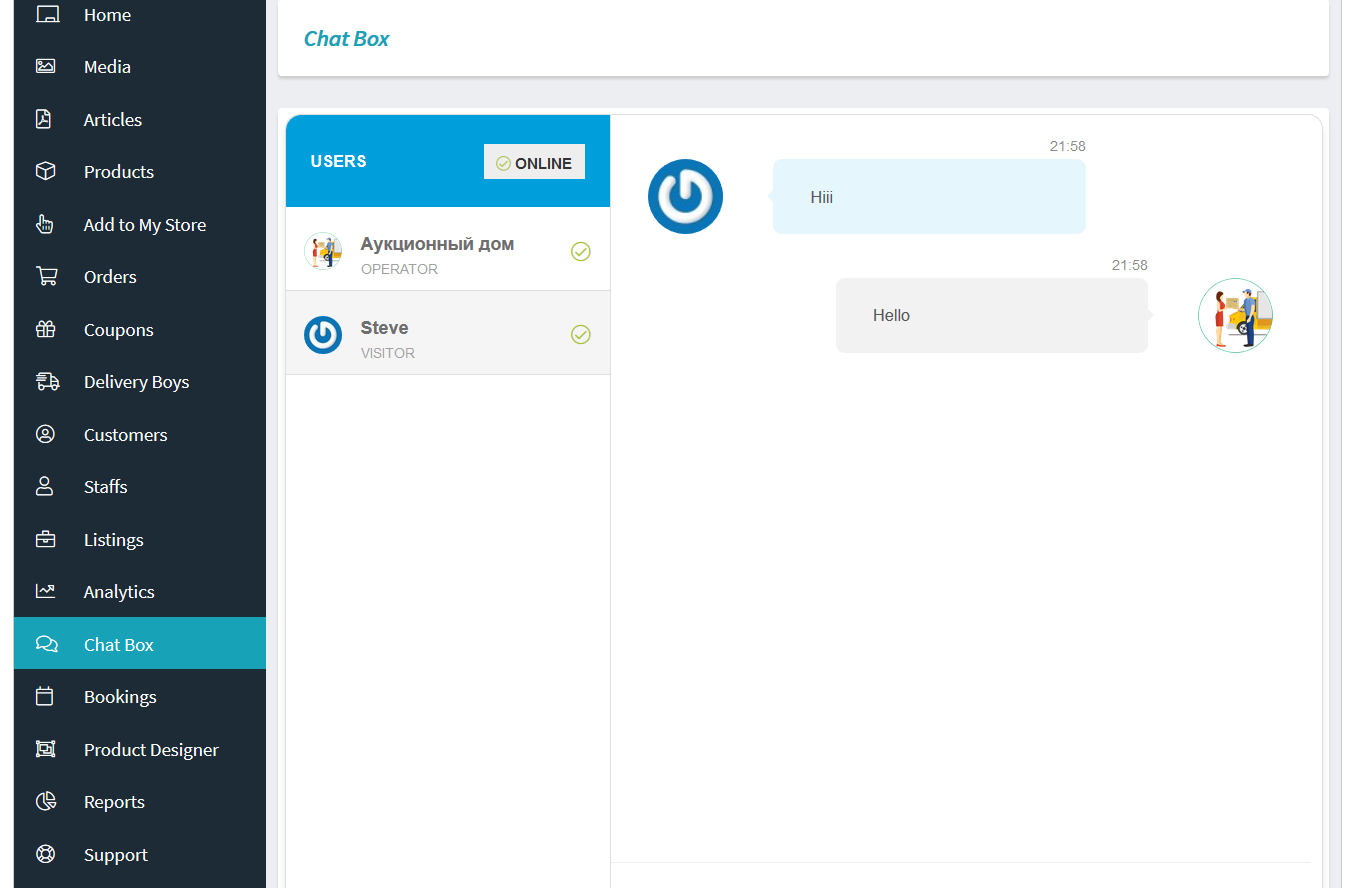
3.3.Dashboard
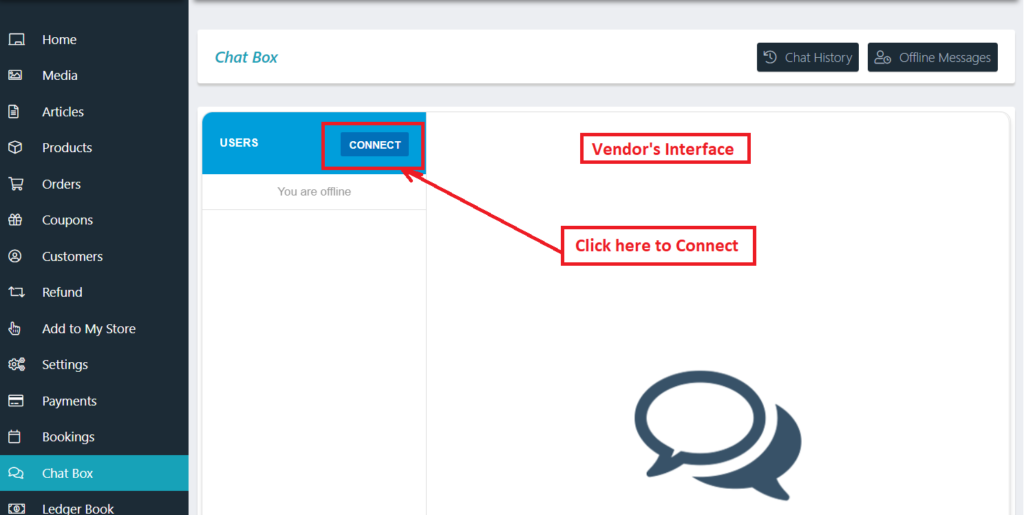
Vendors may manage chat requests from their Dashboard -> Left menu Chat Box
Also note that the vendor needs to click on ” Connect” button for being available to chat as shown below:
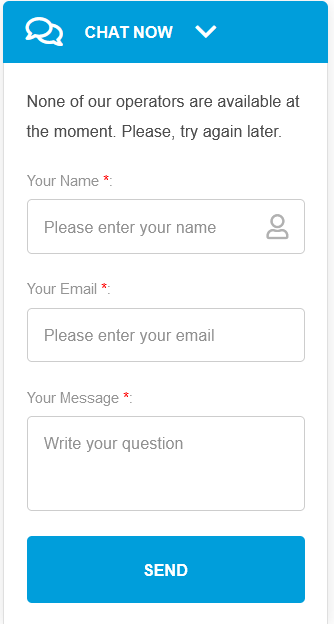
If the above ” connect” button is not clicked the vendors will not be available for chat and the users ( or customers ) who wants to chat with vendors will receive a notification in their chat-box as shown below:
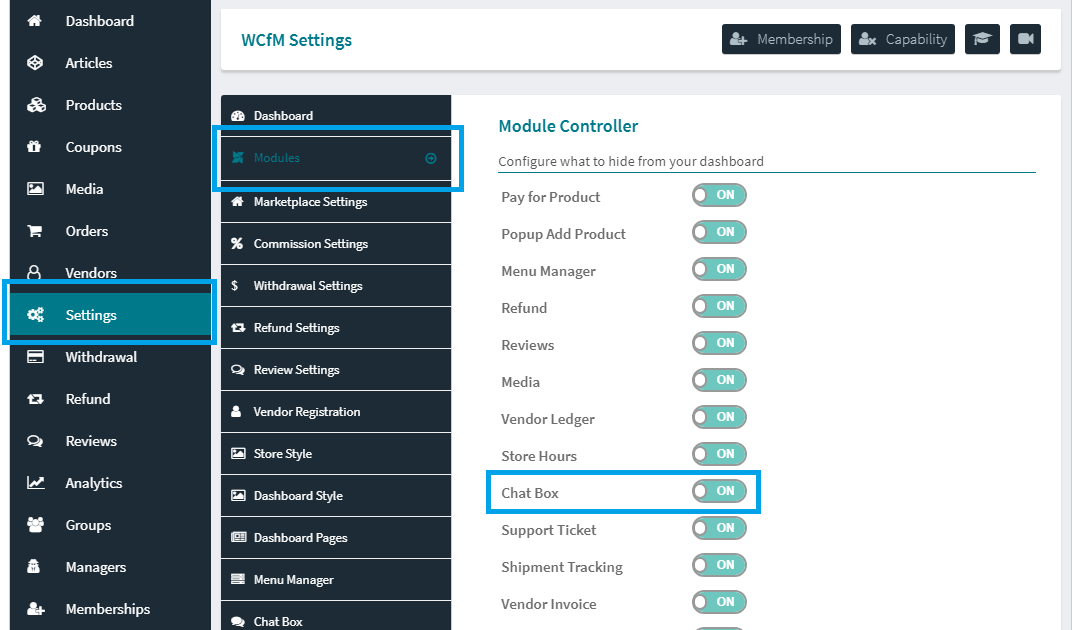
4.Capability
If you don’t want to have Chat Module in your site they you may disable just by on click.
Kindly go to WCFM Admin Dashboard -> Modules -> Chat Box -> Set this OFF
You may control “Chat Box” capability from WCFM Capability setting page.
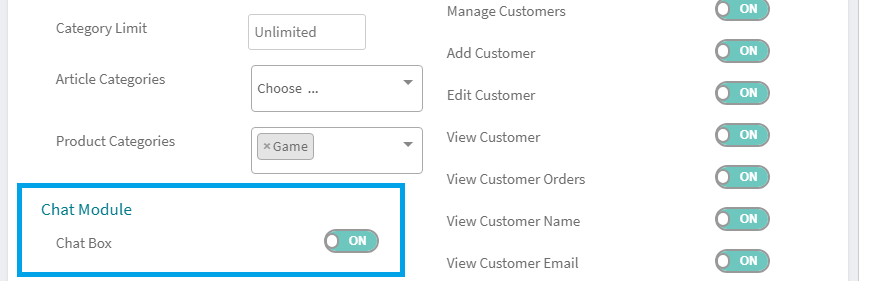
You may control chat module availability as per vendor as well.
Membership specific chat box capability controller is also possible using WCFM – Group & Staff addon.