Posted on Leave a comment

Marketplace Settings: Thank you Tab

his section allows the admin to place the content of the email which will be triggered once the vendor(s) applies for subscription in the site. Note that you do not need to provide the Dashboard Url in the mail content as it will be automatically appended in the mail.

PS: The “ On approval mail content” is only applicable if the user requires admin permission to become a vendor. 

Posted on Leave a comment

Membership settings: Registration Fields

From here the admin can set the fields of the registration form which has to be filled by vendors for subscribing to the site. You will have to check the field items which you want to show in the registration form ( such as first name, last name etc), additionally, you can add custom fields to be inserted in the form as well as shown below:

Pic 1: Showing the fields for registration.

Pic 2: Front-end representation of the registration form ( only First name is enabled)

Posted on Leave a comment

Membership Settings: Features Tab

Membership feature list is very important as membership levels will be created on the basis of these items. You may create any number of features for membership plan from here such as Product Limit, category Limit etc.

Here’s an example how it’s set:

You will be able to see these features to edit/add membership page like shown below where you will have to enter the parameters against these.

Posted on Leave a comment

Membership settings: General

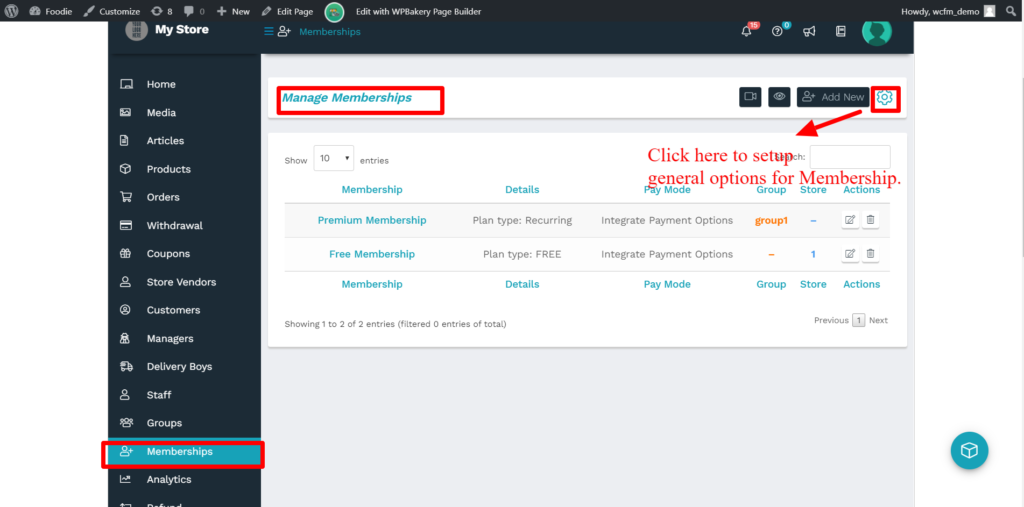
This tab allows the admin to configure the basic rules for membership plans as shown below in the screen-grab:

Here are the options which can be set here categorically:

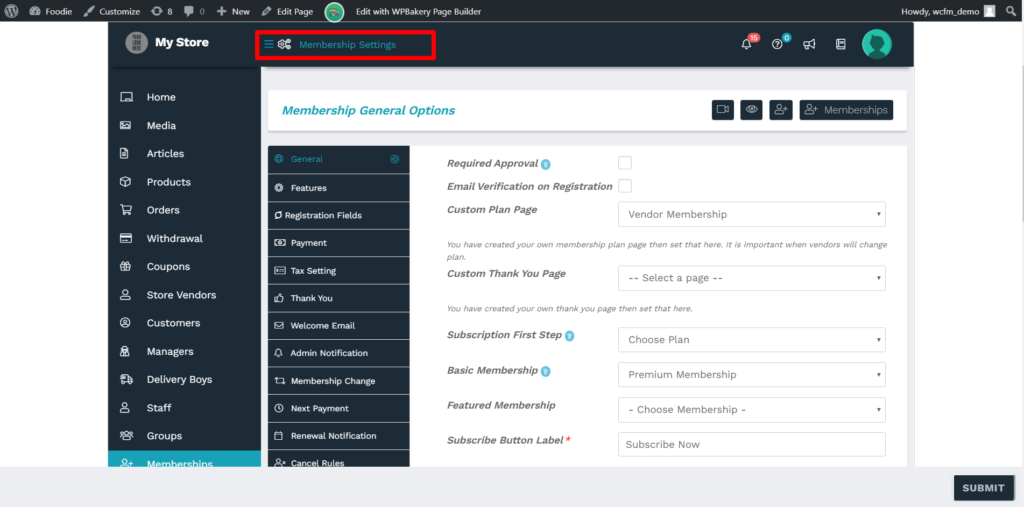
Required Approval: Checking this will ensure that the vendors needs admin approval for becoming a vendor.

Email verification on Registration: Checking this will ensure that the vendors need to go through an email verification process to confirm their registration. This option will send a verification code to the mail which has to be entered for while subscribing for membership.

Custom Plan page: One can set the Plan page from the list of pages in the drop-down, thus incase admin has created a custom page, then it can be selected from here.

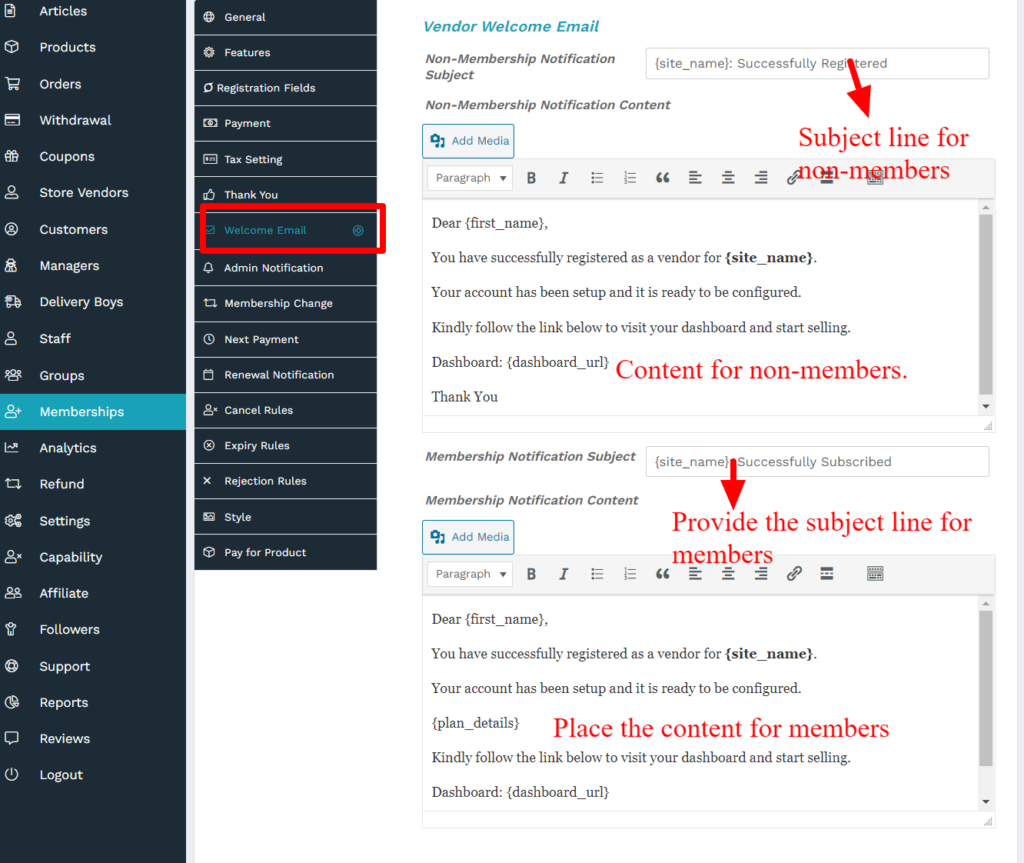
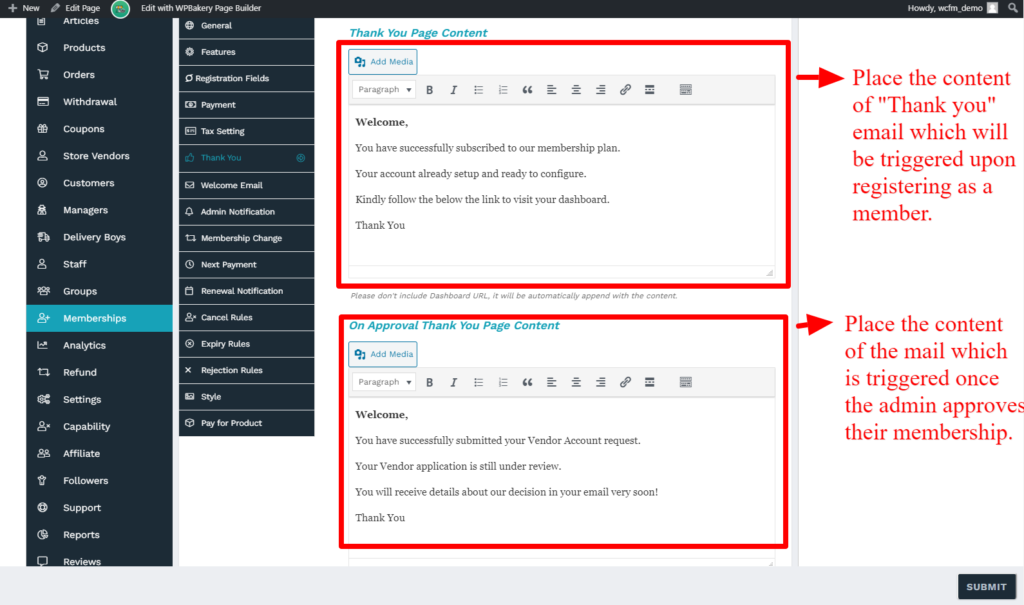
Custom Thank you page: Incase the admin has developed a custom Thank you page, it can be set from here using the available drop-down. This page will be displayed after completion of membership subscription.

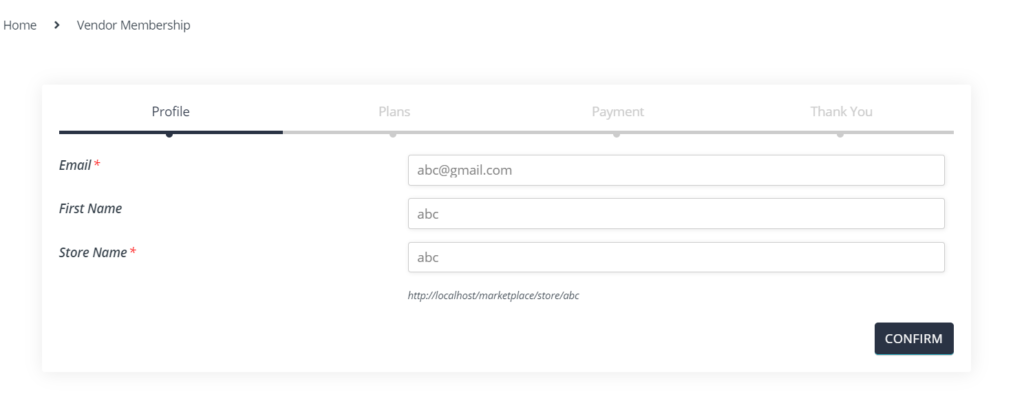
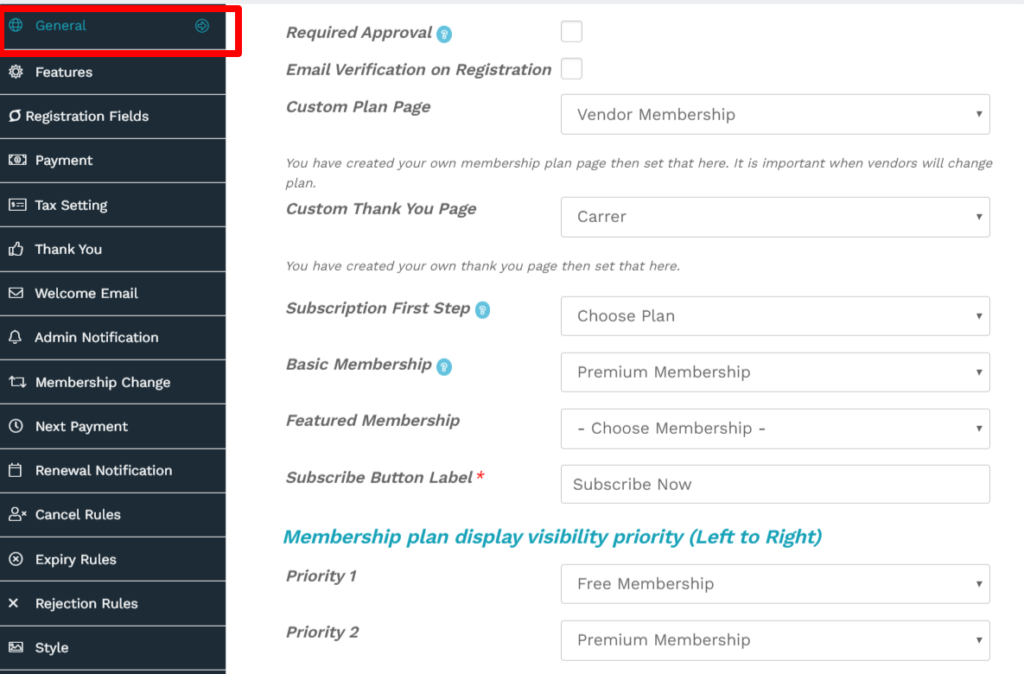
Subscription First Step: This will allow the admin to choose the first step of the membership subscription. You can either keep Registration as first step ( where users will be asked to enter details such as name, email etc) OR plan selection page ( where users can select membership plans).

Basic membership: The admin can choose the membership plan which will be auto-assigned to the vendors if their subscription has expired or recurring subscription is cancelled.

Priority: You can set from here the priority of display for the membership plans ( from left to right) using the dropdown options for each priority level.

Posted on Leave a comment

Membership- General Settings

The general settings for membership can be configured by the admin from here: Goto WCFM Admin Dashboard -> Membership -> Click on Settings icon from Manage Membership page

Here’s a screenshot of the same for better understanding:

Upon clicking on the settings icon ( as shown above) you will be redirected to “Membership settings” page as shown below:

Let’s now discuss the options available for setting up membership levels one by one.

Posted on Leave a comment

Membership: Overview

WCFM allows you to configure membership levels for your multivendor store easily, before we step in to discuss about it’s configuration and settings, please ensure that your store has the WCFM Membership plugin installed and activated. With this, you can build unlimited membership levels with different pricing plans, commision, capabilities etc. Here’s a guide of how you can do it.