In addition to the conditional logic which automatically assigns the badges to the vendor, you can also manually create badges and assign it to the vendor.
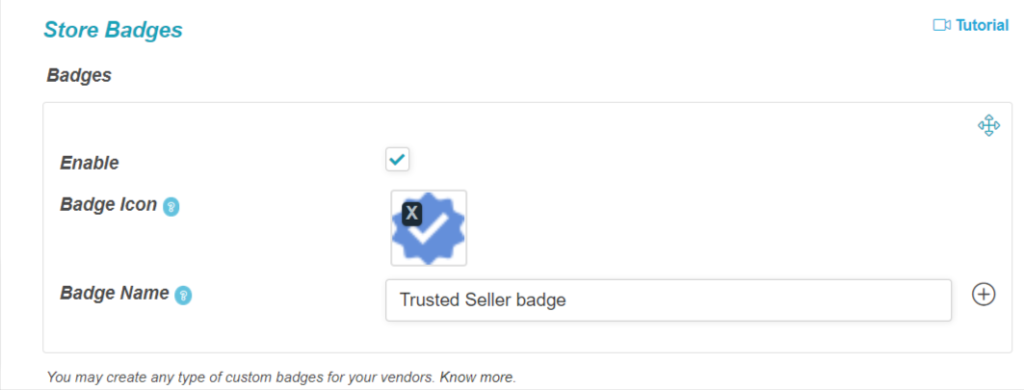
Here’s a glimpse how and where you can create the badges:

The above screenshot shows how to create custom badges, you will need to check the enable button, and add the badge icon ( preferably of size 32*32 px) and name.
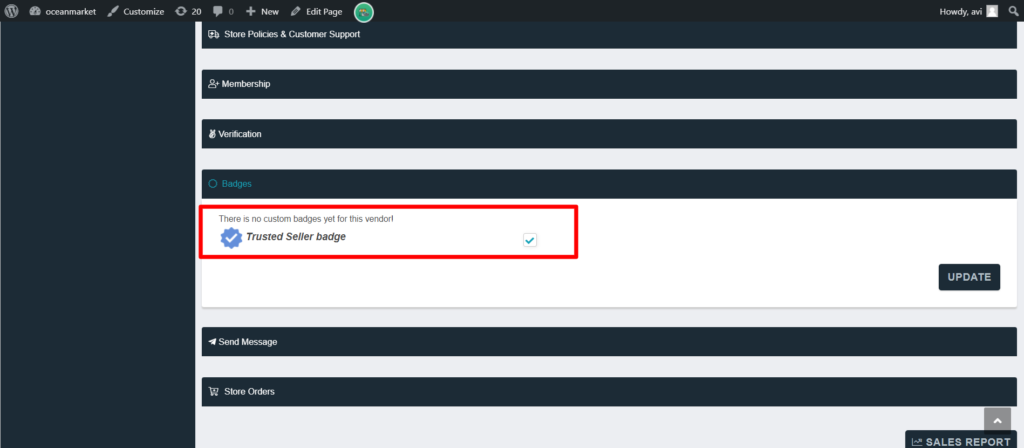
These custom badges can now be assigned to the vendors manually from WCFM Admin dashboard -> Store Vendors-> Manage store vendor page -> Badges option as shown below :

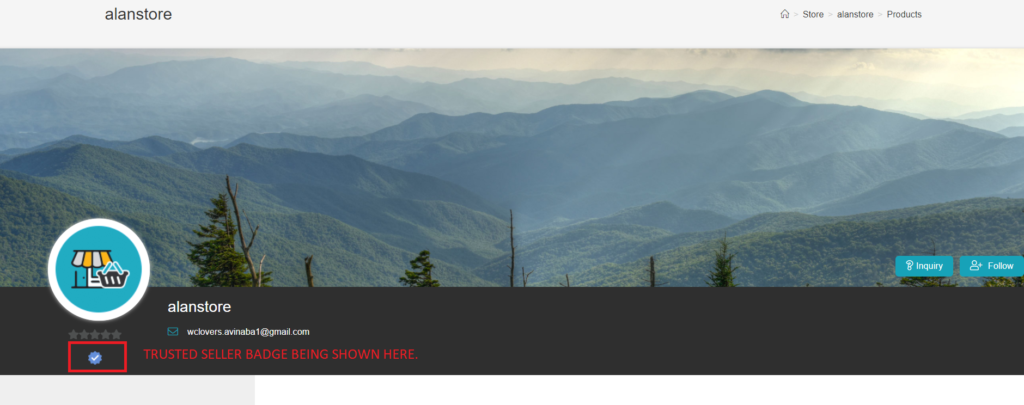
Here, click on the checkbox to enable the badge for the vendor and update it accordingly, Once done this will be reflected in the vendor store page as shown below :

Additionally the badges will be reflected beside the vendor’s name in the store page as well as shown below:

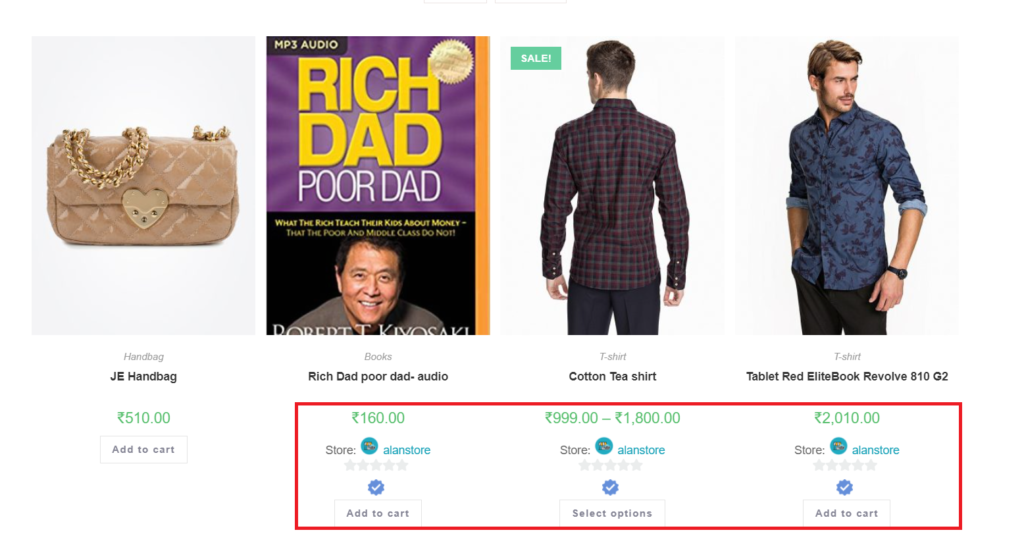
Infact, the badges will be available throughout the store beside the respective vendor name.
