Sign up or Log in
At first, you have to visit stripe.com and sign up. Follow their verification process. If you already have a Stripe Account, just sign in.
Generate (Test and Live) API Keys
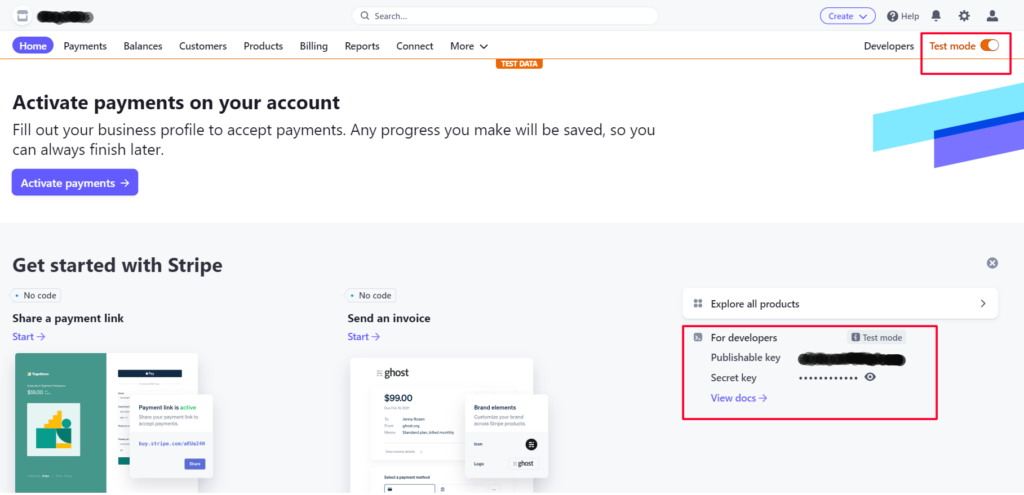
You should land on the Home tab after you log in to Stripe. If not, navigate to the Home tab of the Stripe logged-in interface to find the Secret and the Publishable Keys. The keys will appear based on what you select from the toggle button above. For example, if you activate the Test mode button, then the keys will show up for Test mode only. To view the live mode keys, simply turn off the toggle button for Test mode.
At the WCFM interface
Copy and paste the keys to the credential fields. If you are testing, use the Test credentials. For live transactions, use the live credentials.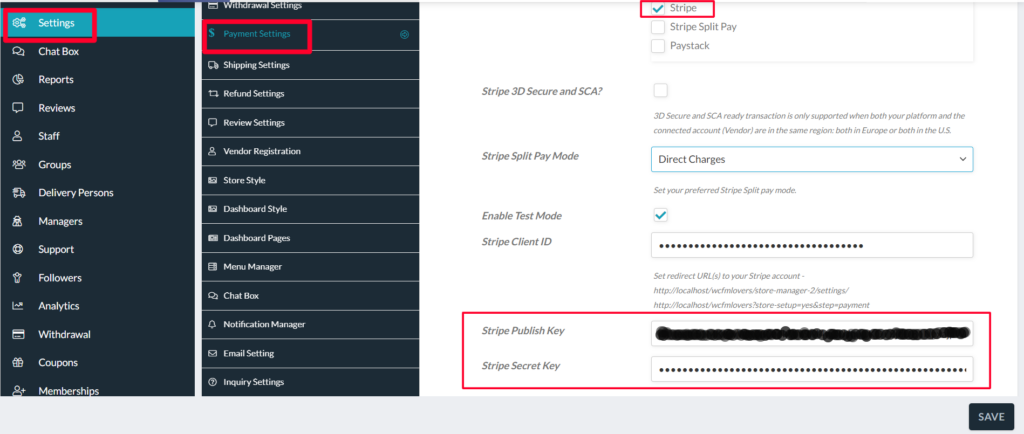
Connect Your Marketplace and Get the Client ID
Now that you have already entered the API keys and the only thing required is the Client ID for live transaction or Test Client ID for Testing.
Click the settings icon from the top right hand side of the Stripe logged in interface, just beside the Profile icon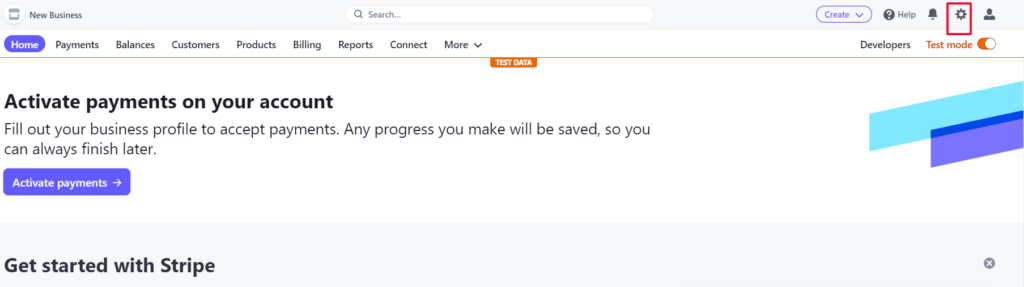
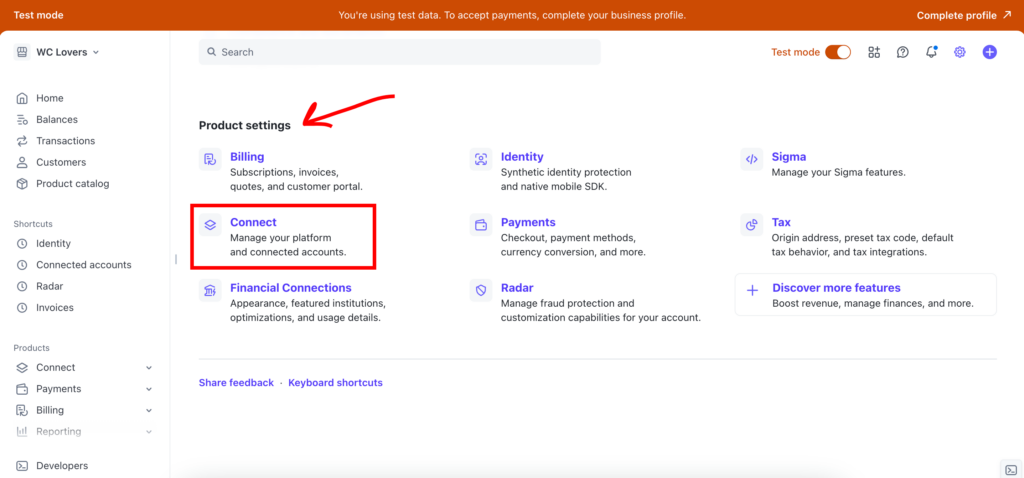
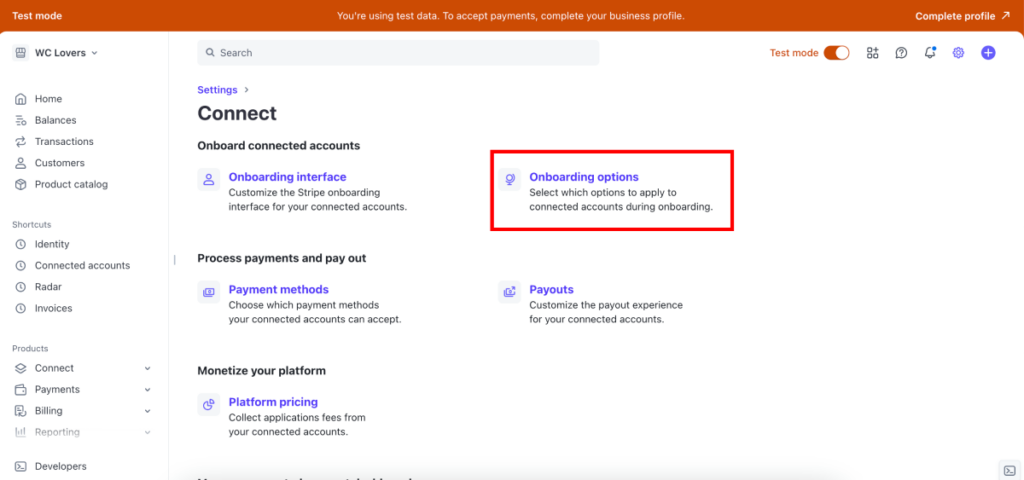
Click on the Connect link under the Product Settings section
From the Connect settings page, choose the Onboarding options link.
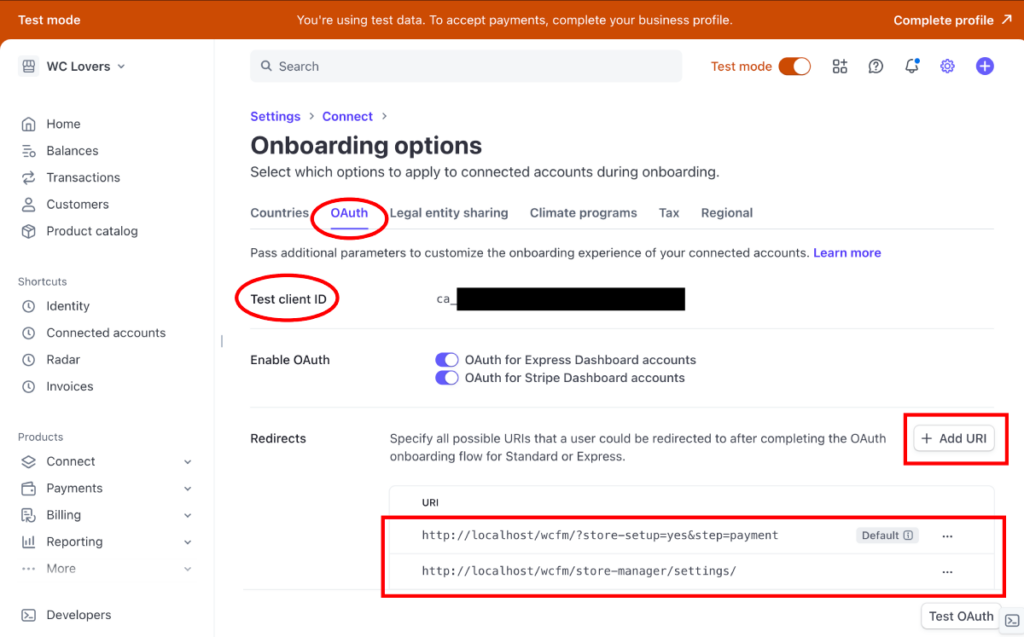
Click on the oAuth tab, and inside that, you’ll find the Stripe Client ID. This is the credential you have to put under the Client ID of the WCFM Payment Settings section. Also, copy the redirect URLs from the Payment Settings in WCFM, and add those to the Stripe interface under the Redirects section (You have to set two URLs here – WCFM Dashboard page setting URL and for Setup Widget https://yourdomain.com?store-setup=yes&step=payment)
Know more about this from here – https://www.appypie.com/faqs/how-to-get-live-publishable-key-live-secret-key-and-client-id-from-stripe