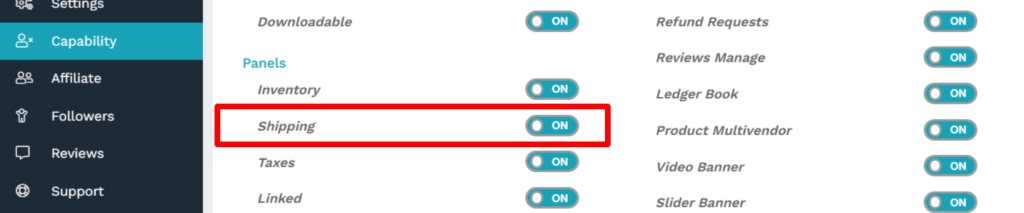
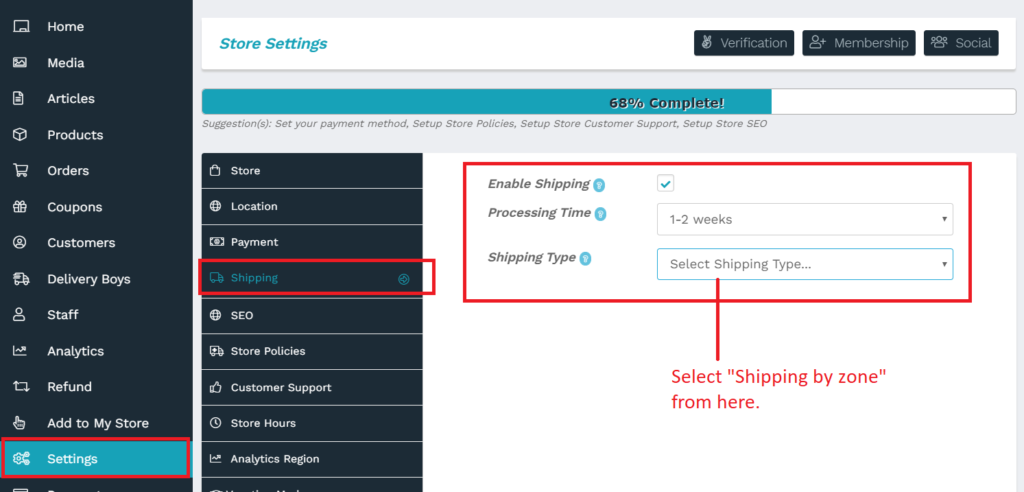
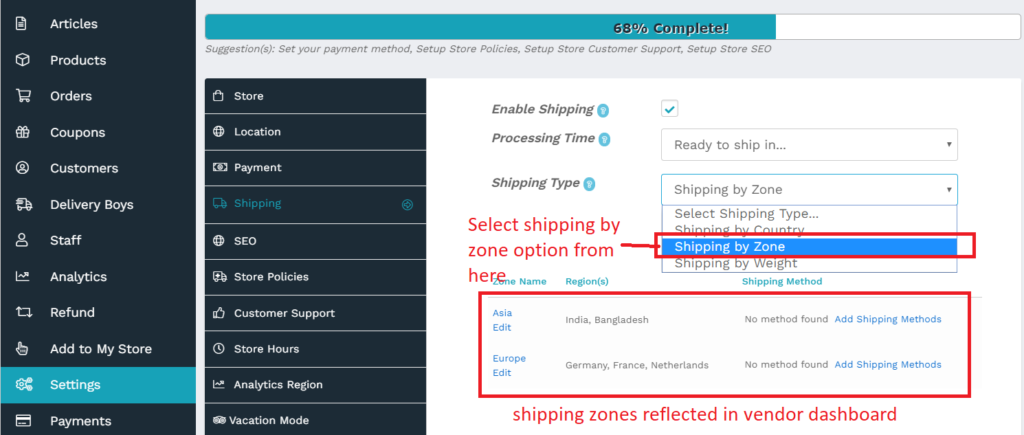
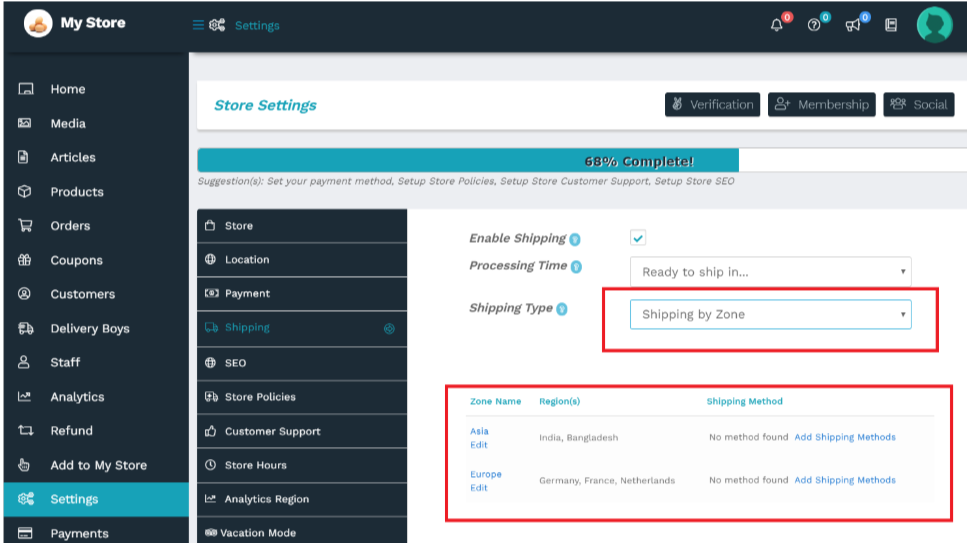
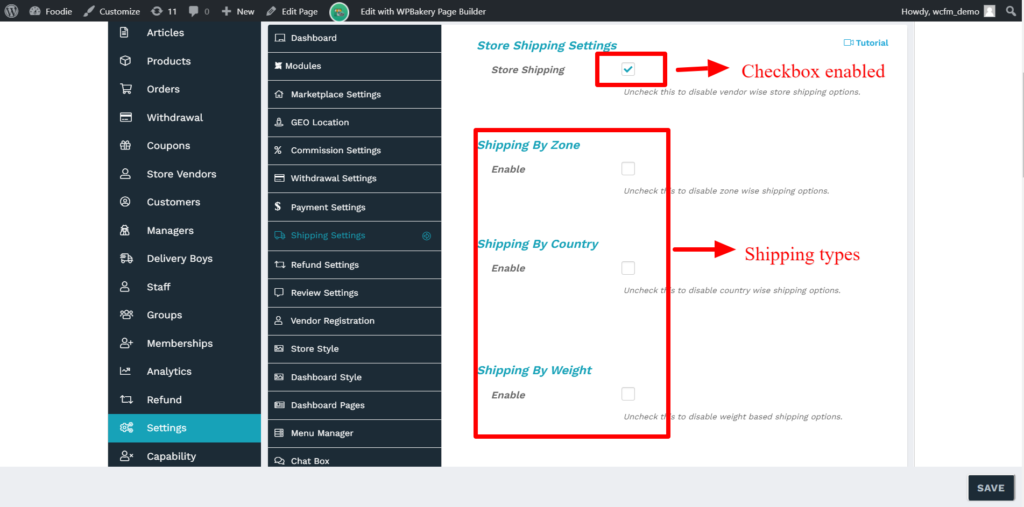
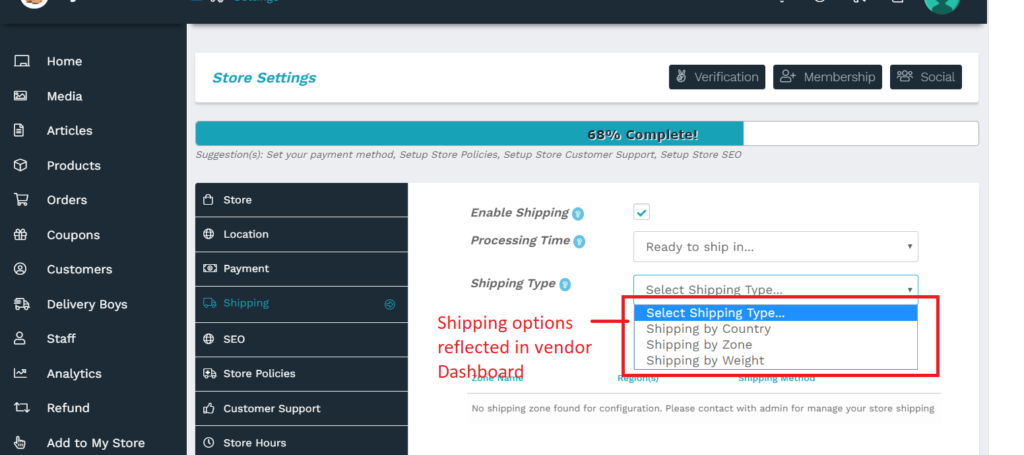
Vendor(s) have to enable the shipping option from here: Vendor Dashboard -> Settings -> Shipping and set the processing time, after this they are prompted to select the shipping type which is globally set by the admin, from here the vendor has to opt for “Shipping by zone” as shown in the screenshot below:
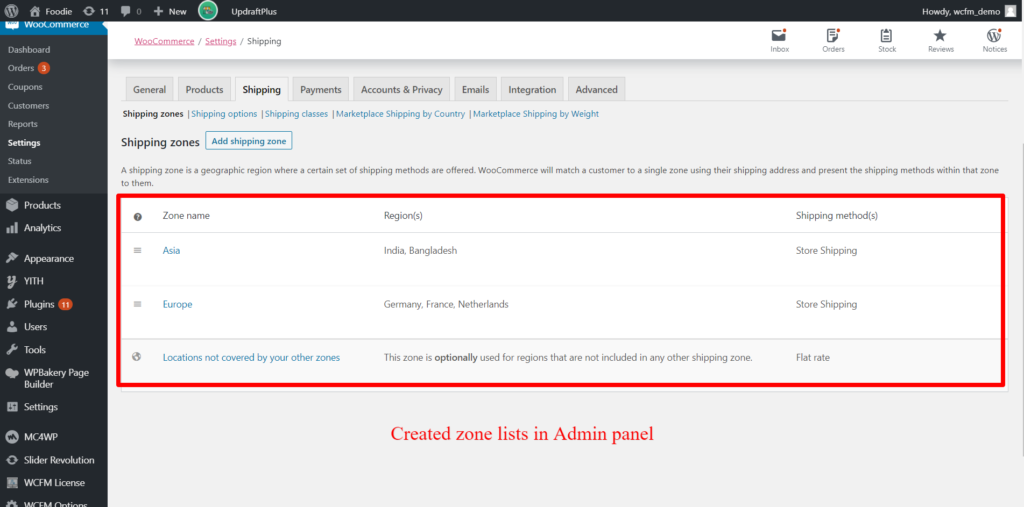
Once shipping by zone type is selected, the vendor gets the same zones as set by admin reflected in their dashboard here: Vendor Dashboard -> Settings -> Shipping-> Shipping by zone.
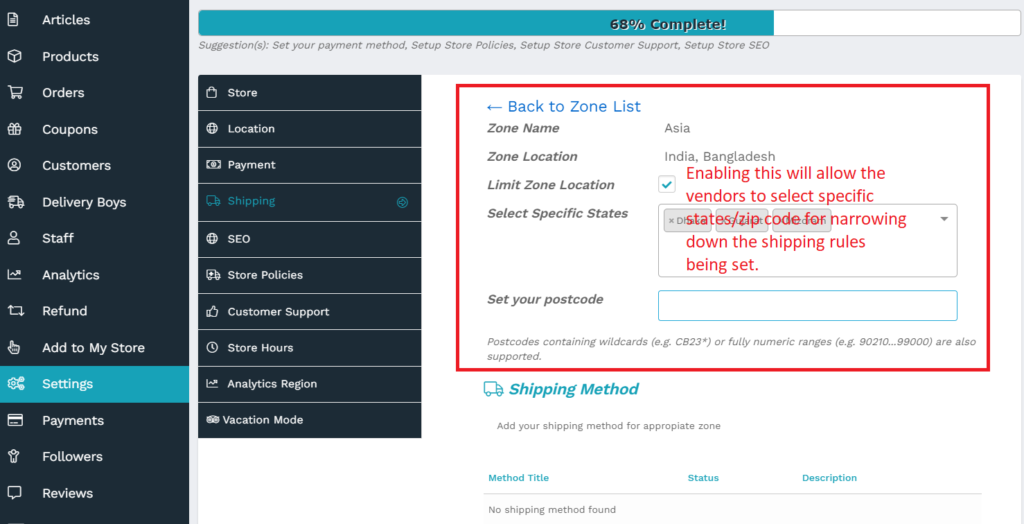
These shipping zones can be configured by the vendor as per the required by clicking on “Edit” as shown below:

Clicking on edit will redirect the vendors to edit-zone page from where they can select country states and postcode ( if applicable ) for the selected zone to enforce the shipping rules.
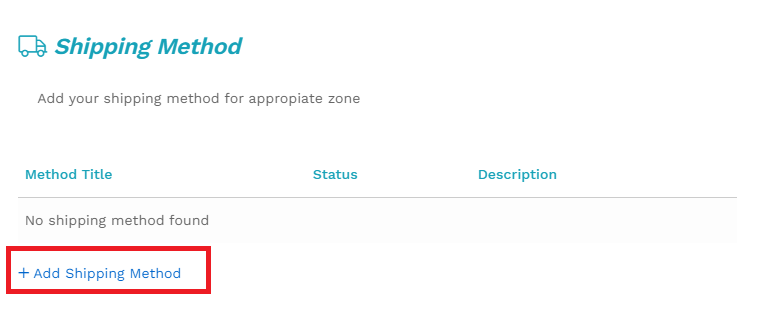
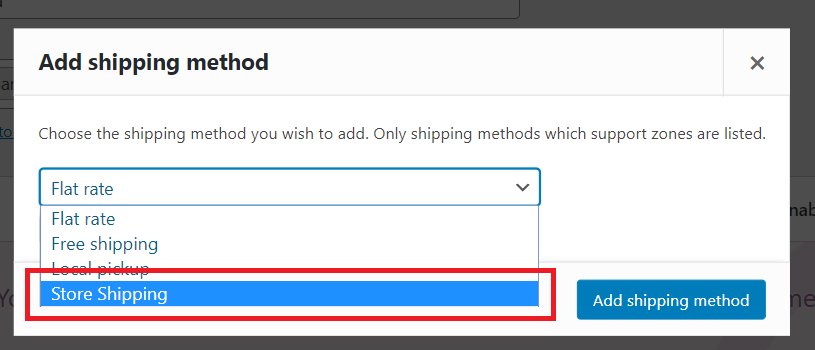
To add shipping methods, the vendor have to click on the “Add shipping Method” option:
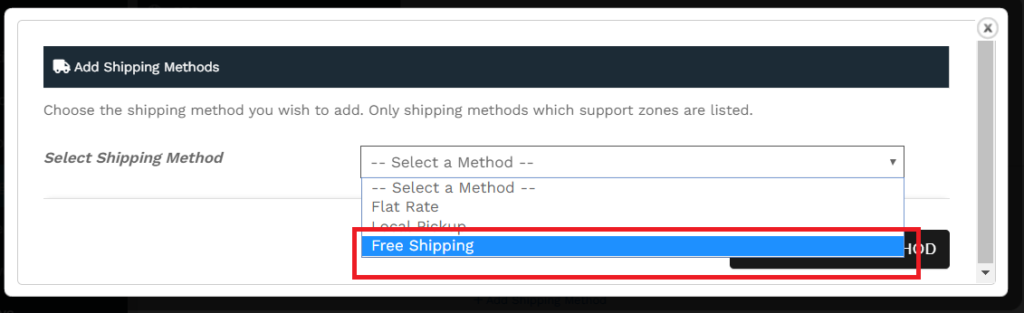
Clicking this will show a pop-up which will prompt the vendor to select the shipping method from the following option:
a. Flat rate
b. Local pickup
c. Free shipping
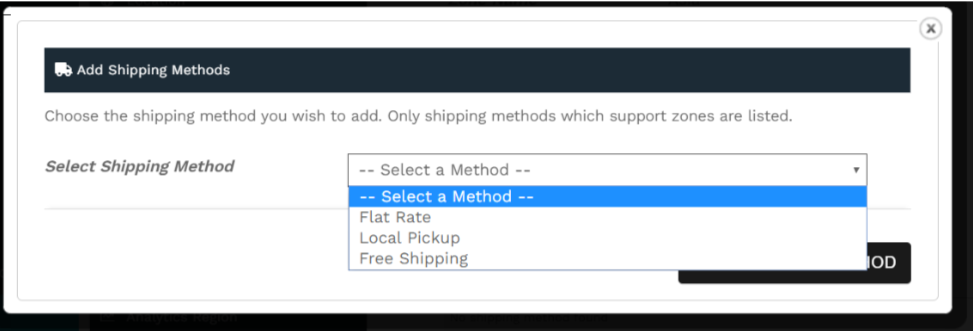
Pic :#9 : Shipping method dropdown
Let’s discuss each of these shipping methods categorically-
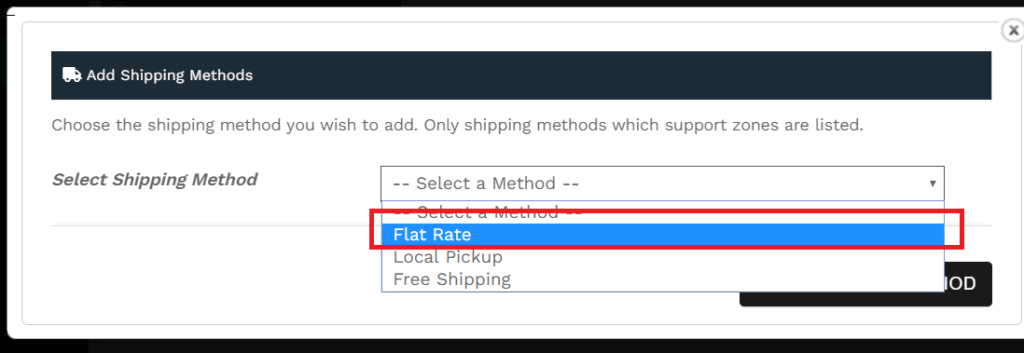
a.Flat rate shipping: Flat Rate Shipping is a shipping method that allows you define a standard rate per item, per shipping class ( * discussed below) or per order, here’s a step-wise guide on how the vendors can setup flat rate method for their individual store.
Step i ) Select Flat rate from the given dropdown show in Pic:
Step ii) Once you add this shipping method, it will be listed in edit zone page as shown below. As a next step, you will have to click on “Edit” button ( as shown below) to configure the flat rate method

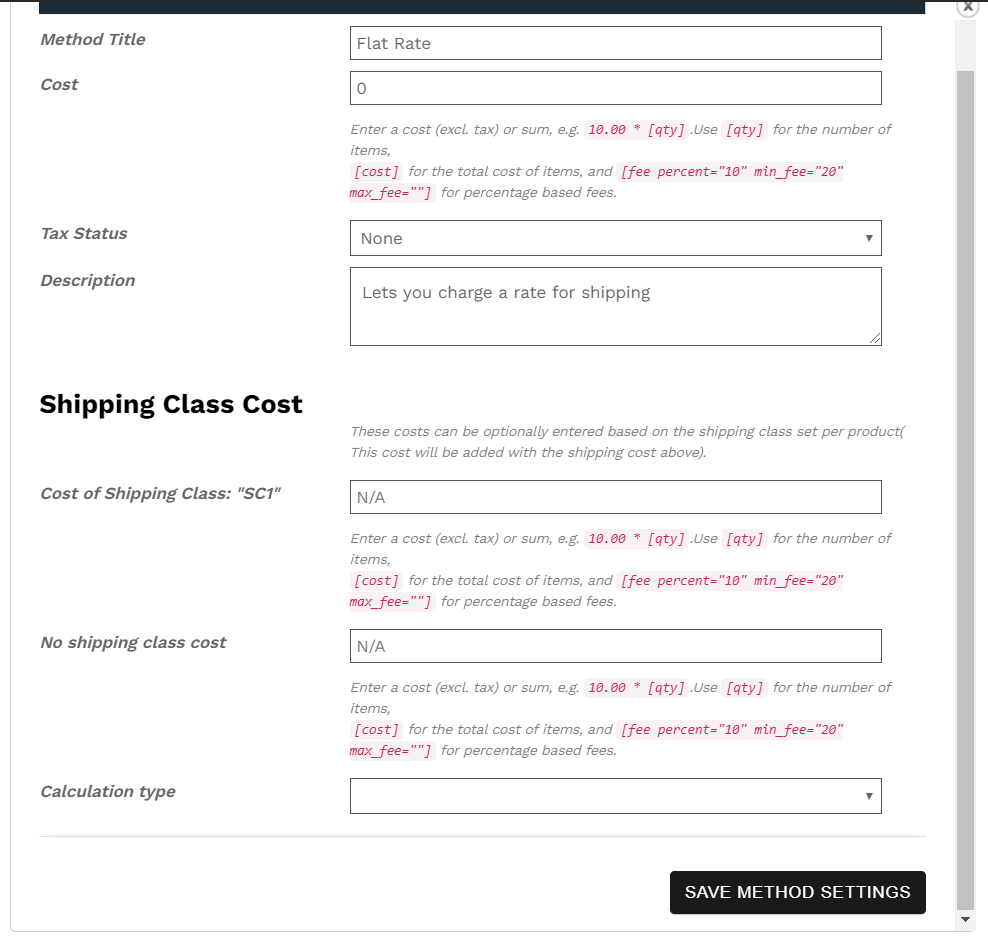
Let’s discuss the above fields in brief:
Method title: Enter a Title that displays to customers in checkout.
Cost: Vendors can add additional costs per item to this field. This can be left blank to disable Flat Rate except where costs are added for Shipping Classes. Note that what you enter here may factor into the overall cost in the Shipping Classes section unless it’s left blank.
Following are the place-holders which are to be kept in mind while entering the cost:
[qty] – Number of products in the cart
[fee] – An additional fee. This fee has two optional arguments.
percent – A percentage based on total order cost.
min_fee – A minimum amount. Useful when using percentages.
max_fee – A maximum amount. Useful when using percentages.
Example:
20 + ( 3 * [qty] ) – A base shipping cost of $20 plus $3 for each item in the cart.
15 + [fee percent=”5″ min_fee=”2″] – A base shipping cost of $15 plus 5% of the order total, which is at least $2.
Tax Status – Define whether or not tax is applied to the shipping amount.
Shipping class cost: If you have shipping classes, the interface adds a few more fields as shown in the above pic. These costs can be optionally entered based on the shipping class set per product( This cost will be added with the shipping cost above).
Cost of shipping class “X”- Enter the cost for a particular shipping class setup by admin.
No shipping class cost- Useful if you use the Per Class option. Otherwise, use the Cost field.
Calculation Type – Two options:
Per Order – Picks the most expensive option based on shipping costs in the cart.
Per Class – Charges shipping for each shipping class.
Step 3 : Once the above options are filled, save the above changes via clicking on “Save method settings” button.
b.Free shipping: This shipping method allows the vendor to set the threshold amount above which the shipping will be free. Here’s how the vendors will be able to setup the same:
Step i) Add free shipping method from the “Add shipping method” drop down.
Step ii) After saving this method, you can click on edit and fill up the following fields from the pop-up appearing.
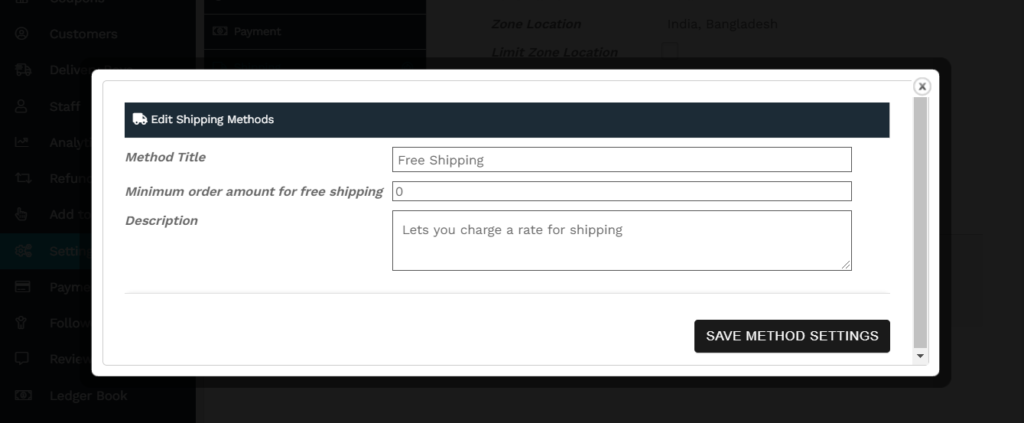
Here’s again a brief manual for the fields:
Method title: This title will be displayed to customers in checkout.
Minimum order amount : Here the vendors can enter the threshold value above which the shipping will be free.
Description: You can enter the description of the rate here
Step iii) : Save the above changes via clicking on “Save method settings” button.
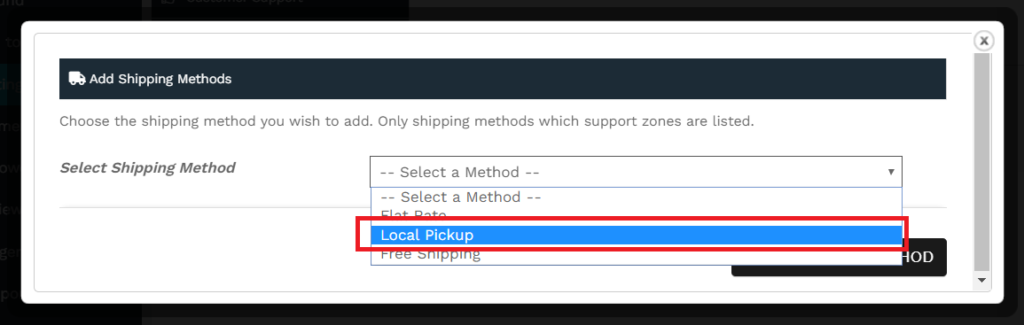
c.Local pickup: Local Pickup is a method that allows the customer to pick up the order themselves.The vendors can configure the relative tax and cost from here. This is how the vendors can configure Local pickup options for their store.
Step i) Add Local pickup method from the “Add shipping method” drop down.
Step ii) Similar to the above methods, after saving this you will have to click on the edit option for configuring the same.
Once “Edit” option is clicked, the vendors will get a pop-up similar to this below:
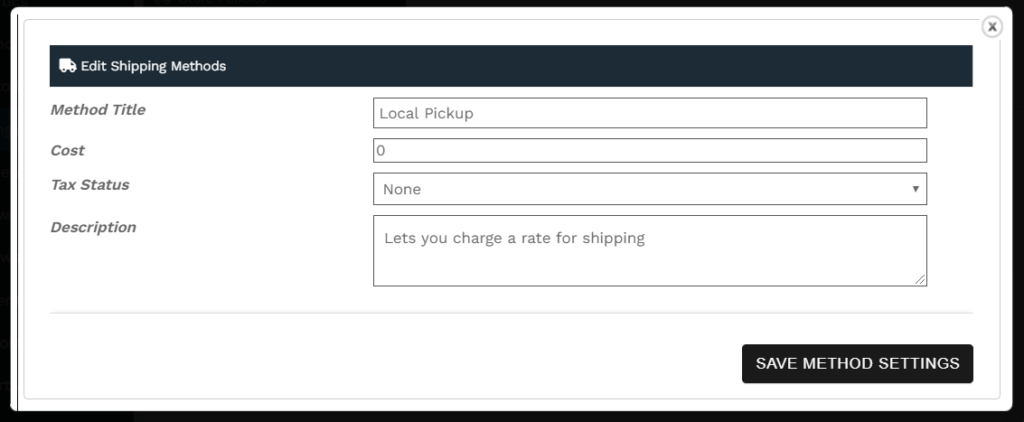
Here’s a briefing on the above fields:
Method title: This title will be displayed to customers in checkout.
Cost: Enter the cost for the option.
Tax status: Define whether or not tax is applied to the shipping amount.
Description: Allows the vendor to describe the option here
Step iii) : Save the above changes via clicking on “Save method settings” button.
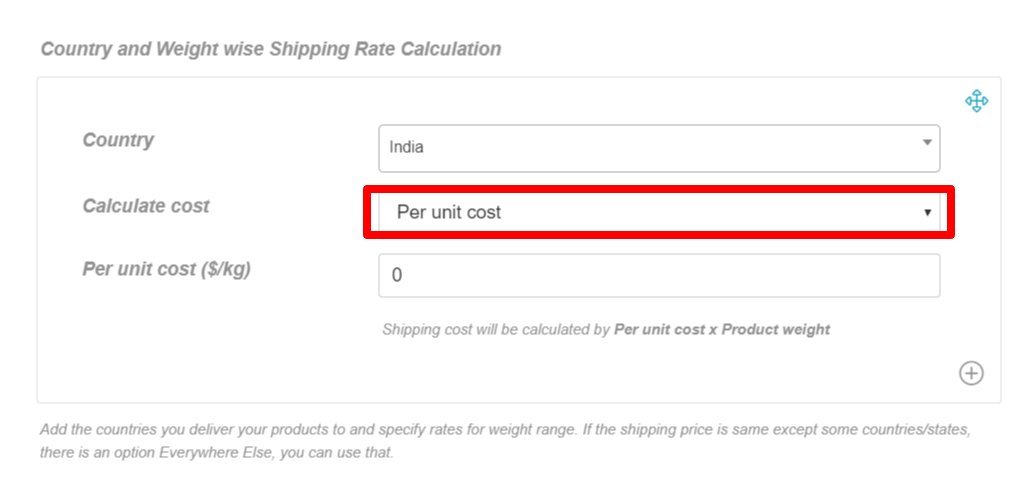 Once per unit cost is selected, the user will be prompted to enter the cost which will be added per Kg.Note that the user can add more countries and set rules by clicking on the (+) icons.
 Pic #4
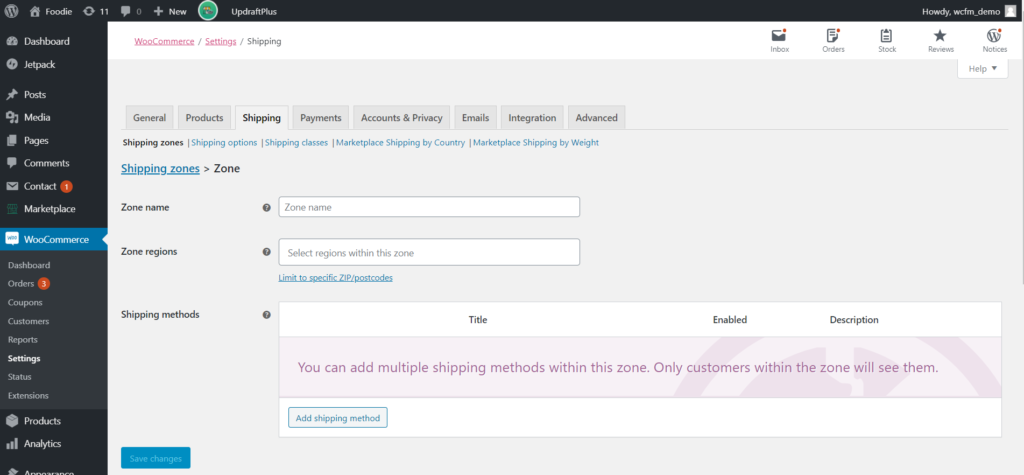 Pic #5
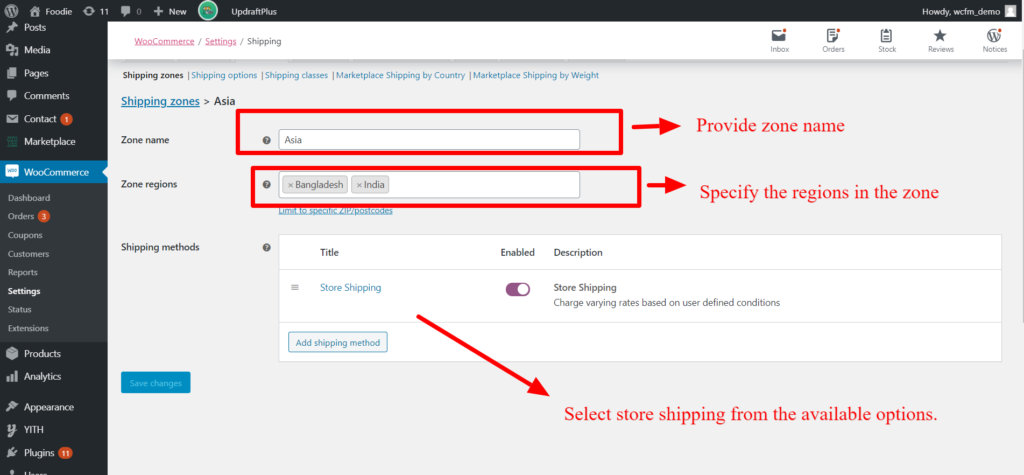
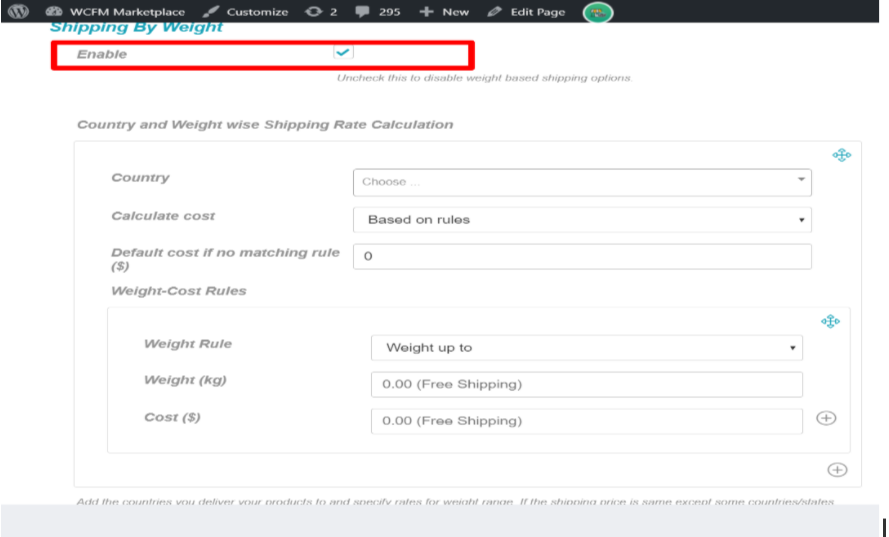
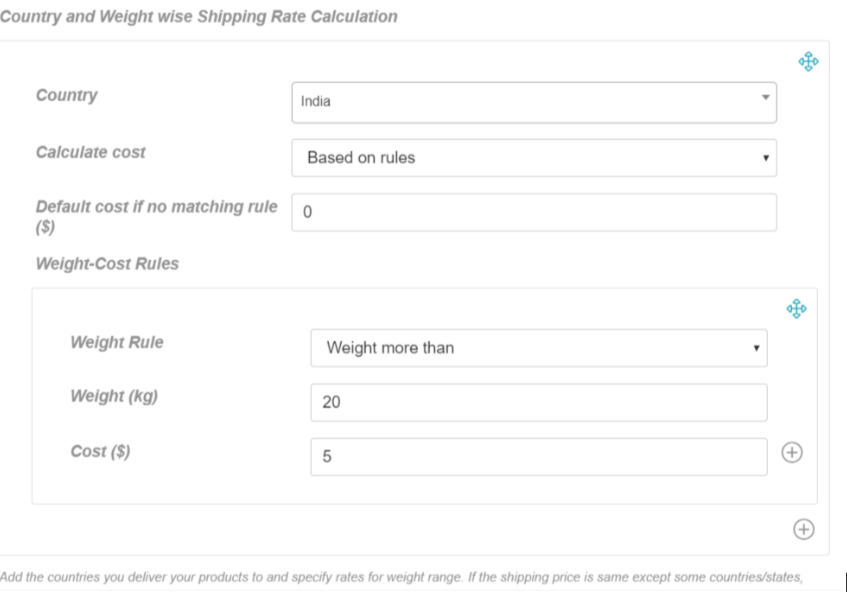
 Pic:#3