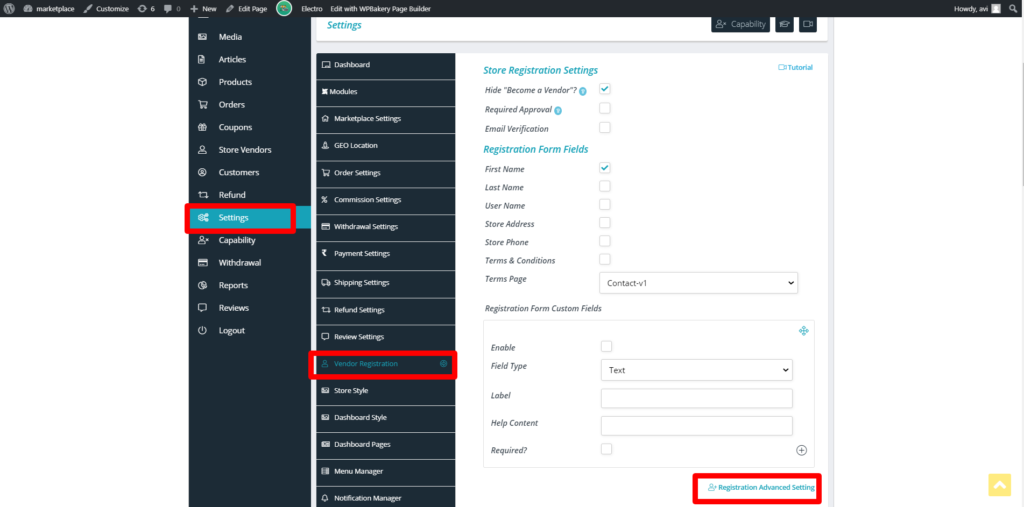
In addition to basic settings provided, the admin will also have more options to control/customize the registration process as per his/her requirement. In order to do so, admin can check into the following “Registration Advance” settings option as shown here:
Clicking on Registration Advance settings will redirect you to Settings page as shown below where you will have the following options ( marked in red box ) to configure basic registration without any membership plans ( discussed here)
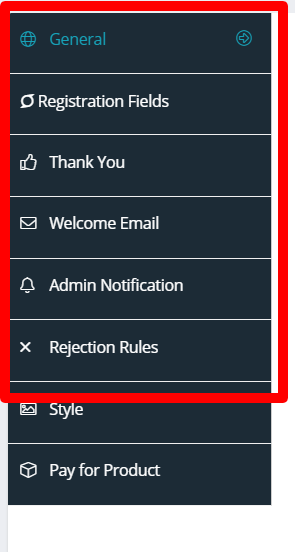
Let’s discuss the options provided in details:
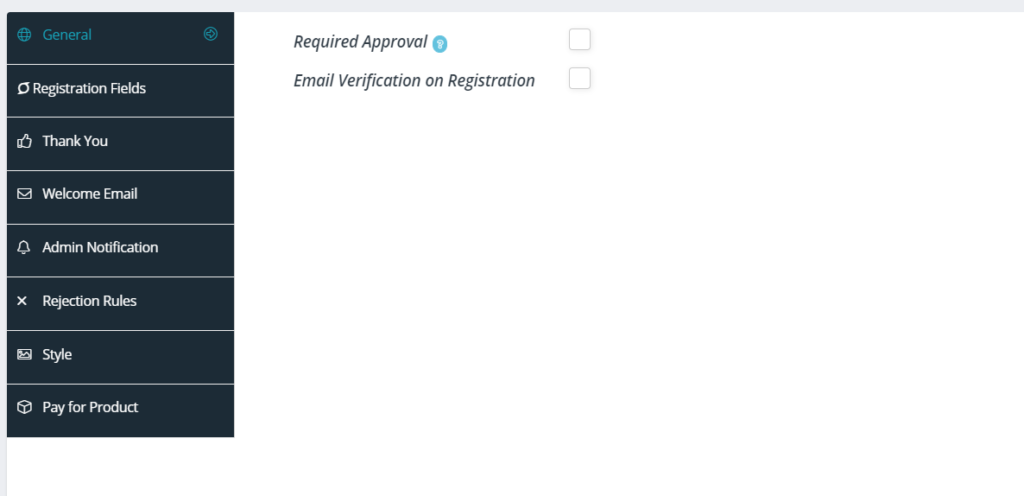
a. General: Admin can enable “Required approval” option if the users needs admin’s approval for becoming a vendor. Additionally, it can also be set if the vendors require email verification by checking the option provided.
b. Registration fields: Similar to the basic options provided, the admin can set which fields are to be added and can also add any custom fields if required.

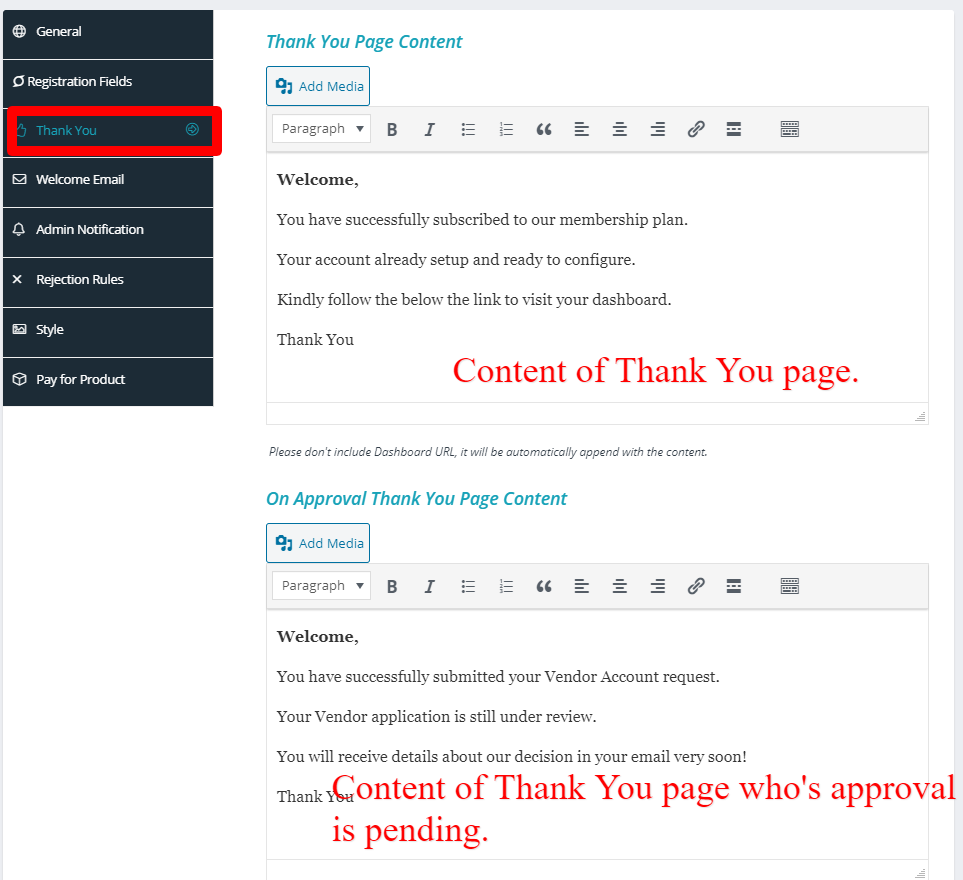
c. Thank You: This section allows you to edit/add the content of the Thank You page after successful registration.
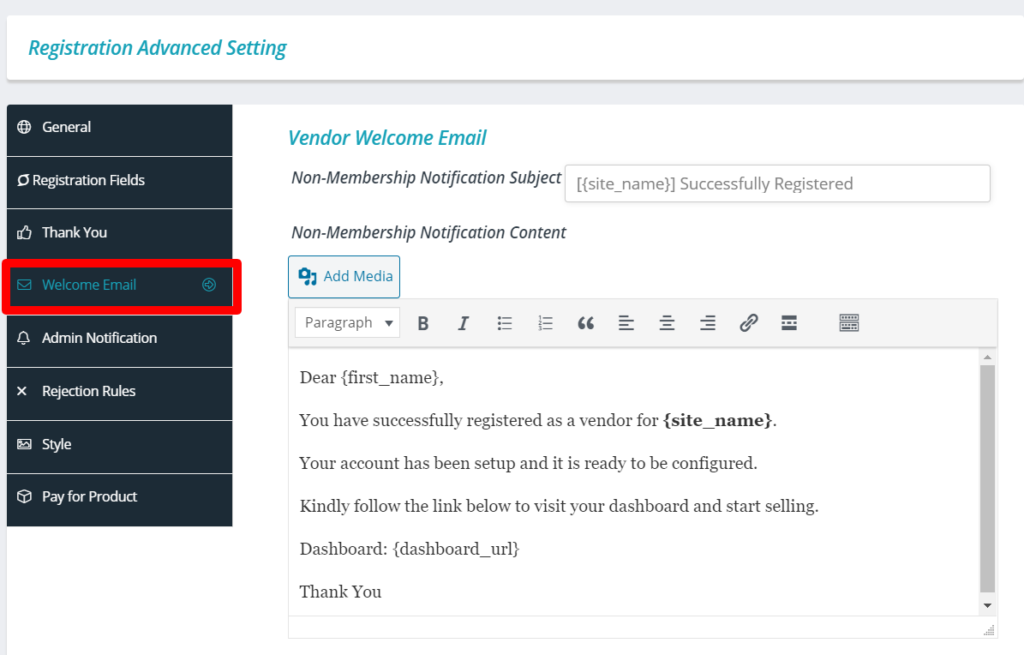
d. Welcome Email: From here the admin can set the content and the subject of the Welcome email which is triggered once’s a vendor is successfully registered and approved.
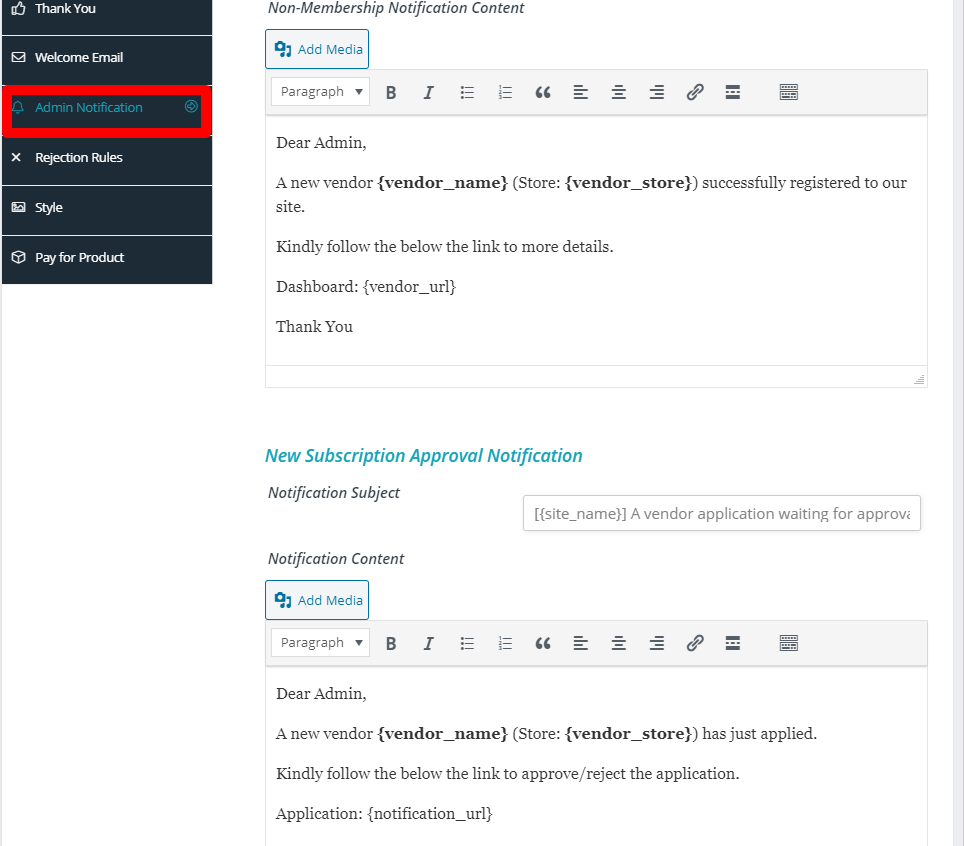
e. Admin Notification: From here the admin can setup the notification emails which are triggered for new vendor registration and for approval.
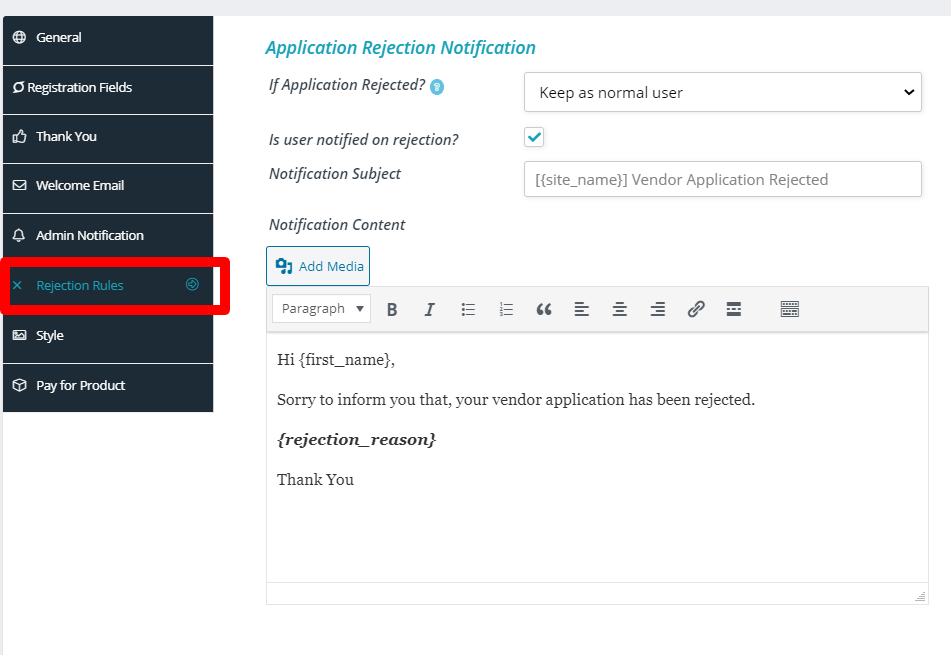
f. Rejection rules: With this option the admin can declare set of rules for the users who have been denied of being a vendor. Admin can also edit/frame a rejection mail along with subject for vendors who have failed to get approval. Here’s a glimpse of the same:
Note: Incase you have membership module enabled you will see additional setting options, thus if you want general registration process it’s recommended to turn off the Membership module from “Modules” section.