Posted on Leave a comment

Buy more credits

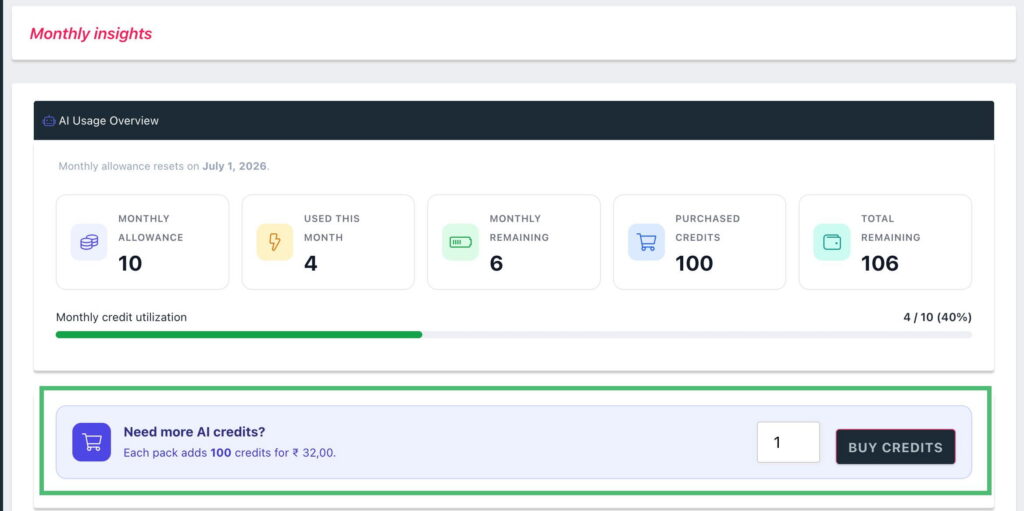
If the marketplace owner has enabled credit purchasing, you can top up when you run low:

  • On your AI Usage report, use the Buy credits button — choose how many packs and check out.
  • If a generate/enhance is blocked for insufficient credits, the popup shows a Buy credits button that opens checkout in a new browser tab, so your in-progress prompt/results aren’t lost. Complete the purchase, return to the editor tab, and run the action again.

Purchased credits land in your Purchased credits balance — they never expire and are used automatically once your monthly allowance is gone.

Posted on Leave a comment

AI Usage report

Open AI Usage from vendor dashboard menu (or the View usage report link on the widget #4.1).

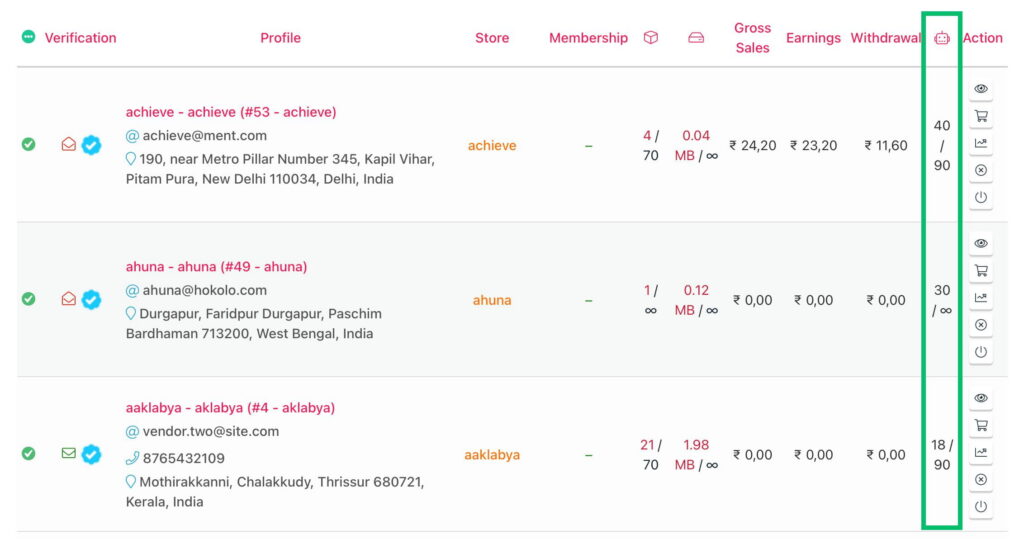
ℹ️ This page shows vendor’s own usage and is available to vendors and their staff. Marketplace admins don’t see this menu — admins review every vendor’s usage from the Vendors page (see #3.5).

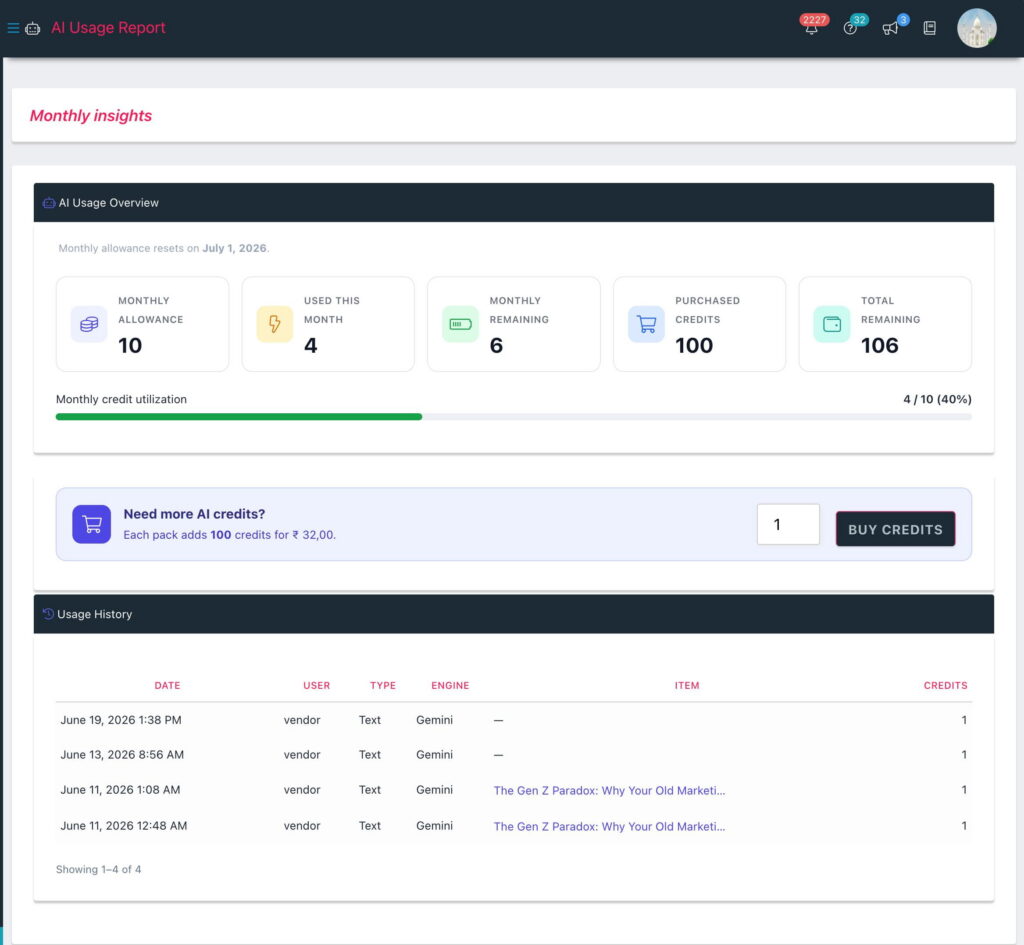
  • Summary cards: Monthly allowance, Used this month, Monthly remaining, Purchased credits and Total remaining — with a monthly utilization bar, and the date your allowance resets shown just above the cards.
  • Usage history: every request with its dateusertype (Text/Image), engine, the item it was for (product/article names link straight to their editor), and credits spent. Use the pager below the table to step through older entries — handy if a charge is ever queried.
Posted on Leave a comment

Enhance images on the Media page

  1. Open Media from your dashboard menu.
  2. On any image row, click the Enhance with AI (magic wand) icon.
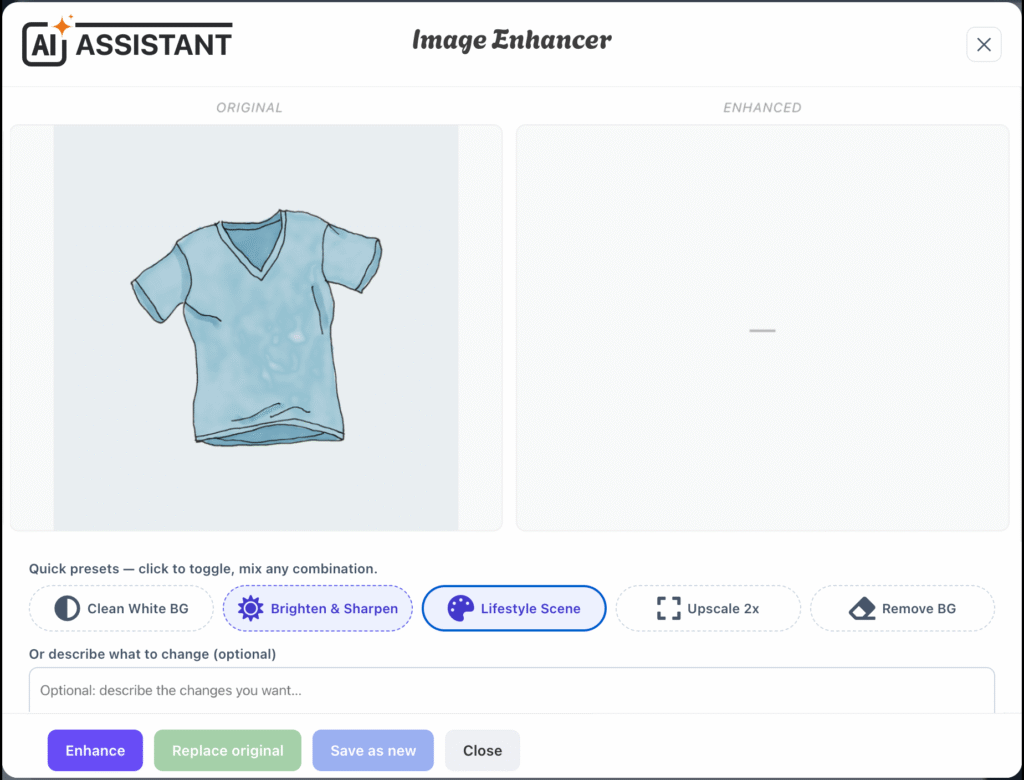
  3. A popup shows the Original on the left. Pick presets / type a prompt, then click Enhance to see the Enhanced version on the right.

  4. Choose what to do:
    • Replace original — overwrites the existing image in place (same file, same web address), so it updates everywhere the image is used.

      ⚠️ If the image is used by more than one product/post, you’ll get a warning listing them first — because they will all change. Confirm to proceed.

    • Save as new — keeps the original and adds the enhanced image as a new file.
    • Discard / Close — change nothing.
Posted on Leave a comment

Write articles with AI

If vendor publish Articles (blog posts), the AI Assistant works like the product one but with options tuned for blog writing rather than product copy.

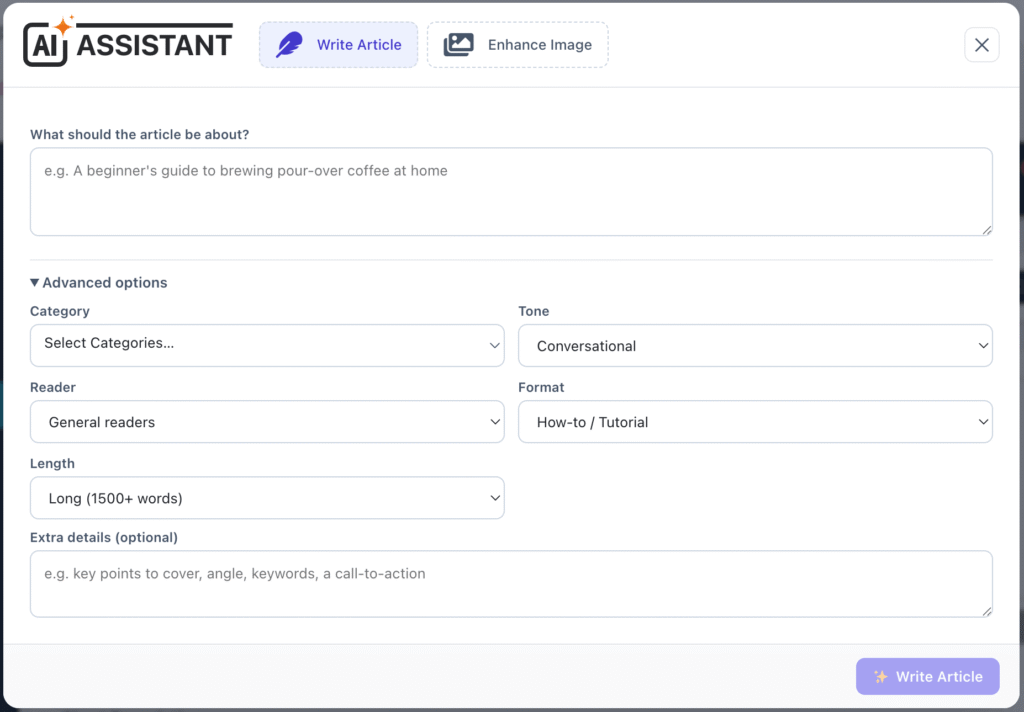
  1. Go to Articles > Add New / Edit and click ✨ Open AI Assistant at the top of the form (next to Add New).
  2. On the Write Article tab, describe what the article should be about, and optionally set the category, tone, reader, format (how-to, listicle, guide, opinion, news, review) and length, then click Write Article.
  3. Review the TitleShort description (intro) and Article bodyLock the ones you like, Regenerate the rest, or edit any field inline — then Apply a single field, or Apply All to fill the title, excerpt and content at once.
  4. To improve the featured image, click ✨ Enhance Image beneath the featured-image box (or the Enhance Image tab). Toggle one or more presets –
    • Vibrant & Punchy
    • Clean & Bright
    • Cinematic Mood
    • Minimal / Flat-lay
    • Blog Header

    you can combine several presets, describe the change, generate, then Apply to set it as the featured image.

Posted on Leave a comment

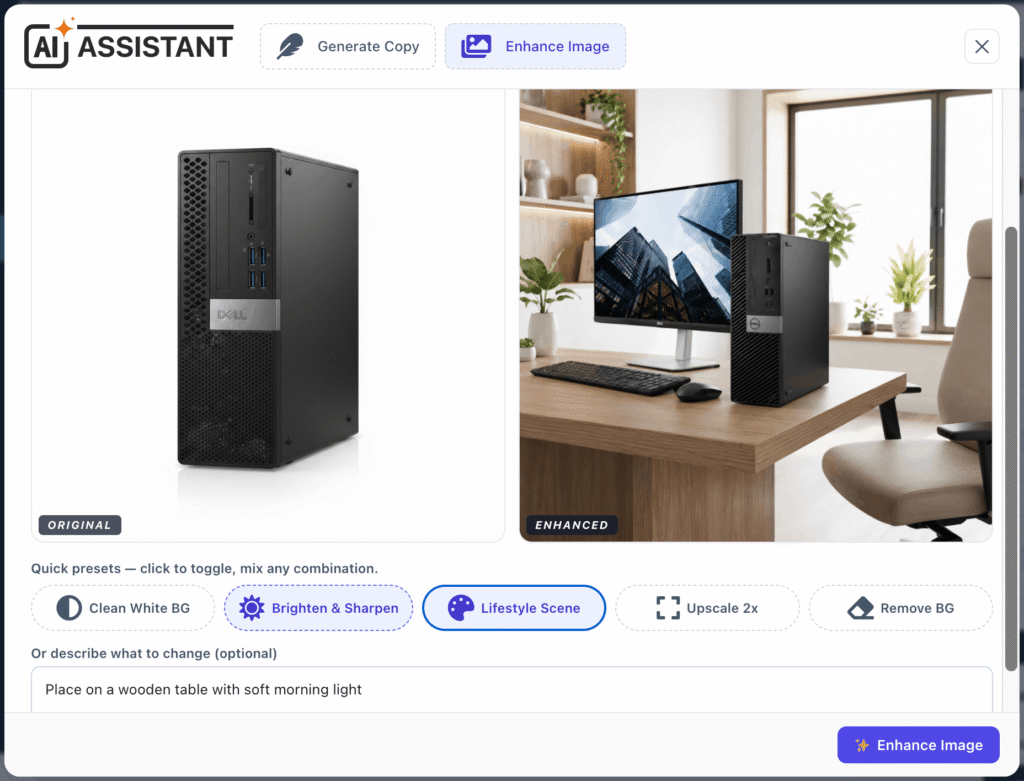
Enhance product images

  1. In the product editor, open the AI popup’s Enhance Image tab (or use the Enhance Image button near the product gallery).
  2. Choose one of the product’s images.
  3. Toggle one or more presets (you can combine several):
    • Clean White BG
    • Brighten & Sharpen
    • Lifestyle Scene
    • Upscale 2x
    • Remove BG.
  4. (Optional) type a specific instruction, then click Enhance Image.
  5. Compare the Original / Enhanced result.
    • Insert / Apply to add the enhanced image to the product.
    • Refine Result to run another pass on the new image.
    • Start Over to pick a different image.
Posted on Leave a comment

Write product copy with AI

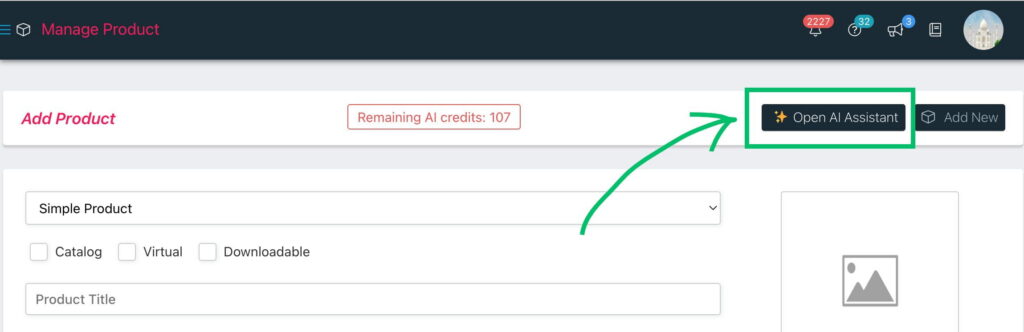
  1. Go to Products and add or edit a product.
  2. In the top toolbar, click the Open AI Assistant button.

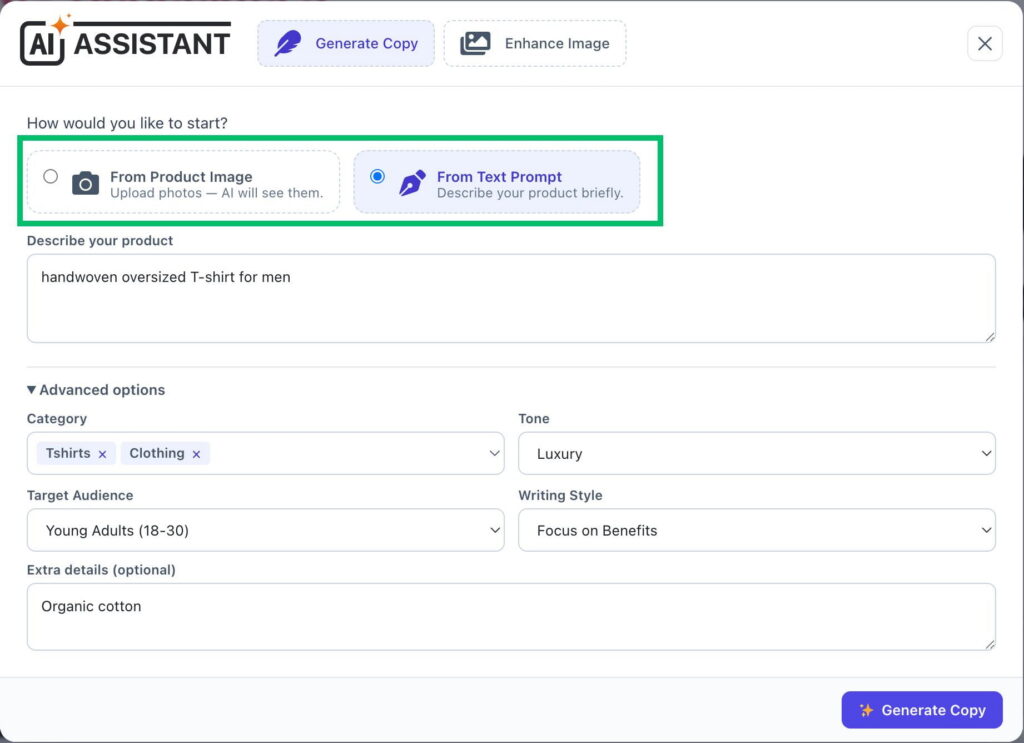
  3. The AI popup opens on the Write Copy tab. Choose an input mode:
    • From Text Prompt — type a short description (e.g., “Organic cotton baby onesie, soft, hypoallergenic”).
    • From Product Image — pick one or more of the product’s photos and let the AI describe them.

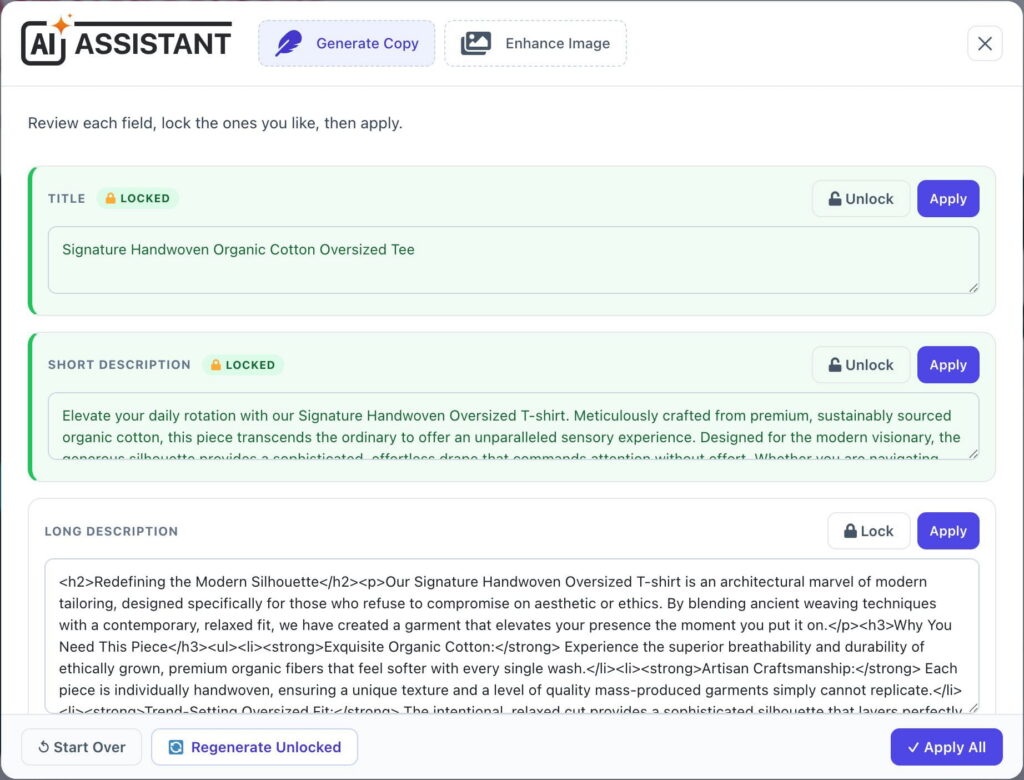
  4. Click Generate Copy. After a few seconds you get three results: TitleShort Description, and Long Description.

  5. Refine the results:
    • 🔒 Lock a card you’re happy with, then click Regenerate Unlocked to redo only the others (locked text is kept and used as context).
    • Apply a single field, or Apply All to fill every field at once.
    • Start Over to clear everything.
  6. Save the product as usual.

💡 Tip: setting the product’s category before generating gives more relevant copy.

Posted on Leave a comment

The AI Suite Status widget

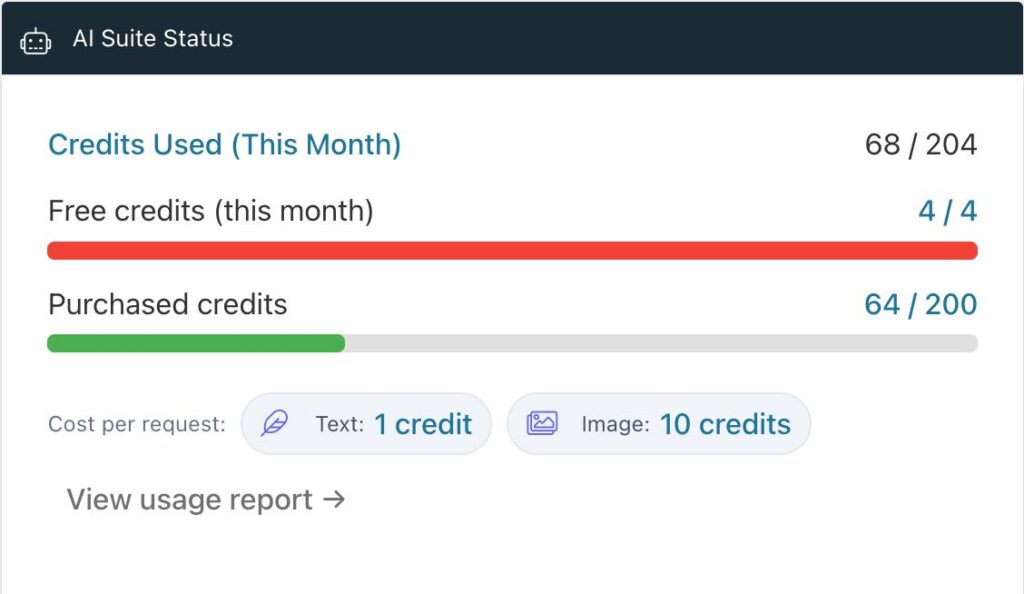
On your dashboard home you’ll see an AI Suite Status widget showing Credits Used (This Month) and Purchased credits with a progress bar, and a View usage report → link.

ℹ️  Purchased credits (total): The vendor’s purchased credit balance at the beginning of the month, plus any credit packs purchased during the month. Unlike monthly free credits, purchased credits never expire and are carried forward until used.

Posted on Leave a comment

For Vendors

This section is a dedicated guide for marketplace sellers. Every action detailed below takes place entirely within your front-end Store Manager / Dashboard (not the WordPress admin area). It will walk you through monitoring your credit limits, generating text for products and articles, and enhancing your photography to marketplace standards.

Posted on Leave a comment

AI Insights (marketplace analytics)

Open AI Insights from the dashboard menu (visible to admins and shop managers, not vendors) for a marketplace-wide view of how AI is used — and, most importantly, what it earns you.
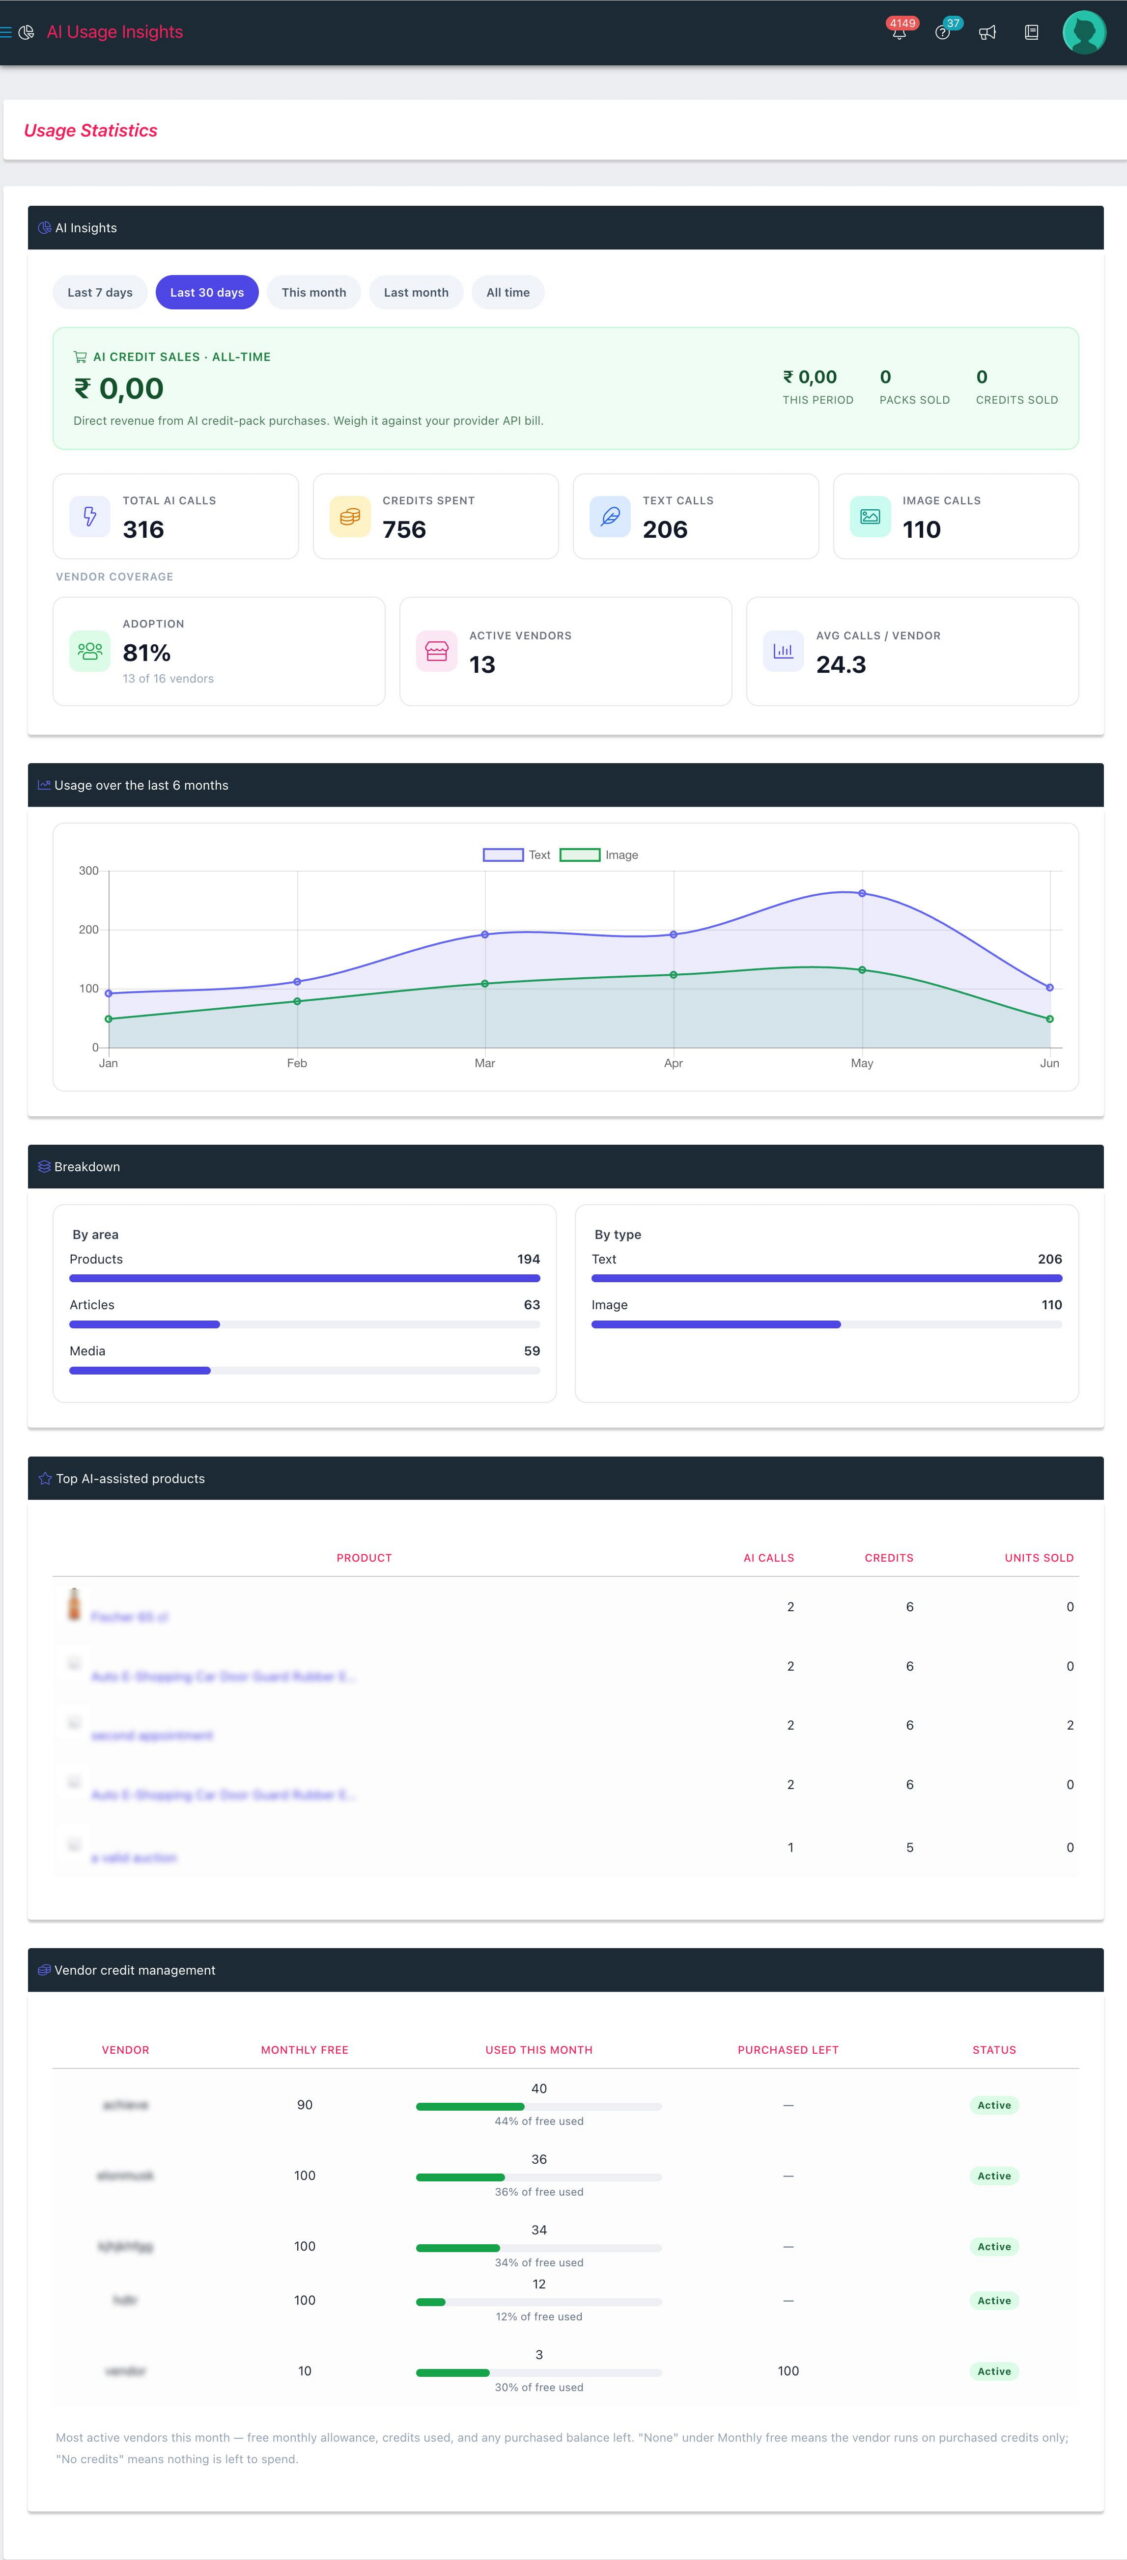
  • AI credit sales (headline): when credit purchasing is enabled, a panel at the top shows your all-time revenue from AI credit-pack sales, plus this period’s revenue, packs sold and credits sold. This is the one ROI figure with no guesswork — weigh it against your AI provider’s API bill to judge whether the tool is making or costing you money. (Hidden when purchasing is off.)
  • Usage cards: Total AI calls, Credits spent, Text calls and Image calls — for the selected period (last 7 / 30 days, this / last month, or all time).
  • Vendor coverage: Adoption (how many of your vendors have ever used AI), Active vendors, and average calls per vendor.
  • Usage over the last 6 months: a line chart of text vs image calls — shows whether adoption is growing.
  • Breakdown: calls by area (Products / Articles / Media) and by type (Text / Image).
  • Vendor credit management: each active vendor’s monthly free allowanceused this month (with a utilization bar), purchased balance left, and a status badge — ActiveUnlimited, or No credits (out of both free and purchased). Vendors on a purchase-only plan show “None” under monthly free, so you can tell at a glance who’s on free credits, who’s bought packs, and who’s run dry.
  • Top AI-assisted products: the products that have had the most AI work, with the call count and their sales — so you can see where the effort is going.

ℹ️ In a WCFM-only shop (no Marketplace) there are no vendors, so the Vendor coverage cards and the Vendor credit management table are hidden — you still get your own totals, the trend, the breakdowns and the top-products list.